Garden Reads: Must-Have Books for Every Green Thumb!

Introduction

Gardening is a timeless and rewarding hobby that connects us to nature and fosters a sense of accomplishment. Whether you’re a novice gardener just starting out or a seasoned green thumb looking to expand your knowledge, there’s always something new to learn. The right books can offer invaluable insights, practical tips, and inspiring ideas to help you grow a flourishing garden. This article highlights some of the best book recommendations for gardeners, covering various aspects of gardening, from organic practices to landscape design.

1. “The Vegetable Gardener’s Bible”: Edward C. Smith

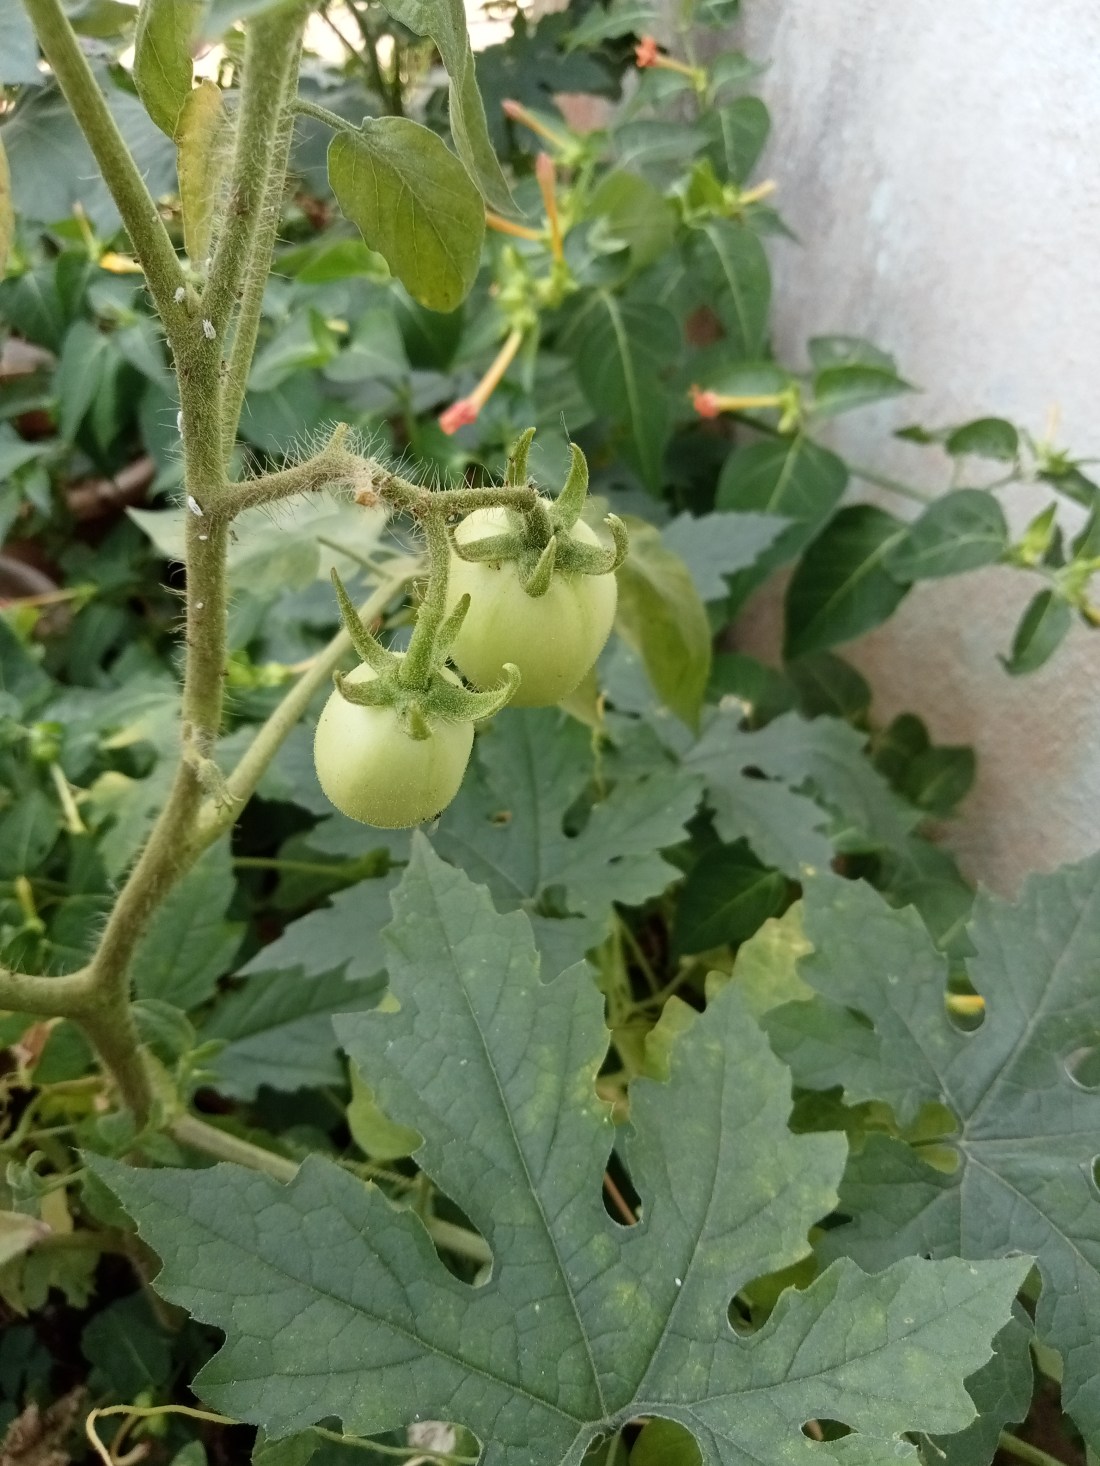
Edward C. Smith’s “The Vegetable Gardener’s Bible” is a comprehensive guide for anyone interested in growing their own vegetables. The book is based on Smith’s W-O-R-D system, which stands for Wide rows, Organic methods, Raised beds, and Deep soil. This approach ensures healthy, productive, and sustainable vegetable gardening. The book covers everything from soil preparation and pest management to crop rotation and companion planting. With detailed instructions and illustrations, it’s a must-have for vegetable gardeners of all levels.

2. “Gaia’s Garden: A Guide to Home-Scale Permaculture”: Toby Hemenway

For those interested in permaculture and sustainable gardening, “Gaia’s Garden” by Toby Hemenway is an essential read. The book introduces the principles of permaculture and how to apply them to a home garden. Hemenway provides practical advice on creating self-sustaining ecosystems that mimic nature. Topics include soil fertility, water conservation, plant guilds, and wildlife habitats. The book is filled with inspiring ideas and real-world examples, making it accessible and engaging for gardeners interested in ecological practices.

3. “The Flower Gardener’s Bible”: Lewis Hill and Nancy Hill

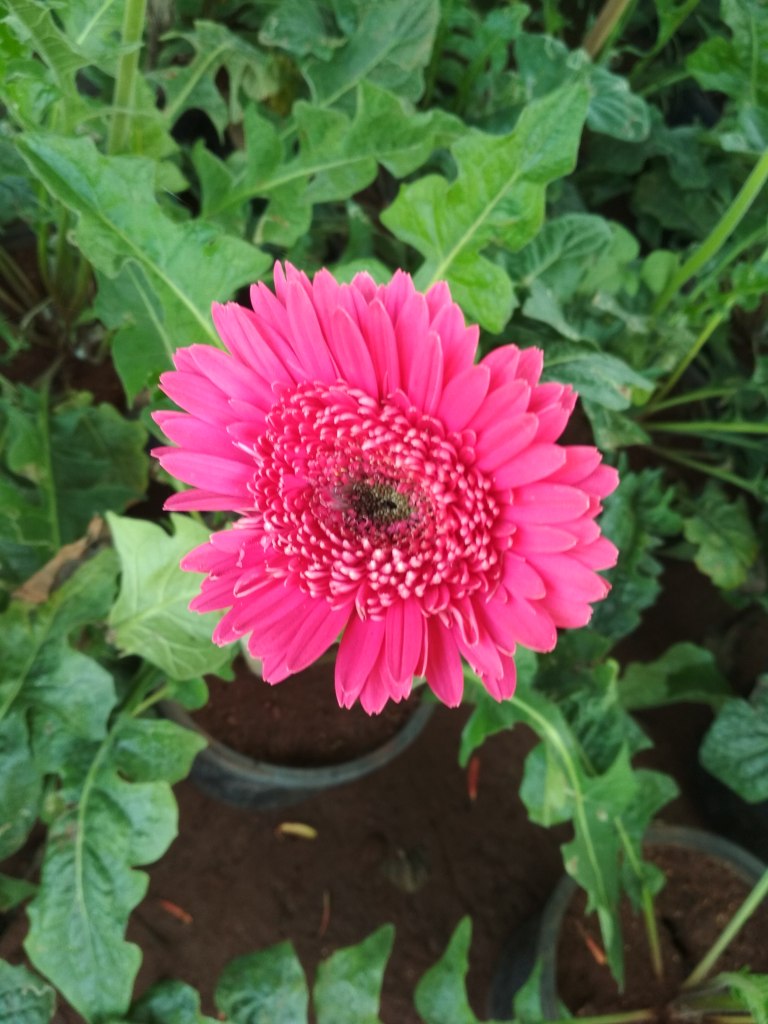
“The Flower Gardener’s Bible” by Lewis and Nancy Hill is a beautiful and informative guide for flower enthusiasts. The book covers everything from selecting the right flowers for your garden to planting, growing, and maintaining them. It includes detailed profiles of over 400 flower varieties, along with tips on garden design, soil preparation, and pest control. The stunning photographs and practical advice make it an indispensable resource for anyone looking to create a vibrant and colorful flower garden.

4. “The Well-Tempered Garden”: Christopher Lloyd

Christopher Lloyd’s “The Well-Tempered Garden” is a classic in the world of gardening literature. Lloyd, a renowned British gardener, shares his vast knowledge and experience in this engaging and witty book. It covers a wide range of topics, including garden design, plant selection, and seasonal care. Lloyd’s passion for gardening and his humorous writing style make this book a joy to read. Whether you’re looking for practical tips or inspiration, “The Well-Tempered Garden” is a timeless addition to any gardener’s library.

5. “The Garden Primer”: Barbara Damrosch

Barbara Damrosch’s “The Garden Primer” is a comprehensive guide for both beginner and experienced gardeners. The book covers all aspects of gardening, from planning and planting to maintenance and harvesting. Damrosch’s clear and concise writing makes complex gardening concepts easy to understand. The book includes sections on vegetable gardening, flower gardening, and landscaping, making it a versatile resource. With its practical advice and beautiful illustrations, “The Garden Primer” is a valuable tool for any gardener.


Similar Posts:


6. “The Organic Gardener’s Handbook of Natural Pest and Disease Control”: Fern Marshall Bradley, Barbara W. Ellis, and Deborah L. Martin

For gardeners committed to organic practices, “The Organic Gardener’s Handbook of Natural Pest and Disease Control” is an indispensable resource. This comprehensive guide provides detailed information on identifying and managing garden pests and diseases without synthetic chemicals. The book includes sections on beneficial insects, organic pesticides, and disease-resistant plants. With its practical solutions and easy-to-follow advice, it’s an essential reference for maintaining a healthy and thriving garden.

7. “The New Sunset Western Garden Book”: The Editors of Sunset Magazine

“The New Sunset Western Garden Book” is a definitive guide for gardeners in the Western United States. It provides detailed information on selecting, planting, and caring for plants that thrive in the region’s diverse climates. The book includes an extensive plant encyclopedia, with profiles of over 8,000 plants. It also covers garden design, soil improvement, and pest management. The comprehensive and region-specific advice makes it an invaluable resource for Western gardeners.

8. “Rodale’s Basic Organic Gardening” A Beginner’s Guide to Starting a Healthy Garden.: Deborah L. Martin

“Rodale’s Basic Organic Gardening” by Deborah L. Martin is a great starting point for those new to organic gardening. The book covers fundamental principles and techniques, including soil preparation, composting, pest control, and plant selection. Martin’s straightforward writing and practical tips make organic gardening accessible and enjoyable. With its step-by-step instructions and helpful illustrations, it’s a perfect guide for anyone looking to cultivate a healthy and sustainable garden.

9. “Bringing Nature Home: How You Can Sustain Wildlife with Native Plants”: Douglas W. Tallamy

Douglas W. Tallamy’s “Bringing Nature Home” emphasizes the importance of using native plants in gardening to support local wildlife. Tallamy explains how native plants provide essential resources for birds, insects, and other animals. The book includes practical advice on selecting and cultivating native plants, along with beautiful photographs and inspiring stories. It’s a compelling read for gardeners interested in creating ecologically beneficial landscapes.

10. “The Hidden Life of Trees: What They Feel, How They Communicate – Discoveries from a Secret World”: Peter Wohlleben

Peter Wohlleben’s “The Hidden Life of Trees” offers a fascinating glimpse into the secret lives of trees. Wohlleben, a forester, shares his discoveries about how trees communicate, support each other, and form complex ecosystems. The book is filled with captivating stories and scientific insights that deepen our understanding of trees and their importance. It’s an inspiring read for anyone interested in the natural world and the intricate relationships within forests.

Conclusion

Gardening is a beautiful journey of continuous learning and discovery. The books listed above offer a wealth of knowledge, practical tips, and inspiration to help you cultivate a thriving and beautiful garden. Whether you’re interested in vegetable gardening, flower cultivation, organic practices, or ecological landscapes, there’s a book for every gardener.

Happy reading and happy gardening! 🌿📚

Horticulture Unveiled: Cultivating Nature’s Masterpieces!

Introduction

Horticulture, the practice of garden cultivation and management, is both an art and a science. It encompasses a wide range of activities aimed at growing and improving plants for food, medicine, aesthetics, and environmental benefits. Unlike agriculture, which focuses on large-scale crop production, horticulture is often more intimate and diverse, involving everything from home gardens to urban parks. This article delves into the various aspects of horticulture, its history, techniques, and its significance in our lives today.

A Brief History of Horticulture

Horticulture has ancient roots, dating back to the earliest human civilizations. Archaeological evidence suggests that as early as 10,000 BCE, humans began cultivating plants in the Fertile Crescent region. The Egyptians, Greeks, and Romans made significant contributions to horticultural practices, particularly in the cultivation of medicinal and ornamental plants.

In medieval Europe, monastic gardens became centers of horticultural knowledge, preserving ancient techniques and introducing new plant species. The Renaissance period saw a surge in botanical gardens and the classification of plants, laying the foundation for modern horticulture.

Branches of Horticulture

Horticulture can be broadly divided into several branches, each focusing on different types of plants and purposes:

1. Pomology

Pomology is the science of fruit cultivation. It involves the study and cultivation of fruit trees and shrubs, including apples, oranges, grapes, and berries. Pomologists work to improve fruit quality, yield, and resistance to pests and diseases through breeding and cultural practices.

2. Olericulture

The branch of horticulture that focuses on vegetable production is called olericulture. This includes everything from leafy greens and root crops to tomatoes and peppers. Olericulturists focus on optimizing growing conditions, pest control, and harvesting techniques to ensure high-quality produce.

3. Floriculture

Floriculture is the cultivation of flowering plants for gardens, floral arrangements, and the floral industry. It encompasses the breeding, growing, and marketing of flowers such as roses, lilies, and tulips. Floriculturists also work on creating new flower varieties through hybridization and genetic modification.

4. Landscape Horticulture

Landscape horticulture involves the design, installation, and maintenance of landscapes, including parks, gardens, and urban green spaces. Landscape horticulturists plan and manage plantings to create aesthetically pleasing and functional outdoor environments. They consider factors such as plant selection, soil preparation, and irrigation to ensure healthy, sustainable landscapes.

5. Arboriculture

Arboriculture is the cultivation and management of trees and shrubs, particularly in urban environments. Arborists focus on the health and safety of individual trees, providing services such as pruning, disease diagnosis, and tree removal. Their work helps maintain the ecological and aesthetic value of trees in our communities.

Techniques and Practices in Horticulture

Horticulture involves a variety of techniques and practices aimed at promoting healthy plant growth and maximizing yields. Some of the key techniques include:

1. Propagation

The practice of growing new plants from existing ones is called plant propagation. It can be done through sexual methods, such as seed sowing, or asexual methods, such as cuttings, grafting, and tissue culture. Propagation ensures the reproduction of desirable plant traits and allows for the mass production of plants.

2. Soil Management

Healthy soil is the foundation of successful horticulture. Soil management practices include soil testing, amendment with organic matter, and proper drainage. These practices improve soil structure, fertility, and water-holding capacity, providing an optimal growing environment for plants.

3. Irrigation

Irrigation is critical for maintaining adequate moisture levels for plant growth. Horticulturists use various irrigation methods, such as drip irrigation, sprinkler systems, and hand watering, to deliver water efficiently and evenly to plants. Proper irrigation practices help conserve water and prevent issues like root rot and nutrient leaching.

4. Pest and Disease Management

Integrated Pest Management (IPM) is a holistic approach to controlling pests and diseases in horticulture. It involves monitoring pest populations, using biological controls, and applying chemical treatments only when necessary. IPM aims to minimize the impact of pests and diseases on plants while reducing the use of harmful chemicals.

5. Pruning and Training

Pruning and training are essential for maintaining the shape, size, and health of plants. Pruning involves the removal of dead, diseased, or excess branches to encourage healthy growth and improve air circulation. Training techniques, such as trellising and staking, help support plants and direct their growth in a desired manner.


Similar Posts:


The Importance of Horticulture

Horticulture plays a vital role in our lives and the environment in several ways:

1. Food Security

Horticulture contributes significantly to food production, providing a diverse range of fruits, vegetables, and nuts that are essential for a balanced diet. By improving crop yields and quality, horticulture helps ensure a steady and nutritious food supply for growing populations.

2. Economic Impact

The horticulture industry is a major economic driver, generating employment and income through the production and sale of plants and related products. From nurseries and greenhouses to farmers’ markets and floral shops, horticulture supports a wide range of businesses and livelihoods.

3. Environmental Benefits

Horticulture enhances biodiversity and promotes environmental sustainability. Green spaces, such as parks and gardens, provide habitats for wildlife, improve air quality, and mitigate the effects of urbanization. Sustainable horticultural practices, such as organic farming and water conservation, contribute to the health of our ecosystems.

4. Mental and Physical Well-being

Gardening and interacting with plants have been shown to have numerous physical and mental health benefits. Horticultural therapy, which uses gardening activities to improve well-being, is used in various healthcare settings to reduce stress, enhance mood, and promote physical activity.

Conclusion

Horticulture is a multifaceted field that combines scientific knowledge with practical skills to cultivate plants for various purposes. From providing food and beauty to enhancing our environment and well-being, horticulture is an essential and enriching part of human life. By embracing and advancing horticultural practices, we can continue to enjoy the many benefits that come from cultivating nature’s bounty.

Happy Gardening! 🌿🌼

Growing and Maintaining Gerbera Plants: A Complete Guide to Vibrant Blooms!

Introduction:

Gerbera plants, with their vibrant and colorful blooms, are a delightful addition to any garden or indoor space. Known for their daisy-like flowers and long-lasting blossoms, gerberas are relatively easy to grow with proper care and maintenance. In this comprehensive guide, we’ll explore everything you need to know about cultivating and nurturing gerbera plants for continuous and vibrant flowering.

Understanding Gerbera Plants:

Gerbera (Gerbera jamesonii) is a genus of ornamental plants native to South Africa, belonging to the Asteraceae family. These perennial flowering plants are cherished for their large, showy flowers, which come in a variety of colors, including red, yellow, orange, pink, and white. Gerberas thrive in moderate climates and are commonly grown as outdoor bedding plants, container plants, or cut flowers for floral arrangements.

Growing Conditions:

To ensure optimal growth and blooming, it’s essential to provide gerbera plants with the right growing conditions:

Sunlight: Gerberas prefer bright, indirect sunlight or partial shade. In hotter climates, they benefit from some protection from the intense afternoon sun to prevent scorching of the leaves and flowers.

Temperature: Gerberas thrive in moderate temperatures ranging from 65°F to 75°F (18°C to 24°C). Protect them from frost and extreme cold, as prolonged exposure can damage the foliage and flowers.

Soil: Well-draining, fertile soil with a slightly acidic to neutral pH (around 6.0 to 6.5) is ideal for gerbera plants. Add organic matter to your soil, such as compost or peat moss, to help with fertility and soil structure.

Watering: Make sure the soil is constantly damp but not soggy. Water gerberas thoroughly when the top inch of soil feels dry to the touch, and avoid overhead watering to prevent fungal diseases.

Planting and Propagation:

Gerberas can be propagated from seeds, division, or tissue culture. Here’s how to plant and propagate gerbera plants effectively:

Seed Propagation: Sow gerbera seeds in seed-starting trays filled with a well-draining potting mix. Keep the seeds moist and lightly cover with soil until germination takes place. Transplant the seedlings into individual pots once they develop true leaves.

Division: Mature gerbera plants can be divided during the dormant season or early spring. Carefully separate the clumps of rhizomes, ensuring each division has healthy roots and foliage. Plant the divisions in separate containers or directly in the garden bed.


Similar Posts:


Care and Maintenance:

Proper care and maintenance are essential for promoting healthy growth and continuous blooming of gerbera plants. Follow these tips to ensure your gerberas thrive:

Deadheading: Remove spent flowers regularly to encourage the production of new blooms and prevent the plant from diverting energy into seed production.

Fertilization: Feed gerbera plants with a balanced, water-soluble fertilizer every two to four weeks during the growing season. High-nitrogen fertilizers should be avoided as they may encourage the growth of foliage at the expense of flowers.

Pest and Disease Control: Monitor gerbera plants for common pests such as aphids, spider mites, and whiteflies. Use neem oil or insecticidal soap to quickly treat infestations. Furthermore, keep fungal diseases at bay by avoiding overhead watering and maintaining adequate air circulation.

Support: Tall varieties of gerbera plants may require staking or support to prevent the flower stems from bending or breaking. Use bamboo stakes or plant supports to provide structural support as needed.

Pruning and Deadheading:

Regular pruning and deadheading are essential for maintaining the health and appearance of gerbera plants. Follow these guidelines for pruning and deadheading gerberas:

Pruning: Remove any dead, damaged, or yellowing leaves and stems as needed throughout the growing season. To make precise cuts and stop spreading of diseases, use sharp, clean pruning shears.

Deadheading: Pinch or cut off spent flowers as soon as they fade to promote continuous blooming. Trim the flower stems back to the base of the plant or to a healthy set of leaves to encourage new flower buds to develop.

Conclusion:

Growing and maintaining gerbera plants can be a rewarding experience for gardeners of all skill levels. By providing the right growing conditions, proper care, and regular maintenance, you can enjoy a profusion of vibrant blooms throughout the growing season. Whether grown in garden beds, containers, or as cut flowers, gerberas add a splash of color and beauty to any landscape or indoor space. Incorporate these tips and techniques into your gardening routine to cultivate healthy, thriving gerbera plants and enjoy their stunning flowers year after year.

Happy Gardening!

Flourishing Beauty: A Guide to Growing and Caring for Azalea Plants!

Introduction

Azaleas, with their vibrant blooms and lush foliage, are beloved ornamental shrubs that can add a touch of elegance to any garden landscape. Known for their stunning flowers and relatively low maintenance, azaleas are a popular choice among gardeners looking to enhance their outdoor spaces. In this comprehensive guide, we’ll explore everything you need to know about growing and caring for azalea plants, from selecting the right variety to providing the optimal conditions for their flourishing growth.

Understanding Azalea Plants

Azaleas belong to the genus Rhododendron and are part of the Ericaceae family. These deciduous or evergreen shrubs are native to Asia, Europe, and North America, with hundreds of species and cultivars available to choose from. Azaleas are prized for their showy, funnel-shaped flowers that bloom in a wide range of colors, including shades of pink, purple, red, white, and orange. Depending on the variety, azaleas can bloom in early spring, late spring, or even summer, providing a spectacular display of color in the garden.

Selecting the Right Variety

When choosing azaleas for your garden, it’s essential to select the right variety based on your climate, soil type, and desired bloom time. Some popular types of azaleas include:

Southern Indica Azaleas: These evergreen azaleas are well-suited to warm climates and bloom profusely in the spring.

Encore Azaleas: Known for their ability to bloom multiple times throughout the year, Encore azaleas offer an extended flowering season.

Native Azaleas: Indigenous to North America, native azaleas are prized for their fragrant flowers and vibrant fall foliage.

Hybrid Azaleas: Hybrid varieties combine the best traits of different azalea species, offering a wide range of colors, sizes, and bloom times.

Before purchasing azaleas, research the specific requirements of each variety to ensure they are suitable for your garden conditions.


Similar Posts


Planting Azaleas

Azaleas thrive in well-drained, acidic soil with a pH between 4.5 and 6.0. Choose a planting location with partial shade or filtered sunlight, as azaleas prefer dappled sunlight rather than full sun exposure. When planting azaleas, follow these steps for success:

Prepare the Soil: Amend the soil with organic matter such as compost or peat moss to improve drainage and acidity.

Dig the Hole: Dig a hole twice as wide as the azalea’s root ball and slightly shallower than its depth.

Plant the Azalea: Gently remove the azalea from its container and place it in the center of the hole. After planting, add soil to fill the hole and make sure to water it sufficiently to help the roots settle in.

Mulch and Water: Apply a layer of mulch around the base of the plant to retain moisture and suppress weeds. Water the newly planted azalea regularly to keep the soil consistently moist but not waterlogged.

Caring for Azaleas

Once established, azaleas require minimal maintenance to thrive. Here are some essential care tips to ensure your azaleas remain healthy and vibrant:

Watering: Azaleas have shallow roots and are sensitive to drought, so it’s crucial to water them regularly, especially during dry periods. It’s recommended to avoid overhead watering since it can cause the foliage to become wet, which increases the risk of fungal diseases.

Fertilizing: Feed azaleas with a balanced, slow-release fertilizer formulated for acid-loving plants in early spring, just before new growth begins. Avoid using high-nitrogen fertilizers as they promote excessive foliage growth, which can negatively impact flower growth..

Pruning: Prune azaleas after they finish blooming to shape the shrub and remove dead or diseased branches. Avoid heavy pruning, as it can reduce the following year’s flower production.

Disease and Pest Control: Keep an eye out for common azalea pests and diseases, such as lace bugs, spider mites, powdery mildew, and root rot. Treat any issues promptly with organic or chemical control methods as needed.

Overwintering Azaleas

In colder climates, protecting azaleas from winter weather is essential to ensure their survival. Here are some tips for overwintering azaleas:

Mulch: Apply a thick layer of mulch around the base of the plant to insulate the roots and retain soil moisture.

Wind Protection: Shield azaleas from harsh winds by planting them in a sheltered location or using windbreaks such as fences or evergreen shrubs.

Anti-Desiccant Spray: Apply an anti-desiccant spray to azalea foliage in late fall to reduce moisture loss through transpiration.

Wrapping: For added protection, consider wrapping azaleas with burlap or frost cloth during periods of extreme cold.

Conclusion

With their stunning blooms and relatively low maintenance requirements, azaleas are a fantastic addition to any garden landscape. By selecting the right variety, providing the optimal growing conditions, and following proper care techniques, you can enjoy the beauty of azaleas in your garden for years to come.

Happy Gardening!

Blooms of Elegance: A Comprehensive Guide to Growing and Caring for Camellia Plants!

Camellias are cherished for their elegant blooms, glossy foliage, and evergreen charm, making them prized additions to gardens around the world. Known for their exquisite flowers that appear in various colors and forms, camellias add a touch of beauty and sophistication to landscapes. Whether you’re a novice gardener or a seasoned enthusiast, learning how to grow and care for camellia plants can elevate your gardening experience and ensure the health and vitality of these beloved ornamentals.

Introduction to Camellias:

Camellias belong to the genus Camellia, which comprises over 300 species, with Camellia japonica and Camellia sasanqua being among the most popular cultivated varieties. Originating from Asia, particularly China and Japan, camellias have been cultivated for centuries for their ornamental value and cultural significance. These evergreen shrubs or small trees are prized for their lush foliage and stunning flowers, which bloom in late fall, winter, or early spring, depending on the species and variety.

Growing Camellias:

Growing camellias begins with selecting the right location and providing optimal growing conditions for these ornamental beauties. Here’s a step-by-step guide to cultivating camellias in your garden:

Choose the Right Location: Camellias thrive in partially shaded to shaded areas with protection from the hot afternoon sun. Select a site with well-draining, acidic soil rich in organic matter.

Planting: Plant camellias in the fall or early spring when the soil is moist and temperatures are mild. Make a hole that is two times as deep and wide as the root ball. Make sure the top of the root ball of the plant is level with the soil surface when you place it in the hole. Backfill the hole entirely with water and soil.

Watering: Consistently keep the soil moist but not waterlogged, water deeply and regularly, and avoid overhead watering to prevent fungal diseases.

Fertilizing: Feed camellias with a balanced, slow-release fertilizer formulated for acid-loving plants in early spring before new growth emerges. Repeat fertilization in late spring or early summer if necessary. Avoid using high-nitrogen fertilizers as they may lead to more foliage growth and less flowering.

Mulching: Apply a layer of organic mulch, such as pine straw or shredded bark, around the base of the plant to conserve moisture, suppress weeds, and regulate soil temperature. Maintain a mulch depth of 2-3 inches, keeping it away from the trunk to prevent rot.

Pruning: Prune camellias selectively to maintain their desired shape, remove dead or diseased branches, and promote air circulation within the canopy. Pruning is best done after flowering to avoid cutting off potential buds.


Similar Posts


Caring for Camellias:

Caring for camellias involves regular maintenance practices to ensure their health, vigor, and prolific blooming. Here are some essential care tips for camellia plants:

Pest and Disease Control: Monitor camellias regularly for signs of pests, such as aphids, scale insects, and spider mites, as well as diseases like camellia leaf spot and root rot. Treat infestations promptly with horticultural oil, insecticidal soap, or neem oil, and remove infected plant parts to prevent the spread of disease.

Winter Protection: In colder climates, provide winter protection for camellias by covering them with frost cloth or burlap during freezing temperatures. Mulch around the base of the plant to insulate the roots and minimize frost damage.

Deadheading: Remove spent flowers promptly to encourage continuous blooming and prevent seed production, which can divert energy away from flower production.

Container Care: If growing camellias in containers, choose a large, well-draining pot and use a soil mix formulated for acid-loving plants. Water container-grown camellias regularly to keep the soil evenly moist, and fertilize them according to label instructions.

Hydration: During periods of drought or high temperatures, provide supplemental irrigation to ensure camellias receive adequate moisture. It is important to avoid overwatering your plants, as damp soil can cause root rot and other issues.

Monitoring pH Levels: Regularly test the soil pH around camellias to ensure it remains acidic, ideally between 5.0 and 6.5. Amend the soil with sulfur or acidic fertilizers if necessary to maintain optimal pH levels.

Conclusion:

Growing and caring for camellias can be a rewarding experience, offering gardeners a glimpse of nature’s beauty and resilience. By providing the right growing conditions, proper maintenance, and tender loving care, you can enjoy the bountiful blooms and lush foliage of these exquisite plants year after year. Whether adorning garden beds, borders, or containers, camellias are sure to captivate with their timeless elegance and charm.

Happy Gardening!

Maximizing Rain Lily Blooms: The Importance of Repotting and Care!

Introduction:

Repotting plays a crucial role in the growth and blooming of rain lilies, ensuring they receive the necessary nutrients and space to thrive. By following specific guidelines and care routines, gardeners can enhance the beauty of these delicate flowers and enjoy vibrant blooms year after year.

Importance of Repotting:

Enhancing Growth and Bloom Potential: Nitrogen is essential for plant growth, making repotting a vital task to replenish soil nutrients and provide adequate space for rain lilies to flourish. It is imperative to ensure that the soil is well-aerated and nutrient-rich to support the rain lilies’ growth and blooming cycle. To achieve optimal blooming, adhering to certain rules during the repotting process is essential.

Propagation and Expansion: Repotting presents an opportunity not only to rejuvenate existing rain lilies but also to propagate and expand your collection. As bulbs multiply over time, consider dividing them during repotting to create new plants.


Similar Posts


How to Repot Rain Lilies:

Repotting rain lilies requires attention to detail and a systematic approach to ensure the best results. Here’s a step-by-step guide to repotting rain lilies effectively:

Removing Bulbs:

Carefully turn the pot upside down to remove the bulbs. Trim any excess roots and leaves, preparing them for transplantation into fresh soil.

Soil Mix:

Prepare a suitable soil mix consisting of 50% normal soil, 30% vermicompost, and 20% cocopeat. Avoid using chemical fertilizers during planting. After preparing the soil with fertilizer, it is recommended to dip the plants in a fungicide solution before planting them.

Pot Size:

Select pots with diameters ranging from 8 to 10 inches, ensuring adequate space for 3 to 4 rain lily bulbs per pot. Proper spacing between bulbs is crucial to prevent overcrowding and promote healthy growth and blooming.

Pot Placement:

After repotting, place the pots in a shaded area for the first two days to allow the plants to acclimate. Once the leaves begin to grow, gradually shift the pots to a sunnier location to facilitate optimal blooming.

Fertilizer:

While chemical fertilizers can be introduced one month after planting, consider using organic alternatives such as vermicompost for chemical-free gardening. Additionally, Tata Raligold Spray can be applied at least once a month to promote root formation and enhance blooming potential.

Monitoring and Maintenance:

After repotting, it’s crucial to monitor the health and growth of rain lilies regularly. Keep an eye on soil moisture levels, ensuring it remains consistently moist but not waterlogged. Adjust watering frequency based on environmental conditions and plant needs, especially during periods of intense heat or rainfall. Additionally, inspect the foliage for signs of pests or diseases, addressing any issues promptly to prevent spread and damage to the plants.

Conclusion:

Repotting is a fundamental aspect of rain lily care, ensuring they receive the nutrients, space, and attention necessary for robust growth and blooming. By following proper repotting techniques and adhering to essential care guidelines, gardeners can maximize the blooming potential of rain lilies. With attention to detail and a commitment to organic gardening practices, beautiful blooms can adorn gardens year after year, bringing joy and color to outdoor spaces.

Happy Gardening!

Finding Green Bliss: Buying and Swapping Plants on Facebook

Introduction

In the age of e-commerce, there’s something uniquely satisfying about sourcing your beloved plants and gardening essentials through vibrant Facebook communities. Whether you’re a seasoned gardener or just starting your green journey, these thriving online plant groups offer a treasure trove of botanical delights, cost-effective options, and expert advice. Let’s dive into the world of Facebook plant groups and discover why they’re becoming the preferred choice for plant enthusiasts.

The Green Advantage of Facebook Plant Groups

Why limit yourself to conventional online plant shopping when you can join a thriving community of fellow plant lovers? Here’s why Facebook plant groups have become the go-to platform for buying, swapping, and enriching your plant collection:

1. Budget-Friendly Finds

One of the most compelling reasons to explore Facebook plant groups is the opportunity to unearth incredible plants at wallet-friendly prices. Many sellers offer top-quality plants at a fraction of the cost you might find on commercial websites.

2. Diverse Plant Categories

Facebook plant groups cater to every botanical passion. Whether you’re obsessed with orchids, adore adeniums, fancy water lilies, or are enchanted by succulents, you’ll find specialized groups dedicated to your favorite plant varieties.

3. Comprehensive Shopping

It’s not just about buying plants; Facebook plant groups also provide access to essential gardening supplies like fertilizer and potting mix. With all your gardening needs in one place, you can nurture your green space with ease.

4. Expert Insights

Within these groups, you’re not just purchasing plants; you’re gaining valuable insights. Members willingly share their gardening wisdom, offering tips and tricks for nurturing your plants to perfection.


Similar Posts


Navigating the Green Marketplace: Tips for Safe Shopping

While Facebook plant groups offer a delightful plant-buying experience, it’s important to exercise caution to avoid potential pitfalls. Here are some essential tips for safe and satisfying plant shopping:

1. Profile Scrutiny

Before making a purchase, thoroughly research the seller’s profile. A well-established and active profile is often a reassuring sign of a reliable seller.

2. Avoid Locked Profiles

If a seller’s profile is locked, think twice before proceeding with the purchase. When it comes to online transactions, transparency is essential.

3. Check for Reviews

Review the seller’s reputation within the group. If there are negative reviews or complaints, it’s best to steer clear.

4. Seek Guidance

Don’t hesitate to seek guidance from group administrators and members. They can provide valuable advice and recommendations based on their experiences.

Facebook Groups for Your Green Quest

To kickstart your plant-buying adventure, here are some popular Facebook plant groups that you can explore:

Buying and Selling Plants Groups

Seed and Plants Swap Groups

Epiphyllum Plant Groups

Hibiscus Groups

Adenium Groups

Orchid Groups

Aquatic Plants Groups

Succulent And Cactus Groups

Rain Lily Group

Plant Care and Tips

Other Plant Groups

Joining these groups opens the door to a world of green possibilities. From rare finds to trusted advice, you’ll discover a vibrant community of plant enthusiasts eager to share their love for all things botanical.

In conclusion, Facebook plant groups offer a delightful alternative to traditional online plant shopping. They foster a sense of community, promote budget-friendly gardening, and provide a platform to explore your botanical passions. So, why wait? Dive into these green havens, and let your plant collection flourish!

Happy gardening!

Unveiling the Art and Science of Hibiscus Hybridization: Breeding Blooms for Beauty and Resilience!

Introduction:

Hibiscus, with its captivating blooms and vibrant colors, has been a garden favorite for centuries. The beauty of hibiscus lies not only in its natural charm but also in the world of possibilities that opens up through hybridization. The process of hibiscus hybridization combines both art and science, allowing horticulturists and enthusiasts to create new varieties with unique traits. In this exploration, we will dive into the intricate world of hibiscus hybridization, understanding the methods, benefits, and the fascinating journey of breeding blooms for beauty and resilience.

Understanding Hibiscus Hybridization:

Hibiscus hybridization involves the controlled cross-breeding of two different hibiscus plants to produce offspring with desirable characteristics. This process aims to combine specific traits from each parent plant, such as color, size, shape, and disease resistance, to create a new and improved hibiscus variety.

Methods of Hibiscus Hybridization:

Hand Pollination:

Hand pollination is a common method in hibiscus hybridization. Breeders carefully select parent plants based on desired traits and manually transfer pollen from the male parent (anther) to the female parent (stigma) using a brush or other tools. This controlled pollination ensures the inheritance of specific characteristics.

Natural Pollination:

In some cases, hibiscus hybridization occurs through natural pollination, where bees, butterflies, or other pollinators transfer pollen between hibiscus plants. While this method is less controlled, it can result in unexpected and unique hybrids.

Embryo Rescue:

Embryo rescue is a technique used when certain hibiscus hybrids may not develop properly on their own. It involves removing embryos from developing seeds and cultivating them in a nutrient-rich medium until they can be planted and grown into mature plants.


Similar Posts


Benefits of Hibiscus Hybridization:

Color Variation:

One of the primary goals of hibiscus hybridization is to introduce new and vibrant colors to the blooms. Hybridization allows breeders to create hibiscus varieties with unique shades and color patterns, expanding the palette beyond the naturally occurring colors.

Size and Shape:

Hybridization enables the modification of flower size and shape. Breeders can experiment with creating larger or smaller blooms, as well as altering petal arrangements and overall flower structure to enhance visual appeal.

Disease Resistance:

Creating hibiscus varieties with increased resistance to pests and diseases is a crucial aspect of hybridization. By combining the natural resilience of certain species, breeders can produce hybrids that are hardier and less susceptible to common hibiscus ailments.

Adaptability:

Hybridization allows for the development of hibiscus varieties that can thrive in various environmental conditions. This adaptability is particularly valuable for expanding the range of hibiscus cultivation, making it possible to grow these beauties in diverse climates.

The Fascinating Journey of Hibiscus Hybridization:

Selection of Parent Plants:

The journey begins with the careful selection of parent plants, each chosen for specific desirable traits. This may involve assessing a plant’s color, size, shape, and any unique characteristics it possesses.

Pollination and Cross-Breeding:

Whether through hand pollination or natural pollination methods, the pollen from the selected male parent is introduced to the stigma of the chosen female parent. This deliberate cross-breeding sets the stage for the creation of a hybrid.

Seed Development and Germination:

Once pollination is successful, seeds develop in the hibiscus pods. Breeders carefully collect and store these seeds until the germination process begins. Each seed harbors the potential for a unique hibiscus hybrid.

Seedling Selection and Cultivation:

As the seeds germinate, breeders carefully observe and select seedlings based on their growth characteristics and adherence to the desired traits. These selected seedlings are then cultivated to maturity.

Evaluation and Naming:

The mature hibiscus plants are thoroughly evaluated for the expression of desired traits. If the hybrid meets the breeder’s expectations, it is officially named and introduced to the world of horticulture.

Conclusion:

Hibiscus hybridization is a captivating blend of artistry and scientific precision, opening up new horizons for horticultural enthusiasts. The process allows us to witness the creation of hibiscus varieties that transcend the limitations of nature, offering an array of colors, sizes, and disease-resistant traits. As hybridizers continue to explore the possibilities, the world of hibiscus will undoubtedly bloom with new and enchanting varieties, each telling a unique story of creativity and innovation. Embrace the beauty of hibiscus hybridization and the remarkable blooms it brings forth, adding a touch of splendor to gardens around the globe. Happy hybridizing!

Happy Gardening!

Harvesting Nature’s Sweetness: A Guide to Growing Fruit Plants in Your Garden!

Introduction:

Growing fruit plants in your garden is a delightful and rewarding experience, offering a bounty of fresh, flavorful produce right at your doorstep. From luscious berries to succulent citrus, here’s your comprehensive guide to cultivating fruit-bearing plants in your outdoor space.

Choosing the Right Fruit Plants:

Selecting suitable fruit plants for your garden largely depends on your climate, soil conditions, and available space If you live in a cold climate, some popular options for growing your own fruit include apple trees, blueberry bushes, raspberry canes, grapes, dwarf citrus trees, and strawberry patches. On the other hand, if you live in an area with high temperatures, you might want to consider growing mangoes, bananas, jackfruits, oranges, guavas, and sapodilla. These plants also require very little water. To enjoy a bountiful harvest sooner, consider buying grafted plants. Consider the specific needs of each plant and how they align with your garden environment.

Site Selection and Preparation:

Ensure your chosen area receives adequate sunlight, as most fruit plants thrive in full sun. Proper drainage is crucial, so amend the soil if needed and consider raised beds for better drainage. Clear the site of weeds and debris before planting to create an optimal growing environment for your fruit plants. If you have limited space or are growing on a balcony or terrace, consider using grow bags to easily move your plants according to their needs.

Planting and Maintenance:

Follow planting guidelines specific to each fruit variety, considering spacing and depth requirements. Regular watering, especially during the establishment phase, is essential. Mulching helps retain moisture and suppress weeds, while fertilizing and pruning, according to plant type, encourages healthy growth and higher yields.


Similar Posts


Pollination and Care:

Understand the pollination needs of your fruit plants; some require cross-pollination for fruit set. Encourage pollinators like bees by planting pollinator-friendly flowers nearby. Protect your plants from pests and diseases by maintaining good garden hygiene and using organic pest control methods.

Harvesting and Enjoying:

Patience is a virtue in fruit gardening; wait for fruits to ripen fully before harvesting. Regularly check for ripe produce, and handle fruits delicately to prevent damage. Indulge in the joy of tasting freshly picked fruits from your garden, knowing they’re free from chemicals and bursting with natural flavors.

Preserving and Sharing:

Preserve surplus fruits by freezing, canning, or making jams and preserves. Share your bounty with friends and neighbors, spreading the joy of homegrown goodness and fostering a sense of community through your garden’s harvest.

Conclusion:

Cultivating fruit plants in your garden is a journey filled with both challenges and rewards. Whether you’re a seasoned gardener or a novice, the satisfaction of nurturing plants and reaping the fruits of your labor is unparalleled. With careful planning, proper care, and a dash of patience, your garden can transform into a thriving orchard, providing an abundance of delicious fruits for years to come. Happy gardening and savor the fruits of nature’s labor in your own backyard!

Happy Gardening!

Harmony in Nature: Exploring the Essence of Permaculture!

Permaculture, a design approach that harmonizes human habitats with natural ecosystems, offers sustainable solutions for creating regenerative and resilient environments. Discover how this holistic approach to gardening and living transforms landscapes while nurturing the planet.

Permaculture: A Holistic Approach to Sustainable Living

Permaculture is more than just a gardening technique; it’s a philosophy that embraces sustainable living by mimicking natural patterns and processes. At its core, permaculture aims to create productive ecosystems that require minimal intervention while maximizing output.

Key Principles of Permaculture

Permaculture operates on several fundamental principles:

  • Observation and Interaction: Understanding and observing natural systems is crucial to creating sustainable designs.
  • Catch and Store Energy: Utilizing renewable energy sources, such as sunlight and rainwater, efficiently.
  • Obtain a Yield: Designing systems that produce not just one, but multiple yields, ensuring productivity.
  • Apply Self-Regulation and Feedback: Using feedback loops to adapt and improve systems over time.
  • Use and Value Renewable Resources and Services: Embracing renewable resources while minimizing waste.
  • Design from Patterns to Details: Considering the big picture first, then delving into specific elements of the design.
  • Integrate Rather Than Segregate: Creating connections between elements to create a functioning whole.
  • Use Small and Slow Solutions: Implementing gradual, manageable changes that have lasting effects.
  • Use and Value Diversity: Encouraging diversity in plants, animals, and ecosystems to increase resilience.
  • Creatively Use and Respond to Change: Embracing change as an opportunity for innovation and adaptation.

Application of Permaculture Principles

In practice, permaculture principles can be applied in various ways, such as:

  • Creating food forests that mimic natural ecosystems and provide diverse yields.
  • Designing water catchment systems to conserve and utilize rainwater effectively.
  • Incorporating companion planting and polycultures to enhance soil fertility and deter pests.
  • Building structures using sustainable materials and energy-efficient designs.
  • Establishing integrated animal systems that contribute to the ecosystem’s health.

Similar Posts


Getting Started with Permaculture: A Step-by-Step Guide to Sustainable Design and Implementation

Starting with permaculture involves understanding its principles and applying them to design sustainable and regenerative systems. Here’s a guide to help you begin:

1. Study Permaculture Principles and Ethics

Principles: Learn about permaculture principles like observing and interacting, catching and storing energy, obtaining a yield, applying self-regulation and accepting feedback, using and valuing renewable resources, producing no waste, etc.

Ethics: Understand the core ethics of permaculture—earth care, people care, and fair share.

2. Gain Knowledge

Read Books and Online Resources: There are several books, articles, and resources available online. “Permaculture: A Designer’s Manual” by Bill Mollison is a comprehensive guide.

Courses and Workshops: Consider taking permaculture courses or attending workshops to gain hands-on experience and learn from experts.

3. Start Small

Observation: Observe your surroundings—climate, soil, water sources, flora, and fauna. Understand how nature works in your area.

Small-Scale Projects: Begin with small projects like creating a vegetable garden, planting fruit trees, or setting up a composting system.

4. Design and Implementation

Zone and Sector Planning: Design your space considering zones (intensity of use) and sectors (natural forces like sun, wind, water flow).

Utilize Patterns: Apply natural patterns in your design—like using polycultures, mimicking forest layers, and using swales for water harvesting.

Implement Changes Gradually: Start making changes one step at a time.

5. Use Sustainable Techniques

Mulching: Use organic mulch to retain soil moisture and improve fertility.

Composting: Create compost from organic waste to enrich soil.

Water Harvesting: Implement rainwater harvesting techniques such as rain barrels, swales, or ponds.

Polyculture: Planting a variety of crops together to mimic natural ecosystems and increase biodiversity.

6. Community and Collaboration

Connect with Others: Join local permaculture groups, attend meetups, and engage with the permaculture community.

Collaborate: Work with neighbors, friends, or community groups to share knowledge and resources.

7. Continuous Learning and Adaptation

Observe and Learn: Continuously observe and learn from the changes you make. Adapt and refine your designs based on feedback from the environment.

8. Legal and Social Considerations

Local Regulations: Understand any local regulations or permits required for certain activities.

Sharing Excess Produce: Consider sharing surplus produce with neighbors or local communities.

9. Document and Reflect

Keep Records: Document your designs, implementations, successes, and failures. It helps in learning and improving over time.

Reflect and Improve: Regularly reflect on your practices and make adjustments accordingly.

Conclusion

Permaculture is about observing, mimicking nature, and creating sustainable systems. Starting small, observing, learning, and adapting are key elements to successfully implementing permaculture principles.

Happy Gardening!