Creating a Thriving Understory Garden: 25 Plants That Flourish Under Trees!

Gardening

Introduction:

Gardening under trees can present unique challenges due to limited sunlight, competition for nutrients, and varying moisture levels. However, selecting the right plants can transform these shady spots into lush, vibrant gardens. Here are 25 plants that can thrive under trees, providing a variety of textures, colors, and growth habits to enhance your garden’s understory.
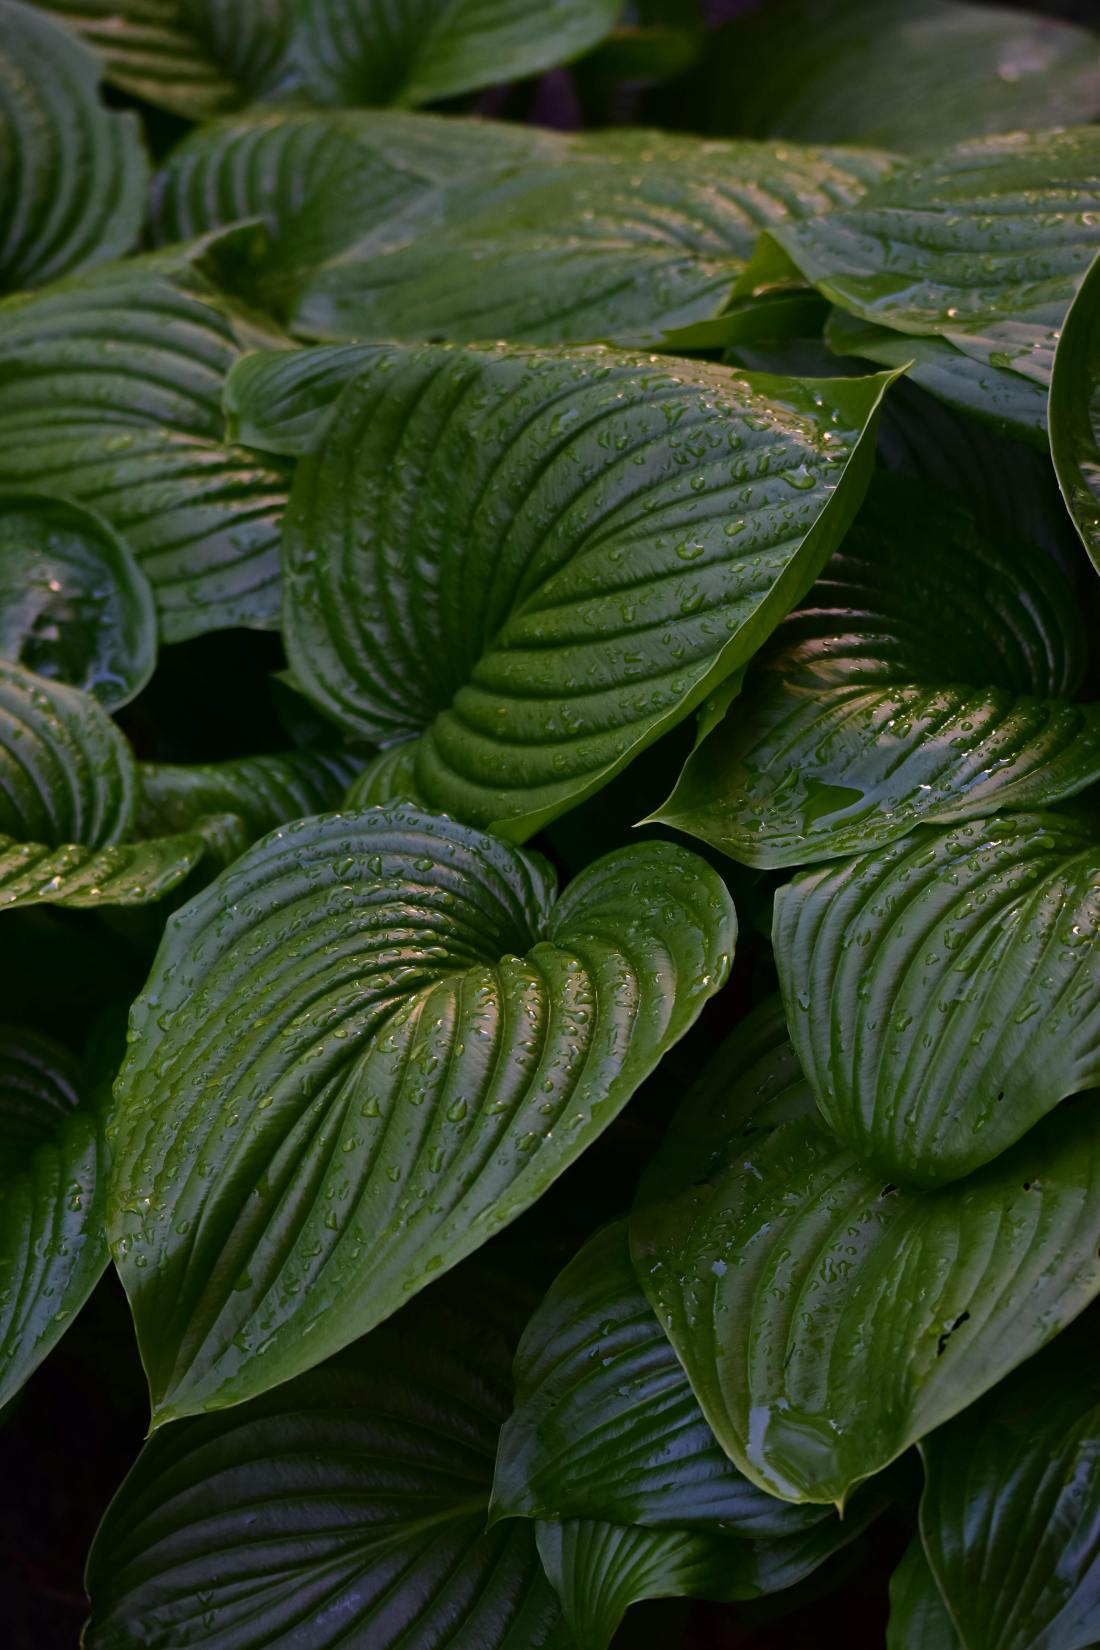
1. Hostas

Hostas are a staple for shaded gardens, known for their diverse foliage colors and sizes. They add a lush, tropical feel with their broad, variegated leaves and can thrive in deep to partial shade.

2. Ferns

Ferns offer a range of varieties suitable for different levels of shade. Their delicate, feathery fronds add a soft texture to the garden. Popular varieties include Maidenhair Fern and Japanese Painted Fern.

3. Astilbe

Astilbes are prized for their feathery, plume-like flowers that come in shades of pink, red, and white. They thrive in partial to full shade and prefer consistently moist soil.

4. Lily of the Valley

Lily of the Valley is a low-growing plant with fragrant, bell-shaped white flowers. It spreads easily, forming a dense ground cover in shaded areas.

5. Heuchera (Coral Bells)

Heucheras, or Coral Bells, are known for their vibrant, colorful foliage ranging from deep purples to bright greens. They tolerate shade well and add year-round interest to the garden.

6. Brunnera

Brunnera, with its heart-shaped leaves and striking blue spring flowers, is a standout in shady gardens. It thrives in partial to full shade and requires moist, well-drained soil.

7. Epimedium

Epimediums are tough ground covers with delicate flowers that bloom in spring. Their heart-shaped leaves provide a dense, attractive cover for shaded areas.

8. Solomon’s Seal

Solomon’s Seal features arching stems with white, bell-shaped flowers that dangle beneath the foliage. It thrives in moist, shady spots and adds graceful movement to the garden.

9. Lamium (Dead Nettle)

Lamium is known for its silver-patterned leaves and small, colorful flowers. It’s an excellent ground cover for shady areas, adding both texture and color.

10. Wild Ginger

Wild Ginger offers heart-shaped leaves and inconspicuous flowers. It forms a dense ground cover in shaded areas, helping to suppress weeds and retain moisture.

11. Pachysandra

Pachysandra is a type of evergreen ground cover that grows well in deep shade. Its glossy leaves and small, white flowers make it a reliable choice for year-round coverage.

12. Tiarella (Foamflower)

Tiarellas are known for their attractive foliage and delicate spring flowers. They thrive in partial to full shade and add a soft, airy texture to the garden.

13. Pulmonaria (Lungwort)

Pulmonarias have speckled leaves and early spring flowers in shades of blue, pink, and white. They prefer shady, moist conditions and add a splash of color early in the season.

14. Trillium

Trilliums are native wildflowers with three-petaled blooms. They thrive in woodland settings, preferring moist, shaded areas with rich soil.

15. Bleeding Heart

Bleeding Hearts are known for their heart-shaped flowers that dangle from arching stems. They prefer moist, shady spots and add a romantic touch to the garden.

16. Bergenia

Bergenias have large, bold leaves and clusters of pink flowers. They are tough and adaptable, thriving in both shade and sun with minimal care.

17. Helleborus (Lenten Rose)

Hellebores are evergreen perennials that bloom in winter or early spring. Their nodding flowers come in various colors, providing winter interest in the garden.


Similar Posts:


18. Ajuga (Bugleweed)

Ajugas are low-growing plants with colorful foliage and spring flowers. They form dense mats that are excellent for ground cover in shaded areas.

19. Japanese Forest Grass (Hakonechloa)

Japanese Forest Grass has graceful, arching foliage that adds movement to the garden. It grows well in regions that are partially shaded and have moist, well-drained soil.

20. Sweet Woodruff

Sweet Woodruff is a ground cover with fragrant, star-shaped flowers. It thrives in shaded areas and adds a sweet, fresh scent to the garden.

21. Corydalis

Corydalis features delicate, fern-like foliage and tubular flowers. It prefers shady, moist conditions and adds a touch of elegance to the garden.

22. Anemone (Windflower)

Anemones have early spring blooms and delicate foliage. They thrive in partial shade and well-drained soil, adding early-season color to the garden.

23. Cyclamen

Cyclamens have variegated leaves and winter or spring flowers. They prefer shaded areas with well-drained soil and add interest during the cooler months.

24. Vinca minor (Periwinkle)

Vinca minor is an evergreen ground cover with blue flowers. It thrives in shade and forms dense mats, making it ideal for covering large areas.

25. Carex (Sedge)

Carex, or sedges, have grass-like foliage and come in many varieties suitable for shade. They add texture and movement to the garden, thriving in a range of conditions.

Conclusion

Creating a lush and diverse understory garden under trees is possible with the right selection of plants. These 25 plants offer a variety of textures, colors, and growth habits that thrive in shady conditions. By incorporating these plants into your garden, you can transform shady spots into beautiful, thriving spaces.

Happy Gardening!

Unveiling the Splendor: A Guide to Growing Summer Flower Bulbs!

Introduction:

Summer is a time of vibrant colors and blooming beauty, and what better way to adorn your garden than with a dazzling array of summer flower bulbs? From the elegant lilies to the cheerful dahlias, there’s a summer bulb for every garden style and preference. In this comprehensive guide, we’ll explore the fascinating world of summer flower bulbs and discover how to grow and care for these enchanting blooms in your garden.

Understanding Summer Flower Bulbs

Summer flower bulbs are underground storage structures that contain the embryonic plants and nutrients needed for growth. Unlike seeds, bulbs produce new shoots and roots from within themselves, giving them a head start on the growing season. Many popular summer flowers, such as Asiatic lilies, calla lilies, and dahlias, grow from bulbs and tubers.

Choosing the Right Bulbs

When selecting summer flower bulbs for your garden, consider factors such as bloom time, color, size, and growing conditions. Some popular types of summer flower bulbs to consider include:

Lilies: Known for their elegant, trumpet-shaped flowers and intoxicating fragrance, lilies are a classic addition to any summer garden. Choose from a variety of colors and sizes, including Asiatic, Oriental, and hybrid lilies.

Dahlias: With their showy, dinner-plate-sized blooms and vibrant colors, dahlias add drama and flair to summer gardens. From pompon to cactus varieties, there’s a dahlia to suit every taste and garden style.

Calla Lilies: Elegant and graceful, calla lilies are prized for their sculptural blooms and glossy, arrow-shaped foliage. Available in a range of colors, including white, pink, yellow, and purple, calla lilies add a touch of sophistication to summer gardens. Plant them in borders or containers for a stunning focal point that will dazzle throughout the season.

Cannas: Loved for their tropical foliage and bold, exotic flowers, cannas are a popular choice for summer gardens. Plant them in containers or along borders for a striking burst of color and texture.


Similar Posts:


Planting Summer Flower Bulbs

Plant summer flower bulbs in spring after the danger of frost has passed and the soil has warmed up. Follow these steps for successful bulb planting:

Choose a Location: Select a sunny spot with well-draining soil for planting summer flower bulbs. Avoid regions susceptible to waterlogging or inadequate drainage.

Prepare the Soil: Loosen the soil to a depth of 8-10 inches and incorporate organic matter such as compost or aged manure to improve soil structure and fertility. Add cocopeat to retain moisture in the soil.

Planting Depth: Follow the planting depth recommendations for each type of bulb, as planting depths can vary depending on the species. It is generally recommended to plant bulbs at a depth that is three times their diameter.

Spacing: Space bulbs according to the recommended spacing guidelines for each species, ensuring adequate room for growth and air circulation.

Watering: Water newly planted bulbs thoroughly to settle the soil and provide moisture for root establishment. Continue watering throughout the growing season for optimal growth and good blooms.

Caring for Summer Flower Bulbs

Once planted, summer flower bulbs require minimal maintenance to thrive. Here are some tips for caring for your summer bulb garden:

Mulching: Apply a layer of organic mulch such as shredded bark or straw around newly planted bulbs to conserve moisture, suppress weeds, and regulate soil temperature.

Fertilizing: Feed summer flower bulbs with a balanced fertilizer or bulb-specific fertilizer in spring as new growth emerges. Repeat applications every 4-6 weeks during the growing season to promote healthy foliage and abundant blooms.

Deadheading: Regularly removing spent flowers promotes continuous blooming and prevents seed pod formation. Deadheading also helps redirect energy back into bulb storage for the following year’s growth.

Staking: Stake tall or top-heavy varieties such as gladioli and dahlias to prevent them from flopping over in strong winds or heavy rain.

Conclusion:

With their stunning colors, diverse forms, and delightful fragrances, summer flower bulbs are a must-have addition to any garden. By selecting the right bulbs, providing optimal growing conditions, and practicing proper care and maintenance, you can enjoy a spectacular display of blooms all summer long. Follow the tips outlined in this guide, and let your garden come alive with the beauty of summer flower bulbs!

Happy Gardening!

Amaryllis Growing Guide: Cultivating Elegance Indoors!

Introduction:

Amaryllis, with its striking blooms and effortless elegance, is a favorite among indoor plant enthusiasts. Known for its vibrant colors and easy care, this beautiful plant can brighten up any room, especially during the winter months when outdoor gardening is limited. Whether you’re a seasoned gardener or a beginner, growing Amaryllis can be a rewarding experience. In this guide, we’ll walk you through the steps to successfully grow and care for this stunning plant.

Choosing the Right Bulb

The journey to growing a beautiful Amaryllis starts with selecting the right bulb. When buying bulbs, look for ones that are firm, plump, and free from mold or blemishes. Larger bulbs often produce more flowers, so opt for bulbs that are at least 2-3 inches in diameter.

Planting Your Amaryllis

Choosing a Container: Amaryllis bulbs don’t require deep pots. Choose a pot that’s about 1-2 inches wider than the bulb to allow for growth.

Soil: Use a well-draining potting mix.A blend of peat moss, perlite, and compost proves to be effective. Avoid using soil from your garden, as it may not provide the right balance of nutrients and drainage.

Planting: Place the bulb in the pot with the pointed end facing up. Leave the top third of the bulb exposed above the soil. Firmly pack the soil around the bulb to provide support.

Watering and Care

Initial Watering: After planting, give your Amaryllis a thorough watering. Irrigate the plant until the surplus water flows out from the bottom of the pot.

Watering Frequency: Amaryllis prefers to dry out between waterings. Water sparingly until you see new growth, then increase the frequency. Overwatering can lead to bulb rot, so it’s essential to find the right balance.

Light: Place your Amaryllis in a bright location with indirect sunlight. Occasionally rotating the pot ensures even growth. Too little light can result in leggy growth, while too much direct sunlight can scorch the leaves.

Temperature: Amaryllis prefers temperatures between 60-75°F (15-24°C). Avoid placing it near drafts or heaters, as extreme temperature fluctuations can stress the plant.

Fertilizing

To encourage healthy growth and abundant blooms, fertilize your Amaryllis regularly during the growing season. Apply a balanced fertilizer containing equal parts of nitrogen, phosphorus, and potassium. Start fertilizing when new growth appears and continue every 2-4 weeks.

Supporting Blooms

As your Amaryllis grows, it may require some support to prevent the flowers from drooping. Use bamboo stakes or decorative supports to gently prop up the stems.

Post-Blooming Care

After your Amaryllis has finished blooming, it will enter a dormant period. Here are the steps for its care during this period:

Stop Fertilizing: Once the flowers fade, stop fertilizing your Amaryllis.

Watering: Reduce watering gradually as the leaves turn yellow and die back. Eventually, the plant will go into dormancy.

Dormancy: During dormancy, it’s essential to keep the bulb dry. You can either leave it in the pot or remove it, clean off any remaining soil, and store it in a cool, dark place until it’s time to replant.

Reblooming Your Amaryllis

With proper care, your Amaryllis can rebloom year after year. To encourage reblooming:

Repotting: Every 2-3 years, repot your Amaryllis bulb in fresh soil.

Forcing Dormancy: If you want your Amaryllis to bloom again around the holidays, you can force it into dormancy by cutting back on watering and placing it in a cool, dark place for 8-10 weeks.

Restarting Growth: After the dormant period, bring your Amaryllis back into a bright, warm location, resume watering, and watch as new growth appears.

Conclusion

Growing Amaryllis is a delightful and rewarding experience. With its vibrant blooms and minimal care requirements, it’s a perfect choice for both novice and experienced gardeners alike. By following these tips and guidelines, you’ll be well on your way to enjoying the beauty of Amaryllis in your home year after year.

Happy Gardening!

Growing Bleeding Heart Plant: A Guide to Heartwarming Beauty!

Introduction:

The Bleeding Heart plant, known for its heart-shaped flowers that dangle gracefully from arching stems, is a romantic and nostalgic addition to any garden. This enchanting perennial, scientifically known as Dicentra spectabilis, captures the hearts of gardeners with its unique blooms and fern-like foliage. If you’re looking to add a touch of whimsy and elegance to your garden, read on to discover our comprehensive guide on growing and caring for the Bleeding Heart plant.

1. Understanding the Bleeding Heart Plant

Botanical Background

The Bleeding Heart plant is native to Siberia, Northern China, Korea, and Japan. It belongs to the Fumariaceae family and is renowned for its distinctive heart-shaped flowers, which come in shades of pink, red, and white. The flowers typically appear in spring, adding a burst of color to the garden landscape.

Ideal Growing Conditions

Bleeding Hearts thrive in cool, moist conditions and prefer partial shade to full shade. They are typically grown as perennials in USDA hardiness zones 3-9, depending on the variety. While they can tolerate some sunlight, too much direct sun can scorch their delicate foliage, making them more suitable for shaded areas or dappled sunlight.

2. Planting the Bleeding Heart Plant

Soil Requirements

Well-draining soil rich in organic matter is essential for the Bleeding Heart’s health. An ideal soil pH level ranges from 6.0 to 7.0. Incorporating compost or well-rotted manure into the planting area can help improve soil structure and fertility.

Planting Depth and Spacing

Plant Bleeding Hearts at the same depth as they were in their nursery pots, typically around 1-2 inches deep. Space them approximately 18-24 inches apart to allow room for mature growth and optimal air circulation.


Similar Posts:


3. Watering and Feeding

Watering

Consistent moisture is key to the Bleeding Heart’s success. Ensure regular watering, particularly during periods of drought, to maintain even soil moisture without causing waterlogging. Applying mulch around the plant’s base aids in preserving soil moisture and controlling weed growth.

Fertilization

In the early spring, apply a balanced fertilizer following the manufacturer’s guidelines. Avoid over-fertilizing, as excessive nutrients can lead to lush foliage at the expense of flower production.

4. Maintenance and Care

Pruning and Deadheading

Deadheading spent flowers promotes ongoing blooms and helps keep a neat appearance. After the plant has finished blooming for the season, you can cut it back to ground level to promote fresh growth and rejuvenate the plant.

Winter Care

Apply mulch around the plant’s base in late fall to insulate the roots against freezing temperatures. In colder climates, additional winter protection such as covering with burlap or a layer of straw may be necessary.

5. Pests and Diseases

Common Pests

Aphids, slugs, and snails can occasionally be a problem for Bleeding Heart plants. Monitor your plants regularly and treat any infestations promptly using insecticidal soap or other organic pest control methods.

Disease Prevention

Powdery mildew and root rot are potential concerns for Bleeding Hearts. Ensuring proper spacing, facilitating adequate air flow, and refraining from overhead watering are effective strategies to prevent these problems. If signs of disease appear, treat the plant with fungicides or other appropriate treatments as recommended.

Conclusion:

The Bleeding Heart plant, with its heartwarming beauty and easy-care nature, is a delightful addition to any garden. By providing the right growing conditions, regular watering, and minimal maintenance, you can enjoy the charm of these romantic blooms year after year. Whether planted in borders, woodland gardens, or containers, the Bleeding Heart’s unique flowers and elegant foliage are sure to captivate and enchant all who behold them.

Happy Gardening!

Essential Safety Measures for Gardening: Protecting Yourself While Cultivating Your Garden Oasis!

Introduction:

Gardening is a rewarding and enjoyable hobby that allows us to connect with nature and create beautiful outdoor spaces. However, it’s essential to prioritize safety while tending to our gardens to prevent accidents and injuries. In this guide, we’ll explore important safety measures and precautions that every gardener should take to ensure a safe and enjoyable gardening experience.

Dress Appropriately:

Before you start gardening, it’s crucial to wear appropriate attire to protect yourself from potential hazards. This includes wearing sturdy, closed-toe shoes to prevent injuries from sharp tools or falling objects. Additionally, wearing long pants and sleeves can protect your skin from scratches, bites, and exposure to harmful plants or chemicals.

Use Protective Gear:

When handling gardening tools and equipment, wearing appropriate protective gear can minimize the risk of injuries. Always wear gloves to protect your hands from blisters, cuts, and thorns while pruning, weeding, or handling soil. If you’re working with power tools or machinery, such as lawn mowers or hedge trimmers, wear safety goggles and ear protection to prevent eye and ear injuries.

Handle Chemicals Safely:

Many gardeners use fertilizers, pesticides, and herbicides to maintain their gardens, but these chemicals can pose health risks if not handled properly. Always read and follow the instructions on chemical labels carefully, and wear protective clothing, gloves, and a mask when applying chemicals. Store chemicals in a secure location out of reach of children and pets, and never mix or transfer chemicals in food containers.

Lift Heavy Objects Safely:

Gardening often involves lifting and carrying heavy objects, such as bags of soil, pots, or gardening equipment. To prevent back strain and injuries, use proper lifting techniques. Bend your knees, keep your back straight, and lift with your legs rather than your back. If an object is too heavy to lift safely, ask for assistance or use a wheelbarrow or gardening cart to transport it.


Similar Posts:


Be Mindful of Sun Exposure:

Spending time outdoors in the garden exposes you to sunlight, which can lead to sunburn and skin damage if proper precautions are not taken. Wear sunscreen with a high SPF rating, even on cloudy days, and reapply it every few hours, especially if you’re sweating or swimming. Additionally, wear a wide-brimmed hat and lightweight, breathable clothing to protect your skin from harmful UV rays.

Stay Hydrated:

Gardening can be physically demanding, especially on hot and humid days, so it’s essential to stay hydrated to prevent dehydration and heat-related illnesses. Drink plenty of water before, during, and after gardening, and take frequent breaks in the shade to rest and cool off. Avoid working in the garden during the hottest part of the day, and schedule tasks for early morning or late afternoon when temperatures are cooler.

Watch Out for Wildlife:

While gardening, you may encounter various wildlife, including insects, spiders, snakes, and other creatures. Be cautious when reaching into dark or hidden areas, such as under bushes or in dense vegetation, where animals may be hiding. Wear gloves and protective clothing to minimize the risk of bites or stings and familiarize yourself with common pests and how to safely remove them from your garden.

Maintain Garden Tools and Equipment:

Regularly inspect and maintain your gardening tools and equipment to ensure they are in good working condition and safe to use. Sharpen dull blades on pruners, shears, and other cutting tools to prevent accidents and make clean, precise cuts. Replace worn or damaged tools and repair any defects or malfunctions promptly to prevent injuries during use.

Conclusion:

By following these safety measures and precautions, you can minimize the risk of accidents and injuries while enjoying your gardening hobby. Remember to prioritize safety at all times and be mindful of potential hazards in your garden environment. With proper precautions and responsible gardening practices, you can create a safe and enjoyable outdoor space to relax, unwind, and connect with nature.

Happy Gardening!

A Beginner’s Guide to Growing Cacti!

Introduction:

Cacti are iconic symbols of arid landscapes, renowned for their unique appearance, low maintenance requirements, and resilience in challenging environments. Whether you’re a seasoned gardener or new to gardening, cultivating cacti can be a fulfilling experience. In this comprehensive guide, we’ll explore everything you need to know about growing and caring for cacti, from selecting the right species to providing optimal growing conditions and essential maintenance tips.

Understanding Cacti:

Before diving into the care and cultivation of cacti, it’s essential to understand the characteristics and requirements of these succulent plants. Cacti belong to the family Cactaceae and are known for their fleshy stems, spines, and unique growth habits. These plants have evolved to thrive in dry, desert-like conditions, storing water in their tissues to survive periods of drought.

Selecting the Right Species:

With thousands of cactus species to choose from, selecting the right plants for your garden or indoor space can seem daunting. Consider factors such as growth habit, size, and appearance when choosing cacti for your collection. Some popular species for beginners include the Golden Barrel Cactus (Echinocactus grusonii), Bunny Ear Cactus (Opuntia microdasys), and Christmas Cactus (Schlumbergera truncata).

Providing Optimal Growing Conditions:

Cacti thrive in bright, indirect light and well-draining soil. Choose a location with plenty of sunlight, such as a south-facing window or a sunny outdoor spot. Avoid placing cacti in direct sunlight for extended periods, as this can cause sunburn and damage the plant tissue. Use a specialized cactus or succulent potting mix that provides excellent drainage to prevent waterlogging and root rot.

Watering Wisely:

One of the most critical aspects of caring for cacti is proper watering. While these plants are adapted to dry conditions, they still require periodic watering to thrive “It is crucial to ensure that the soil dries out completely before watering. Water the plant thoroughly until excess water drains from the bottom of the pot. During the dormant season, reduce watering frequency to mimic the plant’s natural growth cycle.


Similar Posts:


Fertilizing Sparingly:

Cacti have relatively low nutritional requirements and can thrive in nutrient-poor soils. Fertilize your plants with a balanced water-soluble fertilizer diluted to half strength, sparingly during the growing season. Apply fertilizer once every 4-6 weeks to provide essential nutrients without risking overfertilization. Avoid fertilizing during the dormant season, as this can stimulate unwanted growth.

Avoiding Common Pitfalls:

While cacti are relatively low maintenance, they are susceptible to a few common issues that can impact their health and appearance. Overwatering is the most common cause of cactus problems, leading to root rot and fungal diseases. Ensure that your cacti are planted in well-draining soil and water them only when necessary. Additionally, watch for signs of pests such as mealybugs, spider mites, and scale insects, and treat infestations promptly with insecticidal soap or neem oil.

Practicing Proper Maintenance:

Regular maintenance is essential for keeping your cacti healthy and vibrant. Remove dead or damaged growth with clean, sharp pruning shears to promote new growth and maintain the plant’s shape. Inspect your cacti regularly for signs of stress, disease, or pest infestations, and take appropriate action to address any issues that arise.

Conclusion:

Caring for cacti can be a rewarding and enjoyable experience, allowing you to cultivate beautiful and resilient plants with minimal effort. By understanding the unique characteristics and requirements of cacti, selecting the right species, providing optimal growing conditions, and practicing proper maintenance, you can create a stunning cactus collection that thrives for years to come. With a little knowledge and care, you’ll be well on your way to becoming a successful cactus gardener.

Happy Gardening!

Maintaining a Clean Home Oasis: Tips for Growing Indoor Plants Dirt-Free!

Introduction:

Bringing the beauty of nature indoors with houseplants adds a touch of greenery and tranquility to any living space. However, keeping your home clean while nurturing indoor plants can sometimes pose a challenge. With the right strategies, it’s possible to enjoy the benefits of indoor gardening without sacrificing cleanliness. In this article, we’ll explore practical tips for maintaining a dirt-free home while growing indoor plants.

Choose Clean Indoor Plants:

When selecting indoor plants for your home, opt for varieties that are less likely to shed soil or create messes. Look for plants with compact root systems or those that come in clean, soil-free growing mediums like hydroponic setups or air plants. Succulents, snake plants, pothos, and peace lilies are excellent choices known for their low-maintenance nature and minimal mess.

Use Containment Solutions:

To prevent soil spills and water leakage, consider using containment solutions such as decorative pots with built-in saucers or trays. These containers not only catch excess water but also help contain any soil that may escape during watering or transplanting. Additionally, placing plants on trays or trays lined with decorative rocks can further minimize messes and make cleanup easier.

Implement Drip Trays and Watering Techniques:

Drip trays placed underneath pots are essential for catching water runoff during watering sessions. Opt for trays that match the size and aesthetic of your plant containers to maintain a cohesive look. When watering your plants, do so carefully and avoid over-watering to minimize the risk of spills and soil displacement. Using a watering can with a narrow spout or a watering globe can help control water distribution and reduce splashing.

Practice Regular Maintenance:

Routine maintenance tasks such as dusting, pruning, and repotting can help keep indoor plants healthy and minimize messes. Dusting plant leaves with a soft cloth or gentle spray of water removes accumulated dirt and enhances photosynthesis. Pruning dead or yellowing leaves not only improves plant appearance but also prevents soil contamination. Additionally, repotting plants as needed allows for root inspection and prevents overcrowding, which can lead to soil spillage.


Similar Posts


Employ Protective Coverings:

For extra protection against soil spills and water damage, consider using protective coverings such as plastic or silicone mats placed underneath plant containers. These mats provide an additional barrier between the plant and the surface below, preventing water stains and soil residue. Alternatively, decorative waterproof trays or trays lined with waterproof liners can serve as stylish and functional solutions for containing messes.

Opt for Soilless Growing Mediums:

Soilless growing mediums such as coco coir, perlite, or peat moss offer an alternative to traditional potting soil and can help minimize dirt-related messes. These lightweight and sterile mediums provide excellent aeration and drainage for plant roots while reducing the risk of soil-borne pests and diseases. Hydroponic systems, aeroponic towers, and moss poles are innovative soil-free growing methods that eliminate the need for messy soil altogether.

Establish Cleaning Routines:

Regular cleaning routines are essential for maintaining a dirt-free home environment while growing indoor plants. Vacuuming or sweeping floors, wiping down surfaces, and dusting furniture help remove accumulated dirt and debris. Pay special attention to areas around plant containers and windowsills, where soil and dust tend to accumulate. Consider using a handheld vacuum or dusting brush to clean hard-to-reach spaces and tight corners.

Conclusion:

With proper planning and maintenance, it’s possible to enjoy the beauty of indoor plants without compromising cleanliness in your home. By selecting clean plant varieties, using containment solutions, practicing regular maintenance, and implementing protective measures, you can create a dirt-free oasis that enhances both your living space and your well-being. With these tips in mind, you can cultivate a harmonious balance between nature and cleanliness indoors.

Happy Gardening!

Blooms of Elegance: A Comprehensive Guide to Growing and Caring for Camellia Plants!

Camellias are cherished for their elegant blooms, glossy foliage, and evergreen charm, making them prized additions to gardens around the world. Known for their exquisite flowers that appear in various colors and forms, camellias add a touch of beauty and sophistication to landscapes. Whether you’re a novice gardener or a seasoned enthusiast, learning how to grow and care for camellia plants can elevate your gardening experience and ensure the health and vitality of these beloved ornamentals.

Introduction to Camellias:

Camellias belong to the genus Camellia, which comprises over 300 species, with Camellia japonica and Camellia sasanqua being among the most popular cultivated varieties. Originating from Asia, particularly China and Japan, camellias have been cultivated for centuries for their ornamental value and cultural significance. These evergreen shrubs or small trees are prized for their lush foliage and stunning flowers, which bloom in late fall, winter, or early spring, depending on the species and variety.

Growing Camellias:

Growing camellias begins with selecting the right location and providing optimal growing conditions for these ornamental beauties. Here’s a step-by-step guide to cultivating camellias in your garden:

Choose the Right Location: Camellias thrive in partially shaded to shaded areas with protection from the hot afternoon sun. Select a site with well-draining, acidic soil rich in organic matter.

Planting: Plant camellias in the fall or early spring when the soil is moist and temperatures are mild. Make a hole that is two times as deep and wide as the root ball. Make sure the top of the root ball of the plant is level with the soil surface when you place it in the hole. Backfill the hole entirely with water and soil.

Watering: Consistently keep the soil moist but not waterlogged, water deeply and regularly, and avoid overhead watering to prevent fungal diseases.

Fertilizing: Feed camellias with a balanced, slow-release fertilizer formulated for acid-loving plants in early spring before new growth emerges. Repeat fertilization in late spring or early summer if necessary. Avoid using high-nitrogen fertilizers as they may lead to more foliage growth and less flowering.

Mulching: Apply a layer of organic mulch, such as pine straw or shredded bark, around the base of the plant to conserve moisture, suppress weeds, and regulate soil temperature. Maintain a mulch depth of 2-3 inches, keeping it away from the trunk to prevent rot.

Pruning: Prune camellias selectively to maintain their desired shape, remove dead or diseased branches, and promote air circulation within the canopy. Pruning is best done after flowering to avoid cutting off potential buds.


Similar Posts


Caring for Camellias:

Caring for camellias involves regular maintenance practices to ensure their health, vigor, and prolific blooming. Here are some essential care tips for camellia plants:

Pest and Disease Control: Monitor camellias regularly for signs of pests, such as aphids, scale insects, and spider mites, as well as diseases like camellia leaf spot and root rot. Treat infestations promptly with horticultural oil, insecticidal soap, or neem oil, and remove infected plant parts to prevent the spread of disease.

Winter Protection: In colder climates, provide winter protection for camellias by covering them with frost cloth or burlap during freezing temperatures. Mulch around the base of the plant to insulate the roots and minimize frost damage.

Deadheading: Remove spent flowers promptly to encourage continuous blooming and prevent seed production, which can divert energy away from flower production.

Container Care: If growing camellias in containers, choose a large, well-draining pot and use a soil mix formulated for acid-loving plants. Water container-grown camellias regularly to keep the soil evenly moist, and fertilize them according to label instructions.

Hydration: During periods of drought or high temperatures, provide supplemental irrigation to ensure camellias receive adequate moisture. It is important to avoid overwatering your plants, as damp soil can cause root rot and other issues.

Monitoring pH Levels: Regularly test the soil pH around camellias to ensure it remains acidic, ideally between 5.0 and 6.5. Amend the soil with sulfur or acidic fertilizers if necessary to maintain optimal pH levels.

Conclusion:

Growing and caring for camellias can be a rewarding experience, offering gardeners a glimpse of nature’s beauty and resilience. By providing the right growing conditions, proper maintenance, and tender loving care, you can enjoy the bountiful blooms and lush foliage of these exquisite plants year after year. Whether adorning garden beds, borders, or containers, camellias are sure to captivate with their timeless elegance and charm.

Happy Gardening!

Orchids Unveiled: A Closer Look at the Diverse World of Exquisite Blooms!

Introduction

Orchids, with their enchanting beauty and intricate flowers, constitute a vast and diverse family of flowering plants. Boasting over 25,000 species and an impressive 100,000 hybrids and cultivars, these captivating blooms have found their way into homes, gardens, and hearts worldwide. In this blog post, we explore some of the broad categories of orchids, shedding light on their unique characteristics and the wide array of species that make them truly extraordinary.

Phalaenopsis Orchids: Moth’s Grace in Your Living Room

Commonly known as moth orchids, Phalaenopsis orchids captivate enthusiasts with their large, flat flowers and enduring blooms. These graceful beauties have become a staple in households, known not only for their mesmerizing appearance but also for their ease of cultivation.

Cattleya Orchids: Corsage Elegance in Every Hue

Referred to as corsage orchids, Cattleyas steal the spotlight with their impressive, showy flowers that come in a kaleidoscope of colors. Prized for their use in cut flower arrangements and corsages, Cattleya orchids exude an air of elegance and sophistication.

Dendrobium Orchids: Adaptable Wonders of Nature

Dendrobium orchids, boasting a diverse range of species, showcase a splendid variety in size, shape, and color. Their adaptability allows them to thrive in various environments, making them a favorite among orchid enthusiasts. Dendrobium orchids are the most commonly grown type of orchids because they are easy to maintain.

Oncidium Orchids: A Ballet of Colors and Shapes

Dancing lady or dancing doll orchids, commonly known as Oncidiums, take center stage with their vibrant and uniquely shaped flowers. Popular as both potted plants and garden additions, Oncidiums offer a visual spectacle that delights orchid lovers.

Vanda Orchids: Airy Elegance in Vibrant Hues

Characterized by large, flat, and vividly colored flowers, Vanda orchids present a breathtaking display of elegance. Often grown without potting media, with roots exposed to air, Vandas require a lot of bright light and regular watering. Compared to other orchids, they require a bit more care.


Similar Posts


Cymbidium Orchids: Sprays of Beauty for Every Occasion

Cymbidium orchids, renowned for producing large sprays of flowers, have secured a place in the hearts of floral enthusiasts. Often featured in corsages and arrangements, these hardy orchids can tolerate cooler temperatures, adding versatility to their appeal.

Lady’s Slipper Orchids (Paphiopedilum): Nature’s Quirky Elegance

Paphiopedilum, or Lady’s Slipper Orchids, stand out with their distinctive pouch-like lip, resembling a slipper. Available in various sizes and colors, these quirky yet elegant orchids intrigue enthusiasts with their unique form.

Masdevallia Orchids: Small Marvels in Vivid Hues

Masdevallia orchids, known for their small yet brightly colored flowers, captivate enthusiasts with their cool-growing nature. Popular among orchid aficionados, these unique blooms offer a diverse range of forms that add a touch of marvel to any collection.

Miltonia Orchids: Fragrant Pansies in Every Shade

Also known as pansy orchids, Miltonias enchant with their pansy-like appearance and often fragrant blooms. Available in a range of colors, these orchids bring a delightful fragrance to any orchid collection

Brassia Orchids: Spiders in Bloom

Often called spider orchids, Brassia orchids boast long, slender petals that resemble spider legs, creating a truly unique and intriguing flower shape. Dive into the world of Brassia as we unravel the captivating characteristics that define these orchids

Conclusion

These examples merely scratch the surface of the vast orchid family, with each genus and species possessing its own distinct charm. Orchids, found in nearly every corner of the world, showcase nature’s ability to adapt to various climates and ecosystems. Whether you’re a seasoned orchid enthusiast or a novice admirer, the diverse world of orchids offers a treasure trove of beauty waiting to be explored. Embrace the enchantment of orchids and let their unique allure add a touch of nature’s elegance to your life.

Happy Gardening!

Choosing the Perfect Tulips for Your Garden!

Introduction

Tulips, with their vibrant colors and elegant structure, are a delightful addition to any garden. While their beauty is undeniable, choosing the right tulips and understanding how to care for them is crucial for a flourishing display. From selecting the varieties to nurturing them through seasons, here’s a comprehensive guide to help you pick and cultivate the perfect tulips for your landscape.

Understanding Varieties: Hybrid vs. Species Tulips

The tulips you commonly encounter, often found in garden centers, are hybrid tulips. They offer stunning displays but typically need annual replacement for optimal results. On the other hand, species tulips, hardy in zones 4 to 7, possess perennial characteristics, returning year after year given the right conditions. These shorter tulips boast smaller flowers with distinct, pointed petals.

Blooming Time Matters

Tulips have varying flowering durations, with early, mid, and late-season varieties. To ensure an extended and continuous bloom, opt for a mix of tulips from each category when making your selections. This thoughtful curation guarantees a prolonged and captivating showcase in your garden.

Planting Essentials: Location, Timing, and Soil

Tulips thrive in full sun, requiring at least six hours of direct sunlight daily. They also favor well-draining soil, making them ideal for rock gardens. Planting occurs in the fall, with timing dependent on your climate zone. Ensure the soil has cooled from the summer heat before planting. If your area doesn’t experience adequate chilling temperatures, consider pre-cooled bulbs for successful growth.

Soil Preparation and Planting Technique

Prepare the planting area by incorporating nutrient-rich soil (Soil: Vermicompost: Cocopeat). Mixing this soil with the native one promotes robust root development, essential for a splendid spring bloom. When planting, group tulips in sets of ten or more, burying each bulb eight inches deep with the pointy end facing upwards. Optimal spacing allows for a captivating display. Thorough watering after planting is crucial for initial growth.


Similar Posts


Potted Tulip Care

Growing tulips in containers is effortless. Plant bulbs at a depth of eight inches, and ensure the container is moved to a cool, dry location before the first frost. When outdoor growth begins, relocate the pot to a sunny spot and maintain regular watering.

Watering and Feeding

Water tulips upon planting and then weekly for the first month. Resume watering in spring when foliage emerges. Feeding post-flowering with plant food supports nutrient storage for the next season. Apply this feed again in late fall before dormancy.

Maximizing Indoor Enjoyment

To enjoy tulips indoors, cut them when the buds are tight and place them in room-temperature water in a clean vase. Adding preservatives to the water extends their lifespan, and trimming the stems periodically maintains their elegance.

Post-Blooming Care

For species of tulips to return annually, trim the flower stalks once blooms fade. Feed the bulbs, stop watering during dormancy, and trim foliage after it browns. Hybrid varieties are not perennial; remove and compost their bulbs after flowering.

Protecting Against Pests

Deer and rodents can pose a threat to tulips. Use chicken wire to protect bulbs from being dug up, and consider interplanting with deer-resistant varieties like daffodils or Crown Imperials. Utilize deer repellents for additional protection.

Conclusion

Embark on your tulip-growing journey armed with these insights! By selecting the right varieties, providing optimal care, and safeguarding against pests, you’ll create a stunning tulip display that enchants year after year. Whether in garden beds or charming pots, these tips ensure a flourishing and vibrant floral showcase.

Happy Gardening!