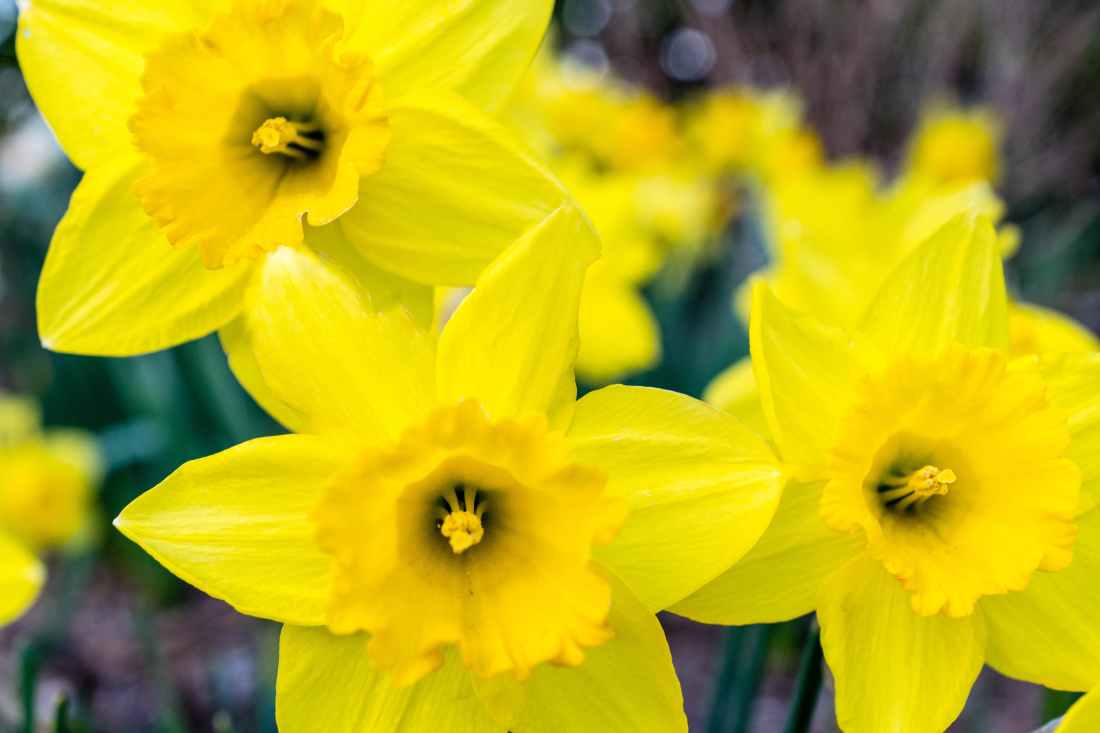
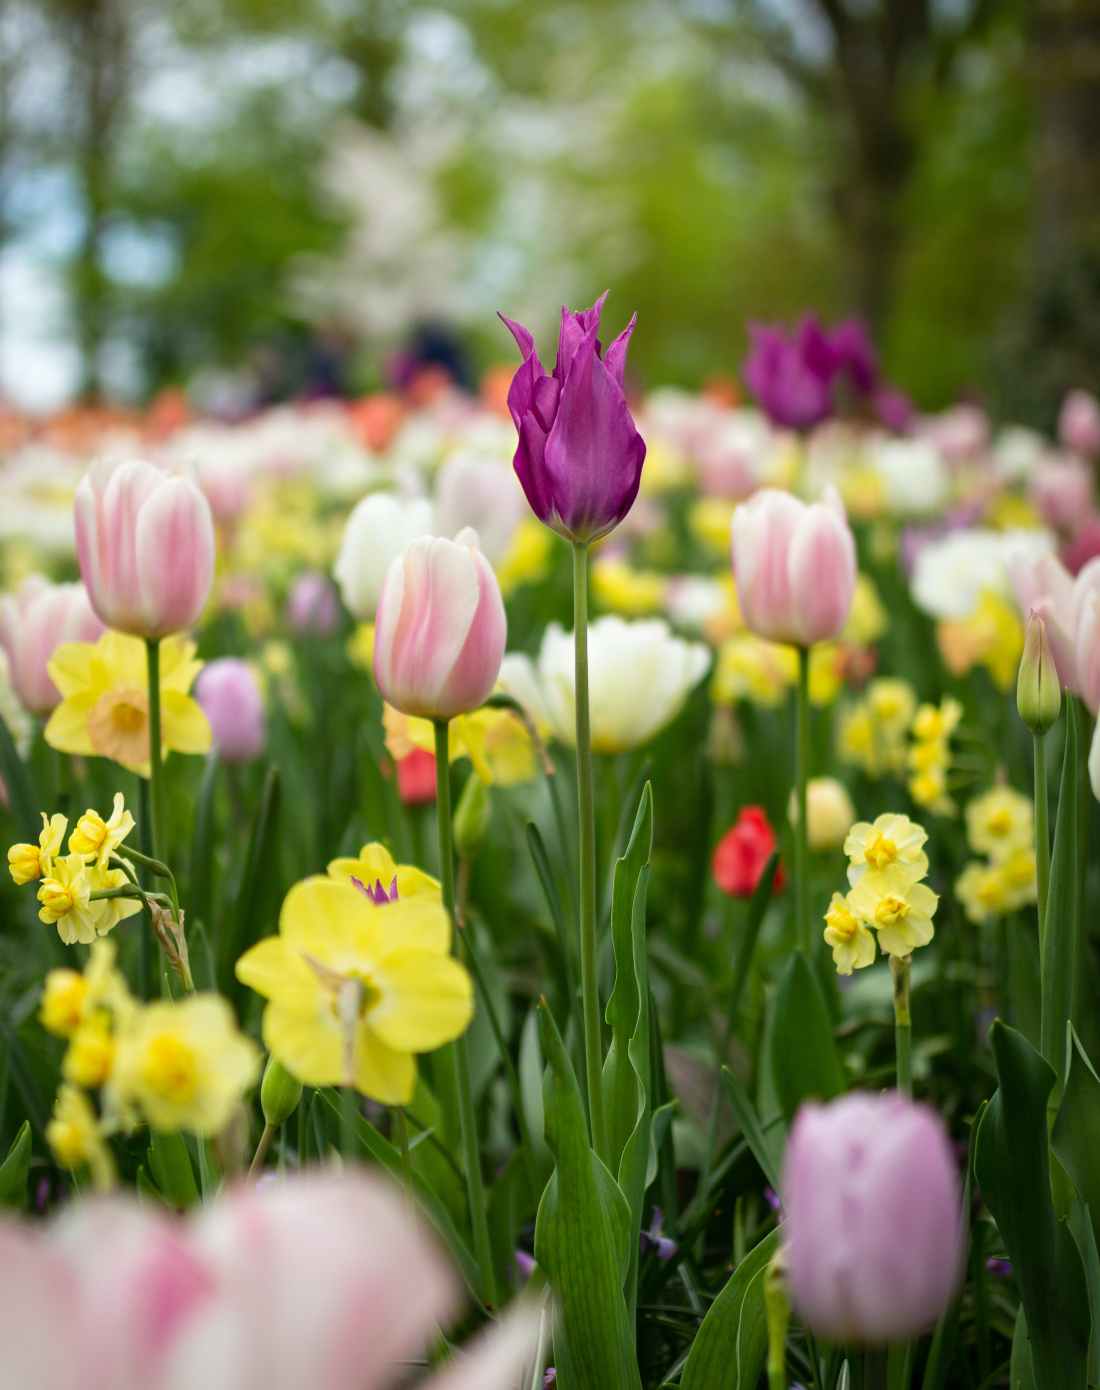
Cultivating Hyacinths: Your Comprehensive Growing Guide!

Introduction

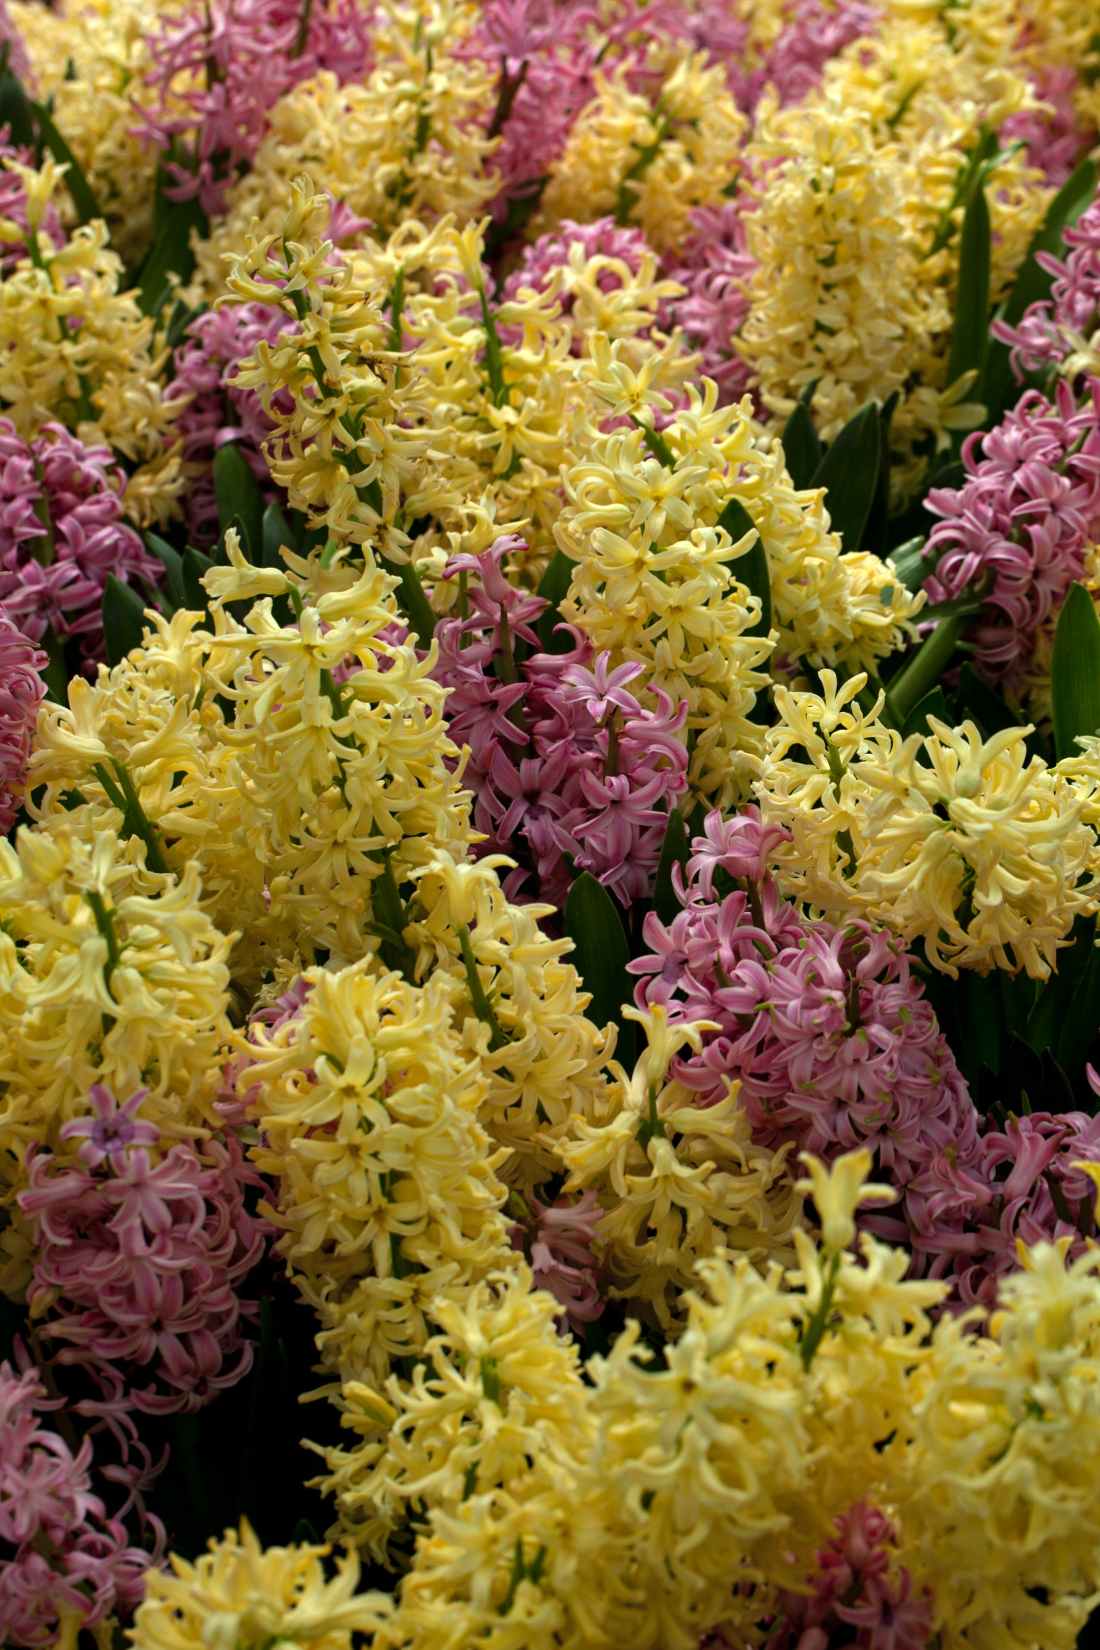
Hyacinths, renowned spring blooms akin to tulips and daffodils, emerge with striking spikes of vivid colors—blues, purples, whites, pinks, apricots, and reds, precisely when winter wanes and you yearn for blossoms. Unlike their counterparts, these fragrant beauties sustain their captivating blooms for an impressive two weeks or more, adding allure to the onset of spring.

For those seeking versatility, hyacinths shine not only in garden beds but also as cut flowers, adorning indoor vases and spaces with their captivating allure. Their long-lasting blooms and fragrant presence make them a perfect choice for stunning floral arrangements that infuse homes with a touch of elegance and natural beauty.

Origins and Popularity of Hyacinths

Originating from Turkey, Syria, and Lebanon, hyacinths found their way to Europe during the 16th century and swiftly rose to prominence. The Dutch, revered for their love of bulbous flowers, had developed over 2,000 cultivars by the 18th century, emphasizing the popularity and significance of these enchanting flowers.

Planting Hyacinths: The Right Start Matters

The ideal time for planting hyacinth bulbs is late summer to early fall, ensuring they establish themselves before frost sets in. Select a spot basking in at least four hours of sunlight daily, favoring locations with full to partial sun exposure.

Ensuring loose and loamy soil is crucial, as hyacinths tend to suffer in heavy, moisture-retentive soils. Enhance soil drainage by incorporating compost, shredded pine bark, or aged manure. For heavy clay soil, raised beds offer an effective solution to improve drainage.

Mass planting hyacinth bulbs, at least 4 inches deep and 3 inches apart, intensifies their sweet fragrance and visual impact. Grape hyacinth bulbs, however, should be planted shallower, at 2 to 3 inches deep.


Similar Posts


Essential Care Tips for Thriving Hyacinths

Adequate moisture without overwatering is vital. During dry spells, ensure they receive about an inch of water weekly. Fertilize with bulb food during the spring emergence and again in early fall for optimal growth.

Post-bloom, supplement the soil with compost to provide essential nutrients for the next season’s blossoms. For enhanced vitality, allow the foliage to persist for six weeks after flowering, as these leaves serve as nutrient factories for future blooms.

For areas lacking cold winters, a special regimen involving digging up bulbs after spring foliage dies, storing them in a cool, dry place, and refrigerating for a couple of months before replanting in fall ensures their continued bloom.

Forcing Hyacinths: Indoor Bloom Marvels

To usher in a fragrant indoor bloom during winter, forcing hyacinth bulbs can work wonders. With or without soil, these methods yield delightful indoor blooms:

With Soil: Plant bulbs slightly exposed in pots, then refrigerate for at least 10 weeks. Gradually introduce them to sunlight for a stunning indoor display.

Without Soil: Employ a bulb-forcing vase, suspending pre-chilled bulbs above water. Place in a well-lit spot, changing water every two weeks, and watch them grow into charming blooms.

Dealing with Pests and Diseases

Hyacinths might face challenges like gray mold caused by excess moisture and bulb rot from overwatering. Identifying and addressing these issues promptly through appropriate measures like fungicide application or improved drainage is essential for their health.

Recommended Hyacinth Varieties

Explore an array of mesmerizing hyacinth varieties like ‘Carnegie,’ ‘China Pink,’ ‘Hollyhock,’ ‘City of Haarlem,’ ‘Peter Stuyvesant,’ ‘Gypsy Queen,’ ‘Viper Bow,’ ‘Woodstock,’ and more, each boasting unique colors and characteristics to grace your garden with splendid blooms.

Hyacinths, with their captivating hues and enduring fragrance, offer an extraordinary springtime spectacle. Their resilience and enchanting charm make them a garden favorite, enriching landscapes with vibrant colors and delightful scents. Embrace the allure of hyacinths and witness the beauty they bring to your garden.

Happy Gardening!

Your Complete Handbook to Cultivating Daffodils!

Introduction

Daffodils, also referred to as Narcissus, are resilient flowering plants that grace gardens with their captivating blooms. These stunning flowers, primarily yellow but also available in white or blends, brighten up the spring landscape, offering a vibrant array of colors ranging from bright yellow to soft pinks and salmons. Their unique characteristics, delightful fragrance, and adaptability make them ideal for container gardening, balconies, and traditional garden beds.

Understanding Daffodils

Daffodils showcase six flower leaves, with sepals on the exterior and actual petals within. These blossoms can appear solitary or double, growing individually or in clusters on a stalk, varying in height from 6 to 20 inches. The sweet aroma emitted by daffodil blooms contributes to their widespread popularity among gardeners.

Selecting the Right Daffodil Varieties

Before embarking on your daffodil journey, consider the variety that suits your preferences. Compact types like ‘Tete-a-Tete’ thrive exceptionally well in containers, providing an enchanting touch to smaller gardening spaces.


Similar Posts


Steps for Planting and Nurturing Daffodils

Planting:

Planting daffodils is a straightforward process. These hardy plants thrive in a wide range of light conditions, from full sun to full shade, adapting well to various soil types, particularly loose and well-drained soil. Enhance the soil’s drainage in denser soils by incorporating ample organic matter before planting.

Care:

Post-planting, ensure adequate moisture until foliage turns yellow, especially in dry weather. During summer, daffodils typically do not require additional watering. After flowering, maintain foliage for at least 6 weeks for healthier bulbs and a tidier appearance in the garden.

Container Planting:

Opting for containers? Choose those with adequate drainage and sufficient depth for bulb growth. Leave a gap between the bulb and pot rim, using a well-draining potting mix enriched with fertilizer. Monitor the bulbs for top growth, usually visible after six to eight weeks, while providing them with cool temperatures they prefer.

Maintaining Daffodils:

In case of underperforming bulbs, consider using low-nitrogen, high-potash fertilizers post-flowering. Ensure watering for late-flowering daffodils in dry spring weather to prevent flower abortion. Additionally, lifting and dividing congested clumps can stimulate healthier growth.

Positioning Containers:

Proper container placement is crucial for daffodil health. Balancing light and temperature to prevent rapid development resulting in floppy shoots is key. ‘Daffodil blindness,’ where leaves grow without flowering, can be addressed by relocating bulbs to a more prominent location once they begin blooming.

Extending the Beauty of Daffodils

As daffodils fade after their blooming period, consider deadheading spent flowers to promote energy conservation within the bulb for the following season’s growth. Allow the foliage to wither naturally, aiding the bulb’s nutrient replenishment process. To support next year’s blooms, consider adding bone meal to the soil after the daffodils have fully faded, ensuring a spectacular floral display year after year.

Embracing Daffodil Magic

Incorporating daffodils into your gardening repertoire brings forth not just vibrant colors but also an enduring sense of joy and natural beauty. Their resilience, coupled with their effortless charm, makes them a perennial favorite among gardeners worldwide. As you delve into the art of daffodil cultivation, revel in the magic they bring to your garden and the promise of spring they herald.

By adhering to these comprehensive steps and care instructions, you’ll ensure the continuity of daffodil cheer in your garden. So, embrace the joy of gardening and witness the beauty of daffodils as they bloom!

Happy Gardening!

Winter Blooming Bulbs: Infusing Your Garden with Springtime Colors!

Introduction

As winter wraps the world in its chilly embrace, your garden need not succumb to the season’s sleepy spell. With thoughtful planning and strategic planting, you can transform your outdoor haven into a vibrant tapestry of colors come spring. Discover ten delightful flower bulbs that, when planted in winter, ensure a spectacle of beauty and fragrance, bringing life to your garden even amidst the cold days.

1) Daffodil: The Herald of Renewal

Daffodils, with their iconic yellow or white blooms, symbolize hope and rejuvenation. Plant these hardy bulbs during winter, and as spring approaches, they’ll bloom, infusing your garden with warmth and vibrant colors, a perfect promise of the coming season.

2) Iris: Elegance Personified

Embrace elegance with the winter planting of irises. These classic beauties boast sword-shaped leaves and delicate flowers, adding sophistication to any garden. Their presence elevates the aesthetic charm, whether adorning a garden bed or gracing a balcony.

3) Freesia: Fragrant Marvels

Perennial freesias enchant with their vibrant hues, long-lasting blooms, and sweet fragrance. Adorn your garden with these stunning flowers by planting them in a pot or grow bag during winter, ready to delight you with their aromatic presence in late winter or early spring.

4) Crocus: Delicate Winter Charms

Crocuses, grown from corms, captivate with their delicate, cup-shaped flowers. Thriving in well-drained soil and partial shade, these resilient bloomers spread their beauty, making them a delightful addition to a winter garden.

5) Gladiolus: Towering Elegance

Known for their trumpet-shaped blooms and tall spikes in varied hues, gladiolus bulbs bring vibrant colors to gardens. With proper care in well-drained, nutrient-rich soil, these flowers extend their display well into summer, a testament to their lasting allure.


Similar Posts


6) Ixia: Diversity in Bloom

Ixias, also called African corn lilies, present an array of star-shaped flowers in different colors and patterns. Their unique varieties thrive when planted in winter, requiring the cool climate to flourish and grace your garden with their diverse beauty.

7) Hyacinth: Intense Fragrance, Vibrant Colors

Renowned for their intense fragrance and vivid spikes of color, hyacinths bloom from early to mid-spring. Plant these bulbs in well-drained soil during winter, ensuring their best display when the new season dawns.

8) Ranunculus: Soft Elegance

Ranunculus, resembling soft rose blooms, add a touch of grace to gardens with their diverse color palette. Plant them in winter, allowing these bulbs to experience the cool period required for their spectacular spring blossoms.

9) Tulip: Iconic Brilliance

Tulips, iconic for their vivid hues and beautiful shapes, thrive when planted in winter. Requiring well-drained soil and abundant sunlight, these bulbs set the stage for a breathtaking spring display.

10) Allium: Dramatic Spheres

Allium bulbs, often known as ornamental onions, adorn gardens with their spherical clusters of small, star-shaped flowers. With proper sunlight and watering, these plants flourish, adding a dramatic and structured appeal to your garden.

Conclusion

As winter settles in, seize the opportunity to infuse your garden with a burst of colors and fragrances. With these ten flower bulbs planted during winter, you’re poised to witness nature’s artistry unfold, transforming your outdoor sanctuary into a captivating display of springtime beauty.

Happy Gardening!

Protecting Your Garden During Parties: Keeping it Safe from Damage!

Introduction

Gardens are serene sanctuaries, a blend of nature’s beauty meticulously crafted by your hands. However, when hosting a party or any function in your garden, ensuring its protection from potential damage becomes crucial. While celebrations bring joy, they can also inadvertently cause harm to your precious garden. With thoughtful planning and a few precautions, you can safeguard your garden from potential harm during gatherings. Here’s how:

1. Define Boundaries:

Establish clear boundaries to guide guests and prevent accidental trampling or damage to delicate plants. Use fencing, subtle barriers, or decorative elements to demarcate sensitive areas and paths. This not only protects your garden but also enhances its aesthetic appeal.

2. Choose Durable Furniture:

Opt for sturdy, weather-resistant furniture that won’t damage your garden beds or lawn. Avoid sharp-edged furniture that might scrape against plants or tear the grass. Providing ample seating and designated areas for gathering can help direct foot traffic away from delicate areas.

3. Light it Right:

Illuminate the garden strategically to avoid mishaps. Place lighting fixtures strategically along paths, near flower beds, and around delicate areas. This not only ensures safety for guests but also safeguards your garden by preventing accidental trampling or damage.

4. Select Garden-Friendly Decor:

Be mindful of the decorations you choose. Avoid decorations that could potentially harm plants or lawns. Opt for potted plants, lanterns, or non-invasive decorations that complement your garden without causing damage.

5. Offer Guided Paths:

Create clear pathways for guests to follow, guiding them through the garden while protecting the plants. Use gravel, stepping stones, or designated walkways to direct foot traffic and discourage guests from wandering into off-limits areas.


Similar Posts


6. Say No to Firecrackers

Firecrackers can be dazzling and exciting during celebrations, but they pose a significant threat to our environment, especially to our cherished plants. The loud noises and harmful chemicals emitted by fireworks can wreak havoc on delicate plants, causing stress, damage, and sometimes even death.

Here are a few ways to shield your plants from the harmful effects of firecrackers:

  • Covering: Use cloth or protective coverings to shield plants from debris and chemicals released by fireworks. This simple step can significantly reduce the impact of pollutants on your green companions.
  • Watering: Before the festivities begin, water your plants thoroughly. Moist soil can help mitigate the effects of heat or sparks that might come in contact with the ground.
  • Pruning: Trim any overhanging branches or foliage near areas where fireworks might be set off. This reduces the risk of direct contact and potential damage.
  • Indoor Placement: If possible, temporarily move potted plants indoors or to a safer location away from the festivities. This offers them a reprieve from the noise and pollution.

7. Communicate Carefully:

Communicate with your guests about the garden’s significance and the need to preserve its beauty. Politely inform them about sensitive areas and request their cooperation in keeping the garden pristine.

8. Prepare for Weather Changes:

Be ready for unexpected weather changes. Have a backup plan or shelters in place to protect both your guests and the garden from sudden rain, wind, or excessive sunlight.

9. Supervise and Monitor:

Assign a few individuals to supervise the garden during the event. They can gently guide guests, ensure compliance with garden rules, and take quick action in case of any potential mishaps.

10. Cleanup and Restoration:

After the event, conduct a thorough check of the garden. Attend to any damages immediately, replant or repair as needed, and restore the garden to its original state. Prompt action can often mitigate any potential long-term harm.

Conclusion:

Your garden represents your dedication and love for nature’s beauty. Protecting it during gatherings requires thoughtful planning and communication. By implementing these precautions, you can enjoy hosting events in your garden while preserving its beauty and tranquility for many more gatherings to come.

Remember, while we celebrate, it’s equally important to safeguard the natural world around us. By taking a few precautions, we can ensure that our plants remain healthy and undisturbed during times of festivity. Remember, a little care goes a long way in safeguarding your green haven.

Happy Gardening!

Enchanting Night-Blooming Plants: Adding Magic to Twilight Gardens!

Night-blooming plants have an enchanting allure, adding a touch of mystique and beauty to gardens. These fascinating floras unfold their petals and release captivating scents as dusk settles, creating an ethereal experience under the moonlit sky.

The Enigmatic Charm

Night-blooming plants, as the name suggests, unveil their blooms after sundown, making evenings a magical time in the garden. These plants often have vibrant, fragrant flowers that open during the night, offering a sensory treat to those fortunate enough to witness their beauty.

Mystical Traditions and Symbolism

Throughout history, night-blooming plants have been linked to mystical beliefs and cultural significance. Some cultures view them as symbols of secrets, mystery, or transformation due to their tendency to bloom under the cover of darkness.

A Symphony for the Senses

Night-blooming plants aren’t just a visual spectacle; they engage multiple senses. Many emit enticing fragrances that attract night-flying pollinators like moths and bats, adding an auditory dimension to the garden’s nocturnal orchestra.

Encouraging Biodiversity

Night-blooming plants aren’t just captivating for humans; they attract an array of nighttime pollinators, contributing to biodiversity. By fostering these plants, gardeners indirectly support the ecosystem by providing sustenance for nocturnal insects and animals.

The Timeless Magic

Night-blooming plants offer an intimate connection with nature, revealing their beauty under the cover of darkness. Their brief yet captivating display reminds us of the fleeting yet profound moments that nature gifts us.

Some Examples Of Night Blooming Plants

1. Moonflower (Ipomoea alba):

These large, white blossoms unfurl their petals in the evening, emitting a sweet fragrance that entices nocturnal pollinators like moths.

2. Night-Blooming Jasmine (Cestrum nocturnum):

Tiny, greenish-white flowers that release an intoxicating fragrance after sunset, filling the air with a sweet aroma.

3. Evening Primrose (Oenothera biennis):

Bright yellow flowers that bloom in the late afternoon and remain open until morning, attracting night-flying insects with their mild scent.

4. Night-Blooming Cereus (Epiphyllum oxypetalum):

Known as the ‘Queen of the Night,’ this orchid cactus produces large, fragrant white flowers that bloom exclusively at night, usually lasting just one night.


Similar Posts


5. Night Phlox (Zaluzianskya ovata):

Delicate, white flowers that release a sweet, jasmine-like fragrance at night, attracting moths and other nighttime pollinators.

6. Night Gladiolus (Gladiolus tristis):

Pale yellow blossoms that exude a rich fragrance in the evening, offering a delightful olfactory experience after dark.

7. Four O’Clocks (Mirabilis jalapa):

Colorful flowers that open in the late afternoon and emit a delightful, sweet fragrance in the evening hours.

8. Brahma Kamal (Saussurea obvallata):

A Himalayan flower that blooms only at night, emitting an exquisite fragrance, often considered divine.

9. Night-Blooming Water Lily (Nymphaea odorata):

Elegant white and pink flowers that bloom at night, perfuming the air around ponds and water gardens.

10. Nicotiana (Nicotiana alata):

Tubular, trumpet-shaped flowers that release a sweet, pleasant fragrance in the evening, attracting night-pollinating moths.

11. Angel’s Trumpet (Brugmansia suaveolens):

Large, pendulous flowers with an intoxicating fragrance that intensifies in the evening, attracting night pollinators.

12. Night-Scented Stock (Matthiola longipetala):

Tiny, delicate flowers that emit a rich, spicy fragrance in the evening, making them ideal for fragrant borders or containers.

13. Night-Blooming Orchid (Brassavola nodosa):

Fragrant white flowers that bloom exclusively at night, offer a captivating aroma.

14. Dragon Fruit (Hylocereus spp.):

These cactus flowers bloom at night, showcasing large, stunning blossoms that give way to delicious, edible fruits.

15. Night-Blooming Cactus (Selenicereus grandiflorus):

Large, showy flowers that bloom spectacularly at night, often filling the garden with their sweet fragrance.

Conclusion

As the sun sets and the night garden awakens, it’s a time of wonder and discovery. Night-blooming plants, with their mysterious allure, beckon us to slow down, appreciate nature’s secrets, and revel in the ephemeral beauty that adorns the darkness.

Night-blooming plants offer a symphony of colors, shapes, and fragrances, creating a magical ambiance in gardens after twilight. Whether for their captivating scents or captivating blooms, they truly shine when the sun sets, making them a delightful addition to nocturnal landscapes. Their delicate blossoms, intoxicating scents, and elusive beauty create an ethereal experience, inviting us to appreciate nature’s magic under the moonlit sky.

Happy Gardening!

Enchant Your Garden: Magical Christmas Decor Ideas!

As the festive spirit fills the air, extending the celebrations to your garden can bring an enchanting touch to your home. Decorating your outdoor space for Christmas isn’t just about trimming the tree indoors; it’s about transforming your garden into a magical wonderland that spreads joy to all who visit.

1. Festive Lighting Extravaganza

Illuminate your garden with a spectacular light show that captivates the neighborhood. Adorn trees, shrubs, and fences with strings of twinkling lights. Opt for classic warm white, vibrant multicolor, or even themed lights to add a whimsical touch. Consider solar-powered lights for an eco-friendly display that shimmers through the night.

2. Welcoming Entrance

Start the festive journey right from the gate or entrance. Adorn the pathway or gateposts with lush garlands, festooned with ornaments, pinecones, and ribbons. Hang a beautifully decorated wreath on the front door to warmly greet your guests.

3. Glittering Ornaments and Decor

Deck the bushes and trees with oversized baubles, shimmering ornaments, and glittering tinsel. Hang dazzling outdoor-safe decorations from branches or pergolas to create a winter wonderland effect.

4. Festive Foliage

Use the greenery from your garden creatively. Evergreen branches, holly, and mistletoe can be fashioned into stunning outdoor arrangements. Create charming displays in pots or urns filled with seasonal plants like poinsettias, holly bushes, or miniature Christmas trees.

5. Cozy Seating Area

Transform your outdoor seating area into a cozy haven. Drape warm blankets over chairs, and add festive cushions and pillows for comfort. Install outdoor heaters or a fire pit to keep the space warm and inviting for gathering around with loved ones.

6. Enchanting Centerpieces

Craft a striking centerpiece for your garden table or patio. Arrange a beautiful display of candles, pine cones, evergreen branches, and seasonal fruits in a decorative bowl or basket to bring the holiday cheer to your al fresco dining area.


Similar Posts


7. Illuminated Sculptures

Introduce illuminated figures or sculptures like reindeer, snowmen, or even Santa and his sleigh to your garden. These charming additions can be placed strategically to create delightful scenes that evoke the holiday spirit.

8. Festive Soundscapes

Enhance the ambiance with seasonal music or the gentle chimes of festive wind chimes. Create a playlist of classic holiday tunes that softly waft through the garden, adding a touch of magic to the atmosphere.

9. Snowy Accents

Even without snow, you can create a wintry scene. Sprinkle faux snow on surfaces, arrange artificial snowflakes on bushes, or hang icicle lights for a frosty effect that transports everyone into a magical Christmas world.

10. Themed Displays

Embrace a specific theme to tie your outdoor decorations together. Whether it’s a traditional red-and-green color scheme, a winter wonderland with icy blue and silver hues, or even a whimsical Santa’s workshop, a cohesive theme can elevate your garden decor.

11. Twinkling Starry Nights

Add a celestial touch with star-shaped lanterns or illuminated stars hanging from trees or adorning pergolas. Create a mesmerizing sky full of stars in your garden to evoke the wonder of the season.

12. Nativity Scenes and Symbols

Incorporate elements of the nativity story by setting up a beautiful outdoor nativity scene or displaying symbols like angels, the Star of Bethlehem, or the Three Wise Men. These pieces can add a spiritual and meaningful touch to your garden decorations.

With these delightful ideas, your garden can become a magical, festive retreat, spreading joy and holiday cheer to all who visit during this merry season. Happy decorating and Merry Christmas!

Happy Gardening!

Creating and Sustaining a Flourishing Kitchen Garden!

Introduction

Planning a kitchen garden is more than just choosing your favorite herbs or vegetables; it’s a blueprint for sustainable, homegrown produce. Here’s a comprehensive guide on how to craft and maintain a thriving kitchen garden.

Choose Your Plot:

Begin by selecting the ideal location for your kitchen garden. Pick a spot that receives ample sunlight and has good drainage. If space is limited, consider container gardening or vertical setups.

Select Your Plants Wisely:

Assess your culinary preferences and climate conditions before choosing the plants. Opt for a mix of vegetables, herbs, and fruits that thrive in your region and suit your cooking needs.

The ideal plants for a kitchen garden are those that not only fit your culinary preferences but also thrive in your local climate. Here are some popular choices:

  • Herbs: Herbs like basil, parsley, cilantro, thyme, rosemary, and mint are kitchen staples. They’re versatile, require minimal space, and can flourish in pots or directly in the ground.
  • Leafy Greens: Lettuce, spinach, kale, and Swiss chard are fast-growing leafy greens perfect for salads and smoothies. They’re relatively easy to grow and provide a continuous harvest.
  • Tomatoes: A favorite among gardeners, tomatoes come in various sizes and colors. They need ample sunlight and support for their vines but reward with abundant fruits.
  • Peppers: Bell peppers, chili peppers, and sweet peppers add zest to meals. They grow well in warm climates and containers, providing a vibrant splash of color to your garden.
  • Cucumbers: These vine-growing vegetables thrive in warm weather and offer a bounty of fresh, crisp cucumbers for salads and pickling.
  • Carrots and Radishes: Root vegetables like carrots and radishes are easy to grow and do well in loose, well-drained soil. They’re perfect for beginners due to their low maintenance.
  • Green Onions: These versatile onions are easy to grow from scraps and are a constant source of fresh flavors for various dishes.
  • Strawberries: Compact and versatile, strawberries can be grown in containers or hanging baskets, providing a sweet, juicy treat during the growing season.
  • Bush Beans: Beans are prolific growers and offer a harvest in a relatively short time. Bush beans, like green beans or snap beans, don’t require trellises and can be grown in limited space.
  • Zucchini and Squash: These prolific growers are perfect for larger spaces. They produce abundant fruits that can be used in various dishes.

Choose plants that suit your taste, available space, and local climate conditions for a successful and bountiful kitchen garden.


Similar Posts


Design and Layout:

Plan the layout of your garden, considering the growth patterns and space requirements of each plant.

  • Companion Planting: Pair plants that benefit each other when grown nearby which can maximize space and yield. For instance, planting basil near tomatoes can deter pests and improve the flavor of tomatoes.
  • Succession Planting: Plan your garden to ensure continuous harvests. As one crop finishes, replant that space with another crop suitable for the upcoming season.
  • Vertical Gardening: Utilize vertical space by growing climbers like peas, beans, or cucumbers on trellises or vertical supports. This maximizes space and promotes healthier plants.

Prepare the Soil:

Well-draining, nutrient-rich soil is the backbone of a successful kitchen garden. Invest time in preparing the soil by adding compost or organic matter to boost fertility.

Planting Techniques:

Follow planting guidelines specific to each crop. Some plants prefer direct sowing while others thrive better as seedlings. Pay attention to spacing and depth requirements.

Watering and Maintenance:

Regular watering is crucial, especially during the initial growth phase. Mulching helps retain moisture and suppresses weeds. Prune, weed, and monitor for pests to ensure healthy growth.

Harvest and Rotate:

Harvest crops at their peak to enjoy the freshest produce. Rotate crops annually to prevent nutrient depletion and minimize pest problems.

Seasonal Considerations:

Adjust your garden according to seasonal changes. Plant cool-season crops in spring and fall, and warm-season crops during the summer. Consider coverings or cold frames to extend the growing season.

Compost and Sustainability:

Implement composting to recycle kitchen scraps and garden waste. This sustainable approach enriches the soil and reduces waste, promoting eco-friendly gardening practices.

Continuous Learning:

Gardening is a continuous learning process. Stay updated on best practices, watch for plant-specific issues, and be open to adapting and improving your gardening methods.

By meticulously planning and nurturing your kitchen garden, you’re not only cultivating fresh produce but also fostering a deeper connection with nature and a sustainable way of living.

 Happy gardening!

Herb Gardening 101: How to Cultivate a Flourishing Herb Garden in Your Home!

Introduction:

Herb gardening offers a delightful way to infuse your culinary endeavors with fresh flavors and elevate the aesthetics of your home. Whether you’re a seasoned gardener or a novice, cultivating a thriving herb garden is an enriching and rewarding experience. This comprehensive guide will walk you through the essentials of starting and maintaining a successful herb garden right in your own home.

Understanding Your Herbs:

Begin by selecting herbs that align with your culinary preferences and growing conditions. Herbs like basil, rosemary, thyme, mint, and parsley are popular choices due to their versatility and ease of growth. Consider their sunlight requirements, soil preferences, and watering needs to create an optimal environment for each herb.

Choosing the Right Location:

For optimal growth, it’s recommended to choose a spot for your herb garden that receives plenty of sunlight. Most herbs tend to do well in areas that are exposed to full sunlight. Ensure adequate drainage and good air circulation to prevent issues like root rot and fungal diseases. For indoor herb gardens, windowsills or areas receiving ample natural light are ideal.

Preparing the Soil:

Well-draining soil is crucial for herb cultivation. Incorporate organic matter like compost or peat moss to enhance soil fertility and drainage. Aim for a slightly acidic to neutral pH level, typically between 6.0 and 7.0, to create an optimal growing environment for your herbs.

Planting Your Herbs:

When planting your herbs, maintain appropriate spacing between each plant to allow for proper airflow and growth. Consider using containers or raised beds for better control over soil quality and moisture levels. Follow planting guidelines specific to each herb to ensure optimal growth.


Similar Posts


Caring for Your Herb Garden:

Regular watering is essential, but be mindful not to overwater your herbs. To prevent waterlogged conditions, it’s best to let the soil dry out slightly between waterings. Pruning and harvesting your herbs regularly promote healthy growth and stimulate new foliage.

Combatting Pests and Diseases:

Keep a vigilant eye for common pests like aphids, mites, and fungal infections that can affect herb plants. Consider natural pest control methods like neem oil or companion planting to deter pests without harsh chemicals.

Harvesting and Enjoying Your Herbs:

To get the most intense flavors out of herbs, it’s best to harvest them in the morning. Use sharp scissors or shears to trim the plants, leaving sufficient foliage for regrowth. Enjoy the freshest flavors by incorporating your homegrown herbs into culinary delights or drying them for future use.

Conclusion:

Embarking on an herb gardening journey is a fulfilling endeavor that brings the joys of fresh flavors and fragrances right to your doorstep. By following these fundamental steps, you can cultivate a thriving herb garden, adding a touch of greenery and zest to your home-cooked meals.

Start your herb garden today and savor the delights of homegrown herbs in your culinary creations!

Happy Gardening!

Marvel-of-Peru: Unveiling the Beauty and Allure of the 4 O’Clock Flower Plant!

Introduction

The Marvel-of-Peru, famously known as the 4 O’Clock Flower, stands as a remarkable addition to any garden, captivating enthusiasts with its vibrant blooms and intriguing characteristics. This perennial beauty, scientifically known as Mirabilis jalapa, offers not just a visual spectacle but also a fascinating history and versatile gardening benefits.

Aesthetic Appeal and Blooming Schedule

The Four-o’clock, also known as Mirabilis jalapa, is a type of ornamental perennial plant that belongs to the family Nyctaginaceae and is originally from tropical America. This plant is known for its quick growth and can reach up to one meter (three feet) in height. It has oval leaves on short leafstalks and its stems are swollen at the joints. The Mirabilis genus of herbs contains 45 species in total. The 4 O’Clock Flower earns its name due to its fascinating blooming habit, typically starting to unfurl its trumpet-shaped flowers around 4 o’clock in the afternoon, emanating a delightful fragrance. These blossoms showcase a kaleidoscope of colors, including shades of pink, red, yellow, white, and bi-color variations, adding a mesmerizing palette to garden landscapes.

Versatile Growing Conditions

One of the plant’s standout features is its adaptability to diverse environments. The 4 O’Clock Flower thrives in both sun and partial shade, making it a versatile choice for various garden settings. It flourishes in well-draining soil and exhibits remarkable resilience, tolerating both dry spells and moderate watering regimes.

Historical Significance and Folklore

Originating from South America, the 4 O’Clock Flower carries historical significance. Marvel of Peru was introduced to Spain and then England from Peru in the 16th century. It earned its name because of how people marvel when the plant blooms at exactly 4 PM.

Cultural Significance

It has been cultivated for centuries, admired for its ornamental value and revered for its medicinal properties. In traditional medicine, its roots were used to treat various ailments, like hallucinogen, and as a purported aphrodisiac, while the flowers produce an edible red dye for coloring food, although caution is advised due to the plant’s toxic properties.


Similar Posts


Attracting Pollinators and Garden Benefits

Beyond its visual allure, the 4 O’Clock Flower serves as a magnet for pollinators like butterflies, bees, and hummingbirds, contributing to garden biodiversity. Its ability to attract these beneficial insects makes it a valuable addition to eco-friendly and pollinator-friendly garden initiatives.

Gardening Tips

For gardening enthusiasts, the 4 O’Clock Flower is an easy-to-grow plant, suitable for borders, containers, or as a standalone specimen. Regular deadheading encourages continuous blooming, while its tuberous roots allow it to self-seed, providing effortless propagation for successive growth.

It is important to prevent these plants from drying out, so water them whenever the top 1 to 2 inches of soil becomes dry. However, be cautious not to overwater them as it can cause root rot due to soggy soil. Mulching around the plants can help keep the soil moist enough. Plants grown in containers will generally require more frequent watering than those planted directly in the ground.

Cautionary Notes

Despite its beauty, it’s essential to note that all parts of the 4 O’Clock Flower are toxic if ingested. Therefore, caution should be exercised, especially around children and pets.

Conclusion

In conclusion, the Marvel-of-Peru or the 4 O’Clock Flower stands as a testament to nature’s beauty and adaptability. With its dazzling blooms, historical significance, and garden-friendly attributes, this versatile plant remains a cherished favorite among gardening enthusiasts seeking both aesthetics and ecological benefits.

Happy gardening!

Brighten Your Garden: Choosing the Best Outdoor Lights for Your Oasis!

Introduction

Gardens transform with the right lighting, creating magical spaces after dusk. Selecting the ideal outdoor lights can enhance ambiance and functionality, making your garden an enchanting haven.

Why To Use Outdoor Lights?

1. Enhanced Aesthetics:

Lighting can transform the look of a garden, highlighting its features and creating a magical ambiance at night. It adds depth and dimension, making the garden visually appealing.

2. Safety and Security:

Illuminated pathways, steps, and dark corners reduce the risk of accidents. Lighting also deters intruders by eliminating hiding spots and making your property less attractive to potential threats.

3.Extended Use of Outdoor Space:

With proper lighting, you can extend the usable hours of your garden, allowing you to enjoy it even after the sun sets. It’s perfect for hosting gatherings or simply relaxing outdoors in the evening.

4. Showcasing Landscaping Elements:

Strategic lighting can accentuate the beauty of specific plants, trees, or architectural elements in your garden, creating focal points and drawing attention to key features.

5. Mood Enhancement:

Different lighting designs and colors can evoke various moods or atmospheres. Soft, warm lights might create a cozy feel, while brighter lights may be more suitable for entertaining.

6. Increased Property Value:

A well-lit garden adds to the overall appeal and value of your property. Having this feature is considered appealing for prospective buyers.

7. Eco-friendly Options:

Opting for solar-powered or energy-efficient LED lights minimizes energy consumption and reduces your carbon footprint.


Similar Posts


Selecting Outdoor Lights

The key to effective outdoor lighting is proper planning and design. Consider factors such as the type of lights, their placement, intensity, and color temperature to achieve the desired ambiance while also being mindful of energy efficiency and your specific garden layout.

Understanding Light Types

When considering outdoor lighting, explore options like LED, solar-powered, and low-voltage lights. LED lights are energy-efficient and durable, perfect for various garden areas. Solar-powered lights harness sunlight for eco-friendly illumination. Low-voltage lights offer versatility and can highlight specific garden features.

Garden Areas to Illuminate

Assess your garden’s layout and choose lighting that suits its purpose. Path lights guide strolls, while accent lights focus on key features like trees or sculptures. Deck and patio lights enhance outdoor living spaces, and spotlights can accentuate architectural elements or plants.

Weather-Resistant and Durable

Opt for lights designed to withstand outdoor conditions. Look for weather-resistant materials like aluminum or stainless steel. This ensures longevity and maintains the lights’ effectiveness in various climates.

Balancing Functionality and Aesthetics

Consider both the functional and aesthetic aspects. Warm-toned lights create a cozy atmosphere, while brighter lights provide security. Experiment with different placements and types to strike a balance between practicality and visual appeal.

Installation and Maintenance

When selecting lights, opt for ones that are simple to install and maintain. Additionally, ensure that they are low-maintenance and easy to repair. Solar-powered lights require minimal setup, while wired options might need professional installation. Prioritize fixtures with easy accessibility for maintenance and bulb replacement.

Conclusion

Selecting the best outdoor lights for your garden involves a blend of functionality, ambiance, and durability. LED, solar-powered, or low-voltage lights cater to different needs, while proper placement and weather resistance are crucial for long-term effectiveness. Illuminate your garden with the perfect lights, creating an inviting and stunning outdoor space, day and night.

Whether it’s LED, solar, or low-voltage, find the ideal outdoor lights to transform your garden into an enchanting retreat after sundown. Illuminate your outdoor paradise with the perfect lighting solutions!

Happy Gardening!