Unlock the Greenhouse Effect: Benefits and DIY Building Guide!

Introduction

Greenhouses are invaluable structures for gardeners and farmers alike, offering a controlled environment that can significantly enhance plant growth and productivity. These versatile buildings provide numerous benefits, from extending the growing season to protecting plants from pests and harsh weather. This article delves into the various advantages of greenhouses and provides a step-by-step guide to building your own.

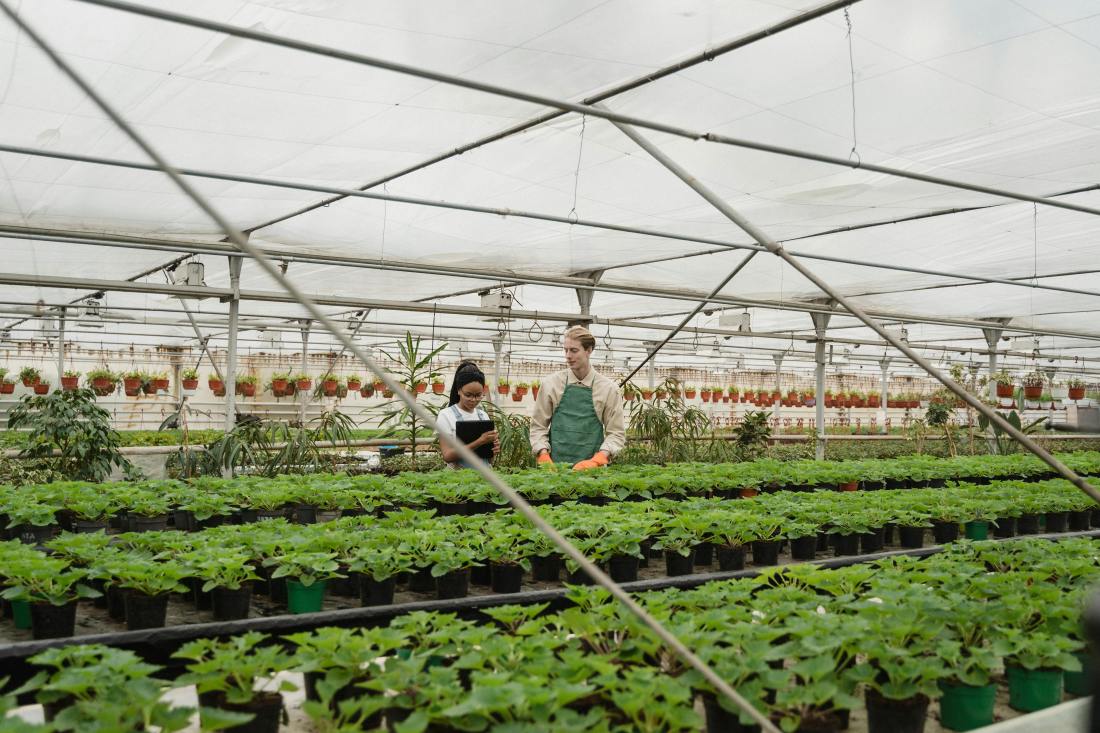
Benefits of Greenhouses

1. Extended Growing Season

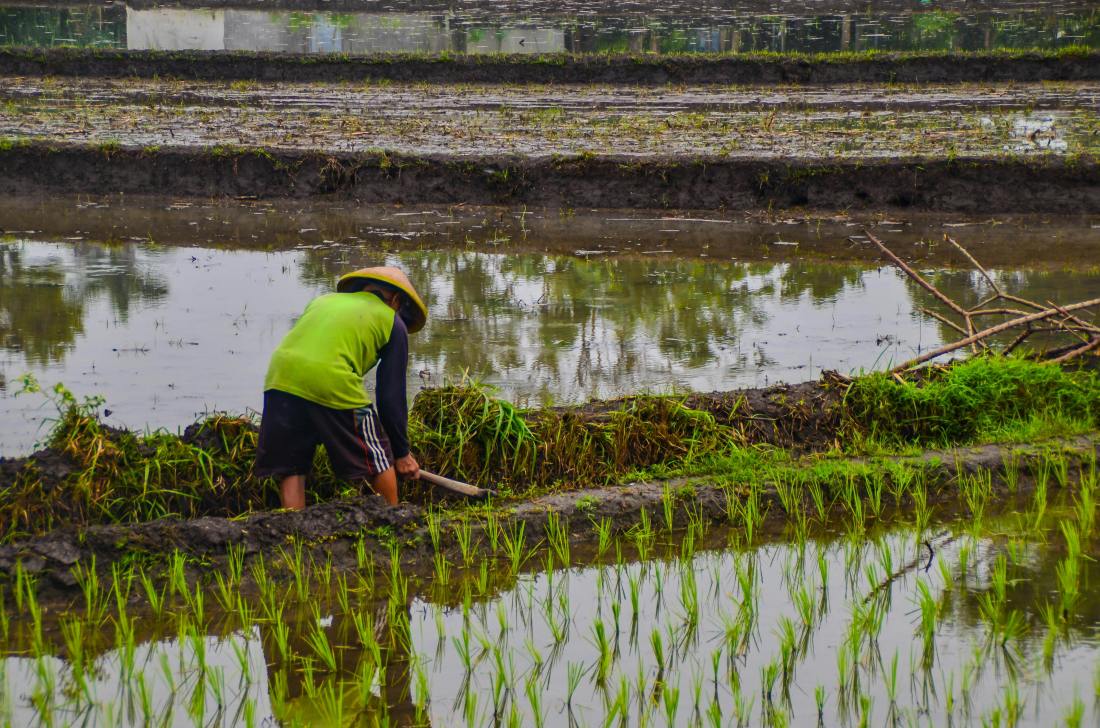
Extending the growing season is one of the main advantages of a greenhouse. By trapping heat from the sun, greenhouses create a warmer environment that allows plants to thrive even during colder months. This means you can start planting earlier in the spring and continue growing crops later into the fall, maximizing your yield.

2. Protection from Pests and Diseases

Greenhouses serve as a protective barrier against many common garden pests and diseases. The enclosed structure prevents insects, rodents, and other animals from accessing your plants. Additionally, the controlled environment reduces the likelihood of fungal infections and other diseases, leading to healthier crops.

3. Controlled Environment

Greenhouses provide the ability to control various environmental factors such as temperature, humidity, and light. This control allows you to create the optimal conditions for different types of plants, ensuring they receive the right amount of sunlight, water, and nutrients. As a result, you can grow a wider variety of plants, including those that may not typically thrive in your region’s climate.

4. Water Efficiency

Greenhouses can help conserve water by reducing evaporation and allowing for more efficient irrigation systems. Drip irrigation and soaker hoses can be used within a greenhouse to deliver water directly to the plants’ roots, minimizing waste. This not only saves water but also ensures that your plants receive consistent moisture levels.

5. Increased Yield and Quality

The controlled environment of a greenhouse often leads to higher crop yields and better-quality produce. Plants can grow faster and healthier due to the optimized conditions, resulting in more abundant and robust harvests. Additionally, you can grow multiple cycles of crops in a year, further increasing your productivity.

6. Year-Round Gardening

With a greenhouse, you can enjoy gardening year-round, regardless of the external weather conditions. This is particularly beneficial for avid gardeners who want to continue their hobby even during winter. The ability to grow fresh produce throughout the year also contributes to food security and self-sufficiency.

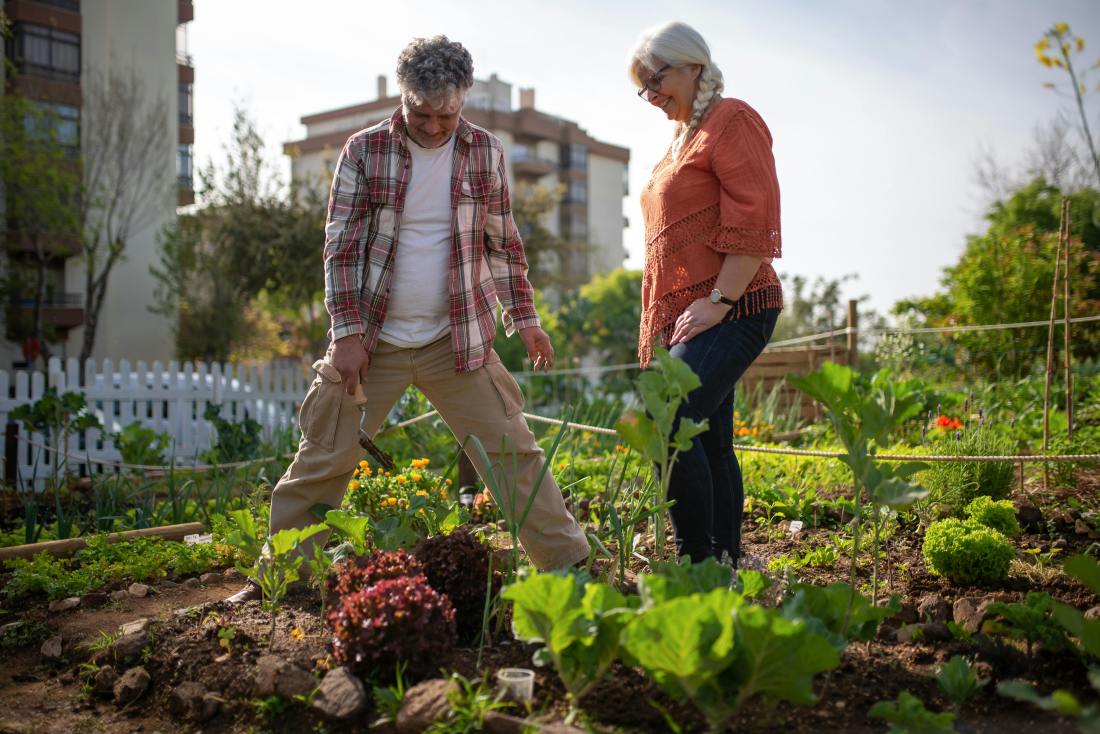
7. Learning and Experimentation

Greenhouses provide an excellent opportunity for learning and experimentation. Gardeners can test different growing techniques, plant varieties, and soil mixes in a controlled setting. This hands-on experience is invaluable for both novice and experienced gardeners looking to expand their knowledge and skills.


Similar Posts:


How to Build a Greenhouse

1. Planning and Design

Before you start building your greenhouse, it’s essential to plan and design it according to your needs and available space. Consider the following factors:

Size: Determine the size of the greenhouse based on the number of plants you want to grow and the available space in your garden.

Location: Select an area that is exposed to direct sunshine all day long. Avoid placing the greenhouse in shaded areas or near large trees that may block sunlight.

Type: Decide on the type of greenhouse structure you want to build. Common types include hoop houses, lean-to greenhouses, and freestanding greenhouses.

2. Materials and Tools

Gather all the necessary materials and tools for your greenhouse project. The materials you need will depend on the type of greenhouse you choose to build, but common items include:

Frame: Wood, PVC pipes, or metal

Covering: Polyethylene film, polycarbonate panels, or glass

Foundation: Treated wood, concrete blocks, or gravel

Fasteners: Screws, nails, brackets, and clamps

Tools: Saw, drill, hammer, measuring tape, level, and utility knife

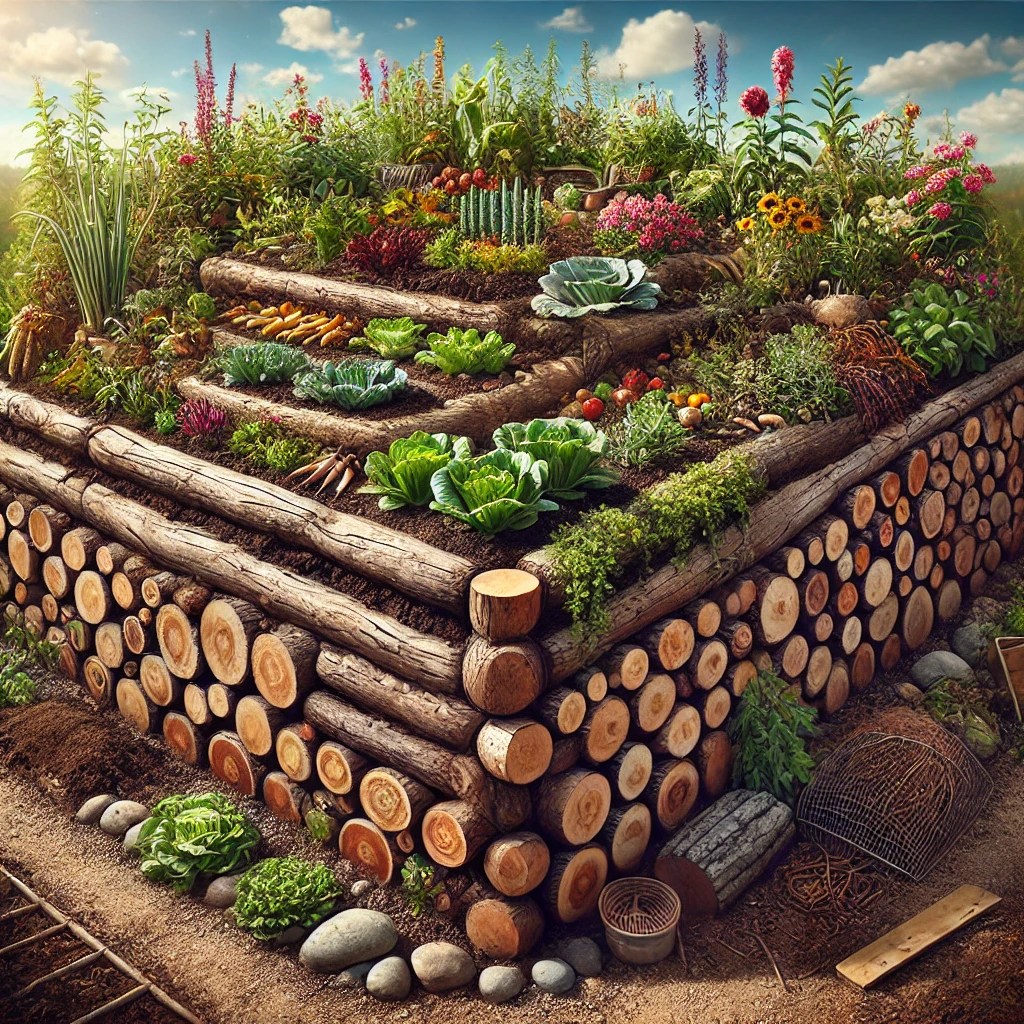
3. Building the Foundation

Having a solid foundation is essential for ensuring the stability and longevity of your greenhouse. Follow these steps to build a sturdy foundation:

Clear the Area: Clear the selected area of any debris, rocks, or vegetation.

Level the Ground: Ensure the ground is level to provide a stable base for the greenhouse.

Lay the Foundation: Depending on your chosen foundation material, lay treated wood, concrete blocks, or gravel to create a base for the greenhouse frame.

4. Constructing the Frame

The next step is to construct the frame of the greenhouse. Here’s how to do it:

Measure and Cut: Measure and cut the framing materials to the specified dimensions.

Assemble the Frame: Assemble the frame pieces using screws, nails, or brackets. Make sure the frame is both square and level.

Install Vertical Supports: Install vertical supports at regular intervals along the frame to provide additional stability.

5. Adding the Covering

Once the frame is complete, it’s time to add the covering material. Follow these steps:

Cut the Covering: Cut the polyethylene film, polycarbonate panels, or glass to the appropriate size.

Attach the Covering: Secure the covering material to the frame using clamps, clips, or fasteners. Verify that there are no loose areas or gaps.

Seal the Edges: Use weatherproof tape or sealant to seal the edges and joints to prevent drafts and moisture infiltration.

6. Ventilation and Irrigation

Proper ventilation and irrigation are essential for maintaining a healthy greenhouse environment. Install vents or fans to regulate temperature and humidity levels. Set up an irrigation system, such as drip irrigation or soaker hoses, to ensure consistent and efficient watering.

7. Finishing Touches

Finally, add any finishing touches to your greenhouse, such as shelving, benches, or pathways. These additions will make it easier to organize and care for your plants.

Conclusion

Building a greenhouse is a rewarding project that offers numerous benefits for gardeners. From extending the growing season to protecting plants from pests, a greenhouse provides a controlled environment that enhances plant growth and productivity. By following the steps outlined in this guide, you can create your own greenhouse and enjoy year-round gardening success.

Happy Gardening! 🌿🌞

From Bud to Bloom: Exploring the Wonders of Floriculture!

Marigold

Introduction

Floriculture, a branch of horticulture, is the art and science of growing, cultivating, and arranging flowers and ornamental plants. It is a field that combines beauty with practicality, playing a significant role in the global economy, the environment, and our well-being. This article delves into the fascinating world of floriculture, exploring its history, techniques, economic importance, and environmental benefits.

A Historical Perspective

The practice of cultivating flowers dates back thousands of years. Ancient civilizations like the Egyptians, Greeks, and Romans grew flowers not only for their beauty but also for their symbolic and medicinal properties. The Egyptians, for example, cultivated lotus flowers and lilies, which were considered sacred. The Greeks and Romans, on the other hand, used flowers in religious ceremonies, celebrations, and as medicines.

During the Renaissance, floriculture flourished in Europe, with the establishment of botanical gardens that focused on studying and classifying plants. The Victorian era saw the rise of ornamental gardening, with elaborate flower beds and intricate garden designs becoming a symbol of status and wealth.

Branches of Floriculture

Floriculture encompasses various branches, each focusing on different aspects of flower cultivation and use:

1. Flower Production

This branch involves the large-scale cultivation of flowering plants for commercial purposes. It includes the production of cut flowers, potted plants, bedding plants, and foliage plants. Floriculturists use advanced techniques to ensure high yield, quality, and disease resistance.

2. Floristry

Floristry is the art of arranging flowers and creating floral designs. Florists use cut flowers and foliage to craft bouquets, wreaths, centerpieces, and other decorative items for various occasions such as weddings, funerals, and celebrations. Floristry requires creativity, an eye for detail, and knowledge of flower care and handling.

3. Landscape Floriculture

Landscape floriculture focuses on using flowering plants in landscape design. It involves selecting and arranging plants to enhance the aesthetic appeal of gardens, parks, and public spaces. This field creates aesthetically beautiful and sustainable landscapes by combining aspects of environmental science, horticulture, and design.

4. Greenhouse Floriculture

Greenhouse floriculture involves growing flowers and ornamental plants in controlled environments. Greenhouses provide optimal conditions for plant growth, such as temperature, humidity, and light. This branch is essential for producing flowers out of season or in regions with unsuitable climates.

Techniques in Floriculture

Floriculture involves a variety of techniques aimed at optimizing plant growth and ensuring the quality of flowers. Some of the key techniques include:

1. Propagation

Propagation is an important process where we create new plants from existing ones. In floriculture, this is often done through methods such as seed sowing, cuttings, grafting, and tissue culture. Propagation ensures the reproduction of desirable traits and allows for the mass production of flowering plants.

2. Soil Management

Healthy soil is crucial for the successful cultivation of flowers. Floriculturists use various soil management practices, including soil testing, fertilization, and amendment with organic matter, to improve soil fertility and structure. Proper soil management ensures optimal growth and flowering.

3. Irrigation

Proper irrigation is essential for maintaining adequate moisture levels for flower growth. Floriculturists use various irrigation methods, such as drip irrigation, sprinkler systems, and hand watering, to deliver water efficiently and evenly to plants. Effective irrigation practices help conserve water and prevent issues such as root rot and nutrient leaching.

4. Pest and Disease Management

Integrated Pest Management (IPM) is a holistic approach to controlling pests and diseases in floriculture. It involves monitoring pest populations, using biological controls, and applying chemical treatments only when necessary. IPM aims to minimize the impact of pests and diseases on flowers while reducing the use of harmful chemicals.

5. Pruning and Training

Pruning and training are essential techniques for maintaining the shape, size, and health of flowering plants. Pruning involves the removal of dead, diseased, or excess branches to encourage healthy growth and improve air circulation. Training techniques, such as staking and trellising, help support plants and direct their growth in a desired manner.


Similar Posts:


The Economic Importance of Floriculture

Floriculture is a significant contributor to the global economy. The flower industry encompasses a wide range of activities, from growing and harvesting flowers to their distribution and sale. Some key economic aspects of floriculture include:

1. Employment

The floriculture industry provides employment to millions of people worldwide. This includes flower growers, greenhouse workers, florists, landscape designers, and many others. The industry offers diverse job opportunities, from manual labor to specialized technical roles.

2. Trade

Flowers and ornamental plants are major commodities in international trade. Countries like the Netherlands, Colombia, Kenya, and Ecuador are leading exporters of cut flowers, supplying markets in Europe, North America, and Asia. The trade of flowers contributes to the economic growth of these countries and supports local communities.

3. Retail and Services

The retail sector of the floriculture industry includes flower shops, garden centers, and online retailers. These businesses provide consumers with a wide range of floral products and services, from bouquets and arrangements to gardening supplies and plants. The demand for flowers for events, holidays, and personal use drives sales and supports local economies.

Environmental Benefits of Floriculture

Floriculture also offers several environmental benefits, contributing to the health and sustainability of our ecosystems:

1. Biodiversity

The cultivation of a wide variety of flowers and ornamental plants promotes biodiversity. Gardens and landscapes rich in diverse plant species provide habitats for pollinators, birds, and other wildlife. This contributes to the overall health of ecosystems and helps in the conservation of endangered species.

2. Air Quality

Flowers and ornamental plants improve air quality by absorbing carbon dioxide and releasing oxygen. They also help filter pollutants and particulate matter from the air, creating healthier environments in urban areas. Green spaces with flowering plants contribute to the well-being of city dwellers.

3. Climate Mitigation

Floriculture practices such as greenhouse cultivation and landscape design can contribute to climate change mitigation. Greenhouses can capture and utilize carbon dioxide, while well-designed landscapes with diverse plantings can sequester carbon and reduce the urban heat island effect.

Conclusion

Floriculture is a vibrant and dynamic field that blends creativity, science, and sustainability. From the ancient gardens of Egypt to modern greenhouse operations, the cultivation of flowers has evolved to meet the needs of society and the environment. By embracing the art and science of floriculture, we can enhance our surroundings, support economic growth, and contribute to a healthier planet.

Happy Gardening! 🌸🌿

Seeds of the Past: Ancient Farming Practices for Modern Sustainability!

Introduction

For thousands of years, agriculture has served as the cornerstone of human civilization. The evolution of gardening and agricultural practices reflects humanity’s ingenuity and adaptability. By understanding these ancient techniques, we gain insights into sustainable farming practices that are still relevant today. This article delves into some of the most fascinating ancient gardening and agricultural techniques from around the world.

Mesopotamian Innovations

The fertile crescent of Mesopotamia, located between the Tigris and Euphrates rivers, is often considered the cradle of agriculture. Here, early farmers developed several groundbreaking techniques:

Irrigation Systems

The Mesopotamians engineered intricate irrigation systems to harness river water for farming. They built canals, dikes, and reservoirs to control the distribution of water, allowing them to cultivate crops even in dry seasons. This innovation significantly boosted agricultural productivity and supported the growth of early cities.

Crop Rotation

To maintain soil fertility and reduce the risk of crop failure, Mesopotamians practiced crop rotation. By alternating the types of crops grown in a particular field, they prevented soil depletion and controlled pests and diseases. This practice ensured a steady supply of food throughout the year.

Ancient Egyptian Agriculture

The ancient Egyptians also harnessed the power of the Nile River to transform their arid land into fertile fields.

Basin Irrigation

Egyptians developed basin irrigation, a method that involved creating embanked fields (basins) to capture and hold floodwaters from the Nile. As the floodwaters receded, they left behind nutrient-rich silt that enriched the soil, allowing farmers to plant crops such as wheat and barley.

Shaduf

The shaduf was an early tool used by Egyptian farmers to lift water from the Nile onto their fields. This manually controlled device comprised a long pole with a counterweight at one end and a bucket at the other.

It allowed for efficient watering of crops, especially during dry spells.

Chinese Agricultural Advancements

Ancient China was home to numerous agricultural innovations that have influenced farming practices for centuries.

Terracing

In the mountainous regions of China, farmers built terraces to create flat, arable land on steep slopes. These terraces not only prevented soil erosion but also made efficient use of water resources. The iconic rice terraces of China are a testament to this ingenious method.

Crop Diversification

Chinese farmers practiced crop diversification to ensure food security and improve soil health. By planting a variety of crops, they minimized the risk of total crop failure due to pests or diseases. This approach also enriched the soil with different nutrients, promoting long-term agricultural sustainability.


Similar Posts:


Mesoamerican Farming Techniques

The indigenous peoples of Mesoamerica developed unique agricultural methods suited to their diverse environments.

Chinampas

The Aztecs constructed chinampas, often referred to as “floating gardens,” in the shallow lakes of the Valley of Mexico. These artificial islands were created by piling mud, reeds, and organic material into rectangular plots. Chinampas were highly productive and provided a year-round growing environment, thanks to the constant supply of water from the surrounding lakes.

Milpa

The milpa system, practiced by the Maya and other Mesoamerican cultures, involved intercropping maize, beans, and squash. This polyculture system maximized the use of available land and resources, as each crop complemented the others. Maize provided a structure for beans to climb, beans enriched the soil with nitrogen, and squash covered the ground, reducing weed growth.

Greco-Roman Contributions

The agricultural practices of ancient Greece and Rome laid the foundation for modern Western farming.

Viticulture

The Greeks and Romans perfected the art of viticulture, the cultivation of grapevines for wine production. They developed advanced pruning, grafting, and irrigation techniques to optimize grape yield and quality. Wine became a crucial part of their economy and culture.

Animal Husbandry

Both Greeks and Romans practiced advanced animal husbandry, selectively breeding livestock for improved traits. They raised cattle, sheep, goats, and pigs, utilizing them for food, labor, and clothing. The integration of animal husbandry with crop farming enhanced soil fertility through manure use.

Indigenous Australian Practices

Indigenous Australians managed their land using sophisticated techniques that promoted biodiversity and sustainability.

Fire-Stick Farming

Fire-stick farming involved the controlled use of fire to manage vegetation and promote the growth of certain plant species. By burning underbrush, indigenous Australians reduced the risk of large wildfires, encouraged the growth of edible plants, and created habitats for game animals.

Yam Daisy Cultivation

The cultivation of yam daisy (Murnong) was a staple of indigenous Australian agriculture. Women used digging sticks to harvest the tubers, which were an important food source. This practice also aerated the soil, promoting the growth of new plants.

Conclusion

The ancient gardening and agricultural techniques developed by different civilizations around the world highlight the ingenuity and adaptability of our ancestors. These methods not only sustained their populations but also laid the groundwork for modern agricultural practices. By studying and incorporating these techniques, we can promote sustainable and efficient farming practices in our own gardens and fields today.

Happy Gardening! 🌱🌾

Rediscovering Ancient Indian Agricultural Mastery: Timeless Techniques for Modern Gardens!

Introduction

Agriculture has been an integral part of Indian civilization since its inception. The rich cultural heritage and diverse geographical landscapes of India have given rise to numerous traditional gardening and agricultural techniques. These age-old practices are a testament to the ingenuity and sustainable approaches of ancient Indian farmers. In this article, we will explore some of the most prominent ancient Indian gardening and agricultural techniques that have stood the test of time.

Vedic Agriculture

The Vedic period, dating back to around 1500 BCE, marks the beginning of organized agriculture in India. The Vedas, ancient Indian scriptures, contain detailed references to various agricultural practices and the importance of farming.

Crop Rotation and Mixed Cropping

Vedic farmers understood the significance of maintaining soil fertility and minimizing pest infestations. They practiced crop rotation, where different crops were grown in succession on the same land to prevent soil depletion and control pests. Mixed cropping, or growing multiple crops in the same field, was another common practice. This not only improved soil health but also ensured a diverse food supply.

Organic Fertilizers

Ancient Indian farmers relied on natural fertilizers to enhance soil fertility. Cow dung, ash, and compost made from decomposed plant material were commonly used. These organic fertilizers provide essential nutrients to the soil, promoting healthy plant growth without causing harm to the environment.

The Dravidian Legacy

The Dravidian civilization, which flourished in southern India, made significant contributions to agricultural practices.

Tank Irrigation

Tank irrigation was a hallmark of Dravidian agriculture. Large tanks, or reservoirs, were constructed to collect and store rainwater. This water was then channeled through a network of canals to irrigate fields during dry periods. Tank irrigation not only ensured a reliable water supply but also helped in recharging groundwater levels.

Rice Cultivation

Southern India, particularly the regions of Tamil Nadu and Karnataka, is known for its rich tradition of rice cultivation. Ancient Dravidian farmers developed sophisticated methods for paddy cultivation, including transplanting seedlings and maintaining water levels in the fields. These techniques resulted in high yields and established southern India as a major rice-producing region.

The Mauryan Empire and Agricultural Reforms

The Mauryan Empire (322-185 BCE), under the rule of Emperor Ashoka, witnessed significant agricultural reforms.

Land Management

Emperor Ashoka emphasized efficient land management and agricultural practices. The Arthashastra, an ancient Indian treatise on statecraft and economics, provided guidelines on land distribution, crop selection, and irrigation. Farmers were encouraged to diversify their crops and adopt sustainable farming practices.

Horticulture

The Mauryan period saw a rise in horticulture, with the cultivation of fruits, vegetables, and medicinal plants. Ashoka’s emphasis on tree planting and conservation led to the establishment of large orchards and botanical gardens. These gardens not only provided food but also played a crucial role in preserving biodiversity.

Ancient Indian Water Management Techniques

Water management was a critical aspect of ancient Indian agriculture, given the country’s varied climate and topography.

Ghaggar-Hakra and Saraswati River Systems

The Ghaggar-Hakra and Saraswati river systems were vital sources of water for ancient Indian civilizations. These rivers provided a lifeline for agriculture, and sophisticated canal systems were developed to divert water for irrigation. The remains of these ancient canals can still be found in the Indus Valley region.

Step Wells and Baolis

Step wells, or baolis, were an ingenious solution to water scarcity in arid regions. These structures, built with descending steps leading to a water reservoir, allowed easy access to water even during dry seasons. Step wells were not only functional but also served as social and cultural centers for communities.


See Also:


Indigenous Farming Practices

India’s diverse ecological zones gave rise to various indigenous farming practices tailored to local conditions.

Zabo System

The Zabo system, practiced by the Chakhesang tribe in Nagaland, is a sustainable method of agriculture that integrates forestry, horticulture, and animal husbandry. Terraced fields are constructed on hill slopes, and rainwater is collected in ponds and used for irrigation. This holistic approach ensures soil conservation and water management.

SRI Method

The System of Rice Intensification (SRI) is a modern adaptation of traditional rice farming techniques. It involves planting fewer seedlings, maintaining a wider spacing between plants, and using organic fertilizers. SRI has gained popularity for its ability to increase rice yields while reducing water usage and chemical inputs.

Traditional Organic Farming

Organic farming has deep roots in ancient Indian agriculture, with practices that have been passed down through generations.

Vermicomposting

Vermicomposting, the process of using earthworms to decompose organic waste, was practiced by ancient Indian farmers. The nutrient-rich vermicompost produced by earthworms was used as a natural fertilizer, enhancing soil fertility and promoting healthy plant growth.

Biodynamic Farming

Biodynamic farming, inspired by traditional Indian practices, is a holistic approach that treats farms as self-sustaining ecosystems. It involves the use of organic fertilizers, crop rotation, and the integration of livestock. Biodynamic farming emphasizes the spiritual and ecological aspects of agriculture, aligning with ancient Indian philosophies.

Conclusion

Ancient Indian gardening and agricultural techniques reflect the wisdom and sustainability of early civilizations. These practices were not only effective in ensuring food security but also in maintaining ecological balance. By revisiting and incorporating these traditional methods, modern agriculture can benefit from their timeless principles of sustainability and harmony with nature.

Happy Gardening! 🌱🌾

The Ultimate Guide to Hugelkultur: Elevating Your Garden with Hugel Beds!

Introduction

Hugel Beds

Hugelkultur, also known as hugel beds, is an ancient gardening method that has been embraced by modern permaculturists for its sustainability and efficiency. Originating from Eastern Europe and Germany, this technique involves creating raised beds filled with decaying wood and organic matter. Hugel beds are celebrated for their ability to retain moisture, improve soil health, and boost plant growth. In this comprehensive guide, we’ll explore the benefits of hugel beds, how to create them, and tips for maintaining these garden powerhouses.

What is Hugelkultur?

Hugelkultur, which translates to “hill culture” or “mound culture,” is a gardening method where a mound is constructed using decaying wood debris and other organic materials. The mound is then covered with soil and used as a planting bed. The decaying wood at the core of the mound acts as a sponge, absorbing and retaining water, which reduces the need for frequent watering.

Benefits of Hugel Beds

Water Retention and Conservation: One of the most significant advantages of hugel beds is their ability to retain water. The decaying wood absorbs rainwater and slowly releases it into the surrounding soil. This natural irrigation system reduces the need for frequent watering, making hugel beds ideal for areas prone to drought.

Enhanced Soil Fertility: As the wood and organic materials decompose, they enrich the soil with nutrients. This slow release of nutrients provides a long-term food source for plants, resulting in healthier and more vigorous growth. The decomposition process also encourages beneficial microbial activity, further enhancing soil fertility.

Improved Soil Structure: Hugel beds improve soil structure by increasing aeration and drainage. The mound’s layered composition prevents soil compaction and promotes root penetration. This leads to stronger root systems and healthier plants.

Pest and Weed Management: The raised nature of hugel beds can help with pest control by creating a physical barrier that deters some ground-dwelling pests. Additionally, the dense planting often associated with hugel beds can suppress weed growth, reducing the need for chemical herbicides.

Carbon Sequestration: By incorporating large amounts of woody debris into the soil, hugel beds contribute to carbon sequestration. This process helps mitigate climate change by trapping carbon in the soil and reducing greenhouse gas emissions.

Extended Growing Season: The decomposition process in hugel beds generates heat, which can create a warmer microclimate for plants. This can extend the growing season, allowing gardeners to plant earlier in the spring and harvest later in the fall.


Similar Posts:


How to Create a Hugel Bed

Creating a hugel bed involves several steps, but the process is straightforward and can be adapted to any garden size or layout.

1. Choose a Location: Select a well-drained site with good sunlight exposure. Consider the bed’s proximity to water sources and other garden features.

2. Gather Materials: You’ll need a variety of organic materials, including:

  • Large logs or branches
  • Smaller branches and twigs
  • Leaves, grass clippings, and straw
  • Compost or manure
  • Topsoil

3. Build the Base: Start by laying large logs or branches directly on the ground. These will form the core of your hugel bed. Organize them in a manner that forms a stable base.

4. Add Layers: Layer smaller branches and twigs on top of the large logs. Follow with a layer of leaves, grass clippings, or straw. These materials will fill in the gaps and add more organic matter to the bed.

5. Add Compost or Manure: Add a layer of compost or manure to provide additional nutrients. This layer will kickstart the decomposition process and enrich the soil.

6. Cover with Topsoil: Finally, cover the entire mound with a thick layer of topsoil. The soil layer should be deep enough to allow for planting.

7. Water Thoroughly: Water the hugel bed thoroughly to settle the materials and start the decomposition process.

8. Plant Your Garden: Once the hugel bed is built and settled, you can start planting. Choose a mix of shallow-rooted and deep-rooted plants to maximize space and resources.

Maintaining Your Hugel Bed

Maintaining a hugel bed is relatively easy, but there are a few key practices to keep in mind:

Watering: Initially, you may need to water the hugel bed more frequently until the wood becomes fully saturated. After this period, the bed will require less water due to its natural water retention capabilities.

Mulching Add a layer of mulch to the surface of the hugel bed to help retain moisture, suppress weeds, and add organic matter as it decomposes.

Crop Rotation: Practice crop rotation to prevent soil depletion and manage pests. Rotate different plant families through your hugel bed to maintain soil health and productivity.

Periodic Inspections: Regularly check your hugel bed for signs of pests, diseases, or nutrient deficiencies. Make sure to address any issues quickly to maintain the health and vitality of your garden.

Conclusion

Hugelkultur is a time-tested gardening technique that offers numerous benefits for gardeners looking to create sustainable and productive growing spaces. By utilizing decaying wood and organic matter, hugel beds enhance soil fertility, improve water retention, and support robust plant growth. Whether you’re an experienced gardener or a novice, incorporating hugel beds into your garden can transform your gardening experience and yield impressive results. Embrace the principles of hugelkultur and watch your garden flourish!

Happy Gardening! 🌱

Growing Together: The Benefits and Impact of Community Gardens!

Introduction

In urban landscapes and suburban neighborhoods alike, community gardens have sprouted up as vibrant oases of green amid the concrete jungle. These shared spaces are more than just plots of land for growing plants—they are vital hubs for social interaction, environmental education, and local food production. Community gardens offer a myriad of benefits, fostering a sense of community and promoting sustainable living. Let’s dive into the world of community gardening, exploring its advantages, challenges, and ways to get involved.

What is a Community Garden?

A community garden is a piece of land collectively maintained by a group of people. These gardens can vary in size, from small plots in urban areas to larger spaces in suburban or rural locales. The land may be owned by a local government, a nonprofit organization, or even a group of private citizens. Participants usually rent plots within the garden to grow vegetables, fruits, flowers, and herbs.

Benefits of Community Gardens

Social Interaction and Community Building Community gardens provide a unique platform for social interaction. They bring together people from diverse backgrounds, fostering friendships and a sense of belonging. Gardeners can share tips, seeds, and stories, building a supportive network that extends beyond the garden gates.

Access to Fresh and Healthy Food

One of the primary benefits of community gardens is the provision of fresh, locally-grown produce. Gardeners can cultivate a variety of fruits and vegetables, which contributes to a healthier diet and reduces the reliance on processed foods. This access to fresh produce is particularly beneficial in food deserts, where grocery stores and fresh food options are limited.

Environmental Benefits

Community gardens contribute significantly to environmental sustainability. They promote biodiversity by providing habitats for various plants, insects, and birds. Gardens also improve air quality, reduce the urban heat island effect, and help manage stormwater runoff. By practicing composting and using organic gardening methods, community gardeners can reduce waste and avoid harmful pesticides.

Educational Opportunities

Community gardens serve as living classrooms for people of all ages. They offer hands-on learning experiences about plant biology, ecology, and sustainable agricultural practices. Schools often partner with community gardens to provide students with practical lessons in science, nutrition, and environmental stewardship.

Mental and Physical Health

 Many beneficial effects on mental and physical health have been shown by gardening. The physical activity involved in planting, weeding, and harvesting helps improve cardiovascular health and muscle strength. Additionally, spending time outdoors and engaging with nature can reduce stress, improve mood, and enhance overall well-being.

Economic Benefits

Community gardens can also have economic benefits. They can increase property values and attract new residents to neighborhoods. Additionally, gardeners can save money on groceries by growing their own produce. Some community gardens even operate farmers’ markets, providing an additional source of income for gardeners and access to fresh produce for the community.


Similar Posts:


Challenges of Community Gardens

Despite their many benefits, community gardens face several challenges:

Access to Land

Securing a suitable piece of land for a community garden can be difficult, especially in densely populated urban areas. Land ownership issues, zoning regulations, and potential redevelopment can all pose obstacles.

Funding and Resources

Community gardens often rely on grants, donations, and volunteer labor to operate. Finding consistent funding and resources for tools, seeds, water, and maintenance can be challenging. Many gardens also need support for infrastructure improvements like fencing, raised beds, and irrigation systems.

Maintenance and Management

Successful community gardens require ongoing maintenance and effective management. This includes organizing volunteers, coordinating planting schedules, and ensuring equitable access to plots. Gardens may face issues with vandalism, theft, or pests, which require a collective effort to address.

Community Engagement

Attracting and retaining participants can be challenging, especially in transient urban areas. Community gardens need active engagement and a sense of ownership among gardeners to thrive. Outreach efforts and inclusive practices are essential to involve diverse community members.

How Can One Participate in a Community Garden?

Interested in joining a community garden? The following steps let you get started:

Find a Local Garden

Search online or check with local community centers, schools, or gardening organizations to find a community garden near you. Websites like the American Community Gardening Association (ACGA) offer directories of gardens across the country.

Attend a Meeting or Open House

Most community gardens hold regular meetings or open houses where prospective members can learn more about the garden, its rules, and how to get involved. It’s an excellent opportunity to ask questions and meet current members.

Sign Up for a Plot

If space is available, sign up for a plot. Some gardens have waitlists due to high demand, so be patient and persistent. Once you have a plot, you’ll need to follow the garden’s guidelines and contribute to its upkeep.

Volunteer

Even if you don’t have a plot, many gardens welcome volunteers to help with maintenance, events, and educational programs. Volunteering is a great way to get involved and learn more about gardening.

Start Your Own Garden

If there isn’t a community garden in your area, consider starting one. Gather a group of interested community members, secure a piece of land, and develop a plan for the garden. Seek assistance and resources from nearby organizations.

Conclusion

Community gardens are vital assets to neighborhoods, providing numerous social, environmental, and health benefits. They offer a place for people to come together, grow fresh food, and learn about sustainable practices. While challenges exist, the rewards of community gardening are immense. By getting involved, you can help cultivate a greener, healthier, and more connected community.

Happy Gardening! 🌱

Succession Planting: A Guide to Continuous Harvests in Your Garden!

Introduction:

Succession planting is a gardening strategy where crops are planted at intervals to ensure a continuous harvest throughout the growing season. This technique maximizes yield, optimizes garden space, and extends the harvest period, allowing gardeners to enjoy a bountiful supply of fresh produce over an extended period. In this article, we’ll explore the benefits of succession planting, how to implement it, and tips for success.

Benefits of Succession Planting

1. Continuous Harvest

Succession planting ensures a steady supply of fresh produce by staggering planting dates. This allows gardeners to enjoy a continuous harvest rather than a glut of produce all at once, reducing waste and maximizing enjoyment.

2. Maximizes Garden Space

By carefully planning planting dates and utilizing garden space efficiently, succession planting allows you to grow more crops in the same area. This is particularly beneficial for small gardens or limited spaces where maximizing yield is essential.

3. Improves Soil Health

Planting a variety of crops and incorporating cover crops during intervals can help improve soil health. Different plants have varying nutrient needs, and succession planting can help balance soil fertility, reduce soil erosion, and enhance microbial activity.

4. Reduces Pests and Diseases

Continuous planting disrupts the life cycle of pests and diseases, reducing their impact on your garden. By removing old plants and replacing them with new ones, you can minimize pest infestations and disease outbreaks.


Similar Posts:


How to Implement Succession Planting

1. Plan Your Garden Layout

Before you start, plan your garden layout carefully. Consider the mature size and spacing requirements of your crops, and plan succession intervals accordingly. Research companion planting to find combinations that work well together and maximize space.

2. Understand Planting Intervals

Research the growth cycle of your crops to determine the ideal planting intervals. Some crops, like lettuce and radishes, have quick growth cycles and can be planted every few weeks. Others, like tomatoes and peppers, have longer growing seasons and may only allow for one or two successions.

3. Use a Garden Calendar

Maintain a garden calendar to track planting dates, harvest times, and succession intervals. This will help you stay organized and ensure a continuous supply of fresh produce throughout the growing season.

4. Rotate Crops

Crop rotation helps minimize pest and disease issues and stops soil erosion. To ensure a balanced nutrient profile and healthier plants, plan your planting calendar such that crops are rotated annually.

Tips for Successful Succession Planting

1. Choose Complementary Crops

Select crops that complement each other in terms of growth rate and nutrient needs. For example, planting fast-growing radishes between slower-growing carrots can help maximize space and yield.

2. Plant Quick-Growing Crops

Include quick-growing crops like lettuce, radishes, and spinach in your succession planting plan. These crops can be planted multiple times throughout the season, providing a continuous harvest.

3. Optimize Soil Fertility

Incorporate cover crops or green manures during intervals to improve soil fertility and structure. This can help balance soil nutrients and enhance microbial activity, promoting healthier plants and higher yields.

4. Monitor and Maintain

Regularly monitor your garden to ensure plants are thriving and address any issues promptly. Inspect plants for nutrient deficiencies, pest or disease issues, and adjust watering and fertilization as required.

Conclusion:

Succession planting is a valuable gardening technique that allows you to enjoy a continuous harvest throughout the growing season. By carefully planning your garden layout, understanding planting intervals, and following these tips and strategies, you can create a productive and thriving garden that provides a bountiful harvest from spring to fall.

Happy Gardening!

A Complete Guide to Crafting and Using Seed Balls for Gardening Success!

Introduction

In the realm of gardening, the ingenious concept of seed balls has gained remarkable popularity for its simplicity and effectiveness. These small, compact spheres encapsulate seeds within a mixture of clay, compost, and other natural materials. They offer a convenient and efficient way to sow seeds while aiding in plant germination and growth. Here’s a comprehensive guide on how to prepare and utilize seed balls to foster lush gardens.

Understanding Seed Balls

Seed balls, also known as seed bombs, serve as protective casings for seeds, shielding them from harsh environmental conditions like wind, birds, and excessive sunlight. This technique was inspired by ancient agricultural practices and has evolved into a modern-day technique for conservation and gardening.

Ingredients for Seed Balls

Creating seed balls requires a simple blend of clay, compost, and seeds. Clay acts as a protective casing, compost provides nutrients for initial growth, and seeds are, of course, the potential plants. Additional ingredients like water and soil amendments may be added for specific seed requirements.

Step-by-Step Guide to Crafting Seed Balls

Gather Materials: Acquire clay powder or finely ground natural clay, quality compost, desired seeds, and optional amendments like organic fertilizers.

Mix Ingredients: Combine clay and compost in a ratio of 3:1 or 4:1, adjusting to ensure a manageable consistency. Gradually add water while mixing until the mixture reaches a moldable, dough-like texture.

Incorporate Seeds: Integrate the seeds evenly into the clay-compost mixture, ensuring they’re well distributed throughout.

Form Balls: Pinch off small portions of the mixture and roll them into small balls, roughly 1-2 centimeters in diameter. Allow the balls to dry for 24-48 hours in a dry, cool place.


Similar Posts


Utilizing Seed Balls in Gardening

Seed balls offer a versatile approach to gardening:

Enhanced Germination: The protective coating of the seed balls provides an ideal environment for seeds to germinate.

Biodiversity Promotion: Seed balls aid in dispersing seeds and encouraging biodiversity in gardens, especially in challenging terrains or barren areas.

Easy Planting: Simply scatter the seed balls in desired locations, whether in garden beds, wildflower patches, or urban landscapes.

Tips for Successful Seed Ball Gardening

Choose Appropriate Seeds: Opt for native or adaptive seeds suited to your local climate and soil conditions. Seeds that work well for making seed balls typically include wildflowers, herbs like basil or parsley, vegetables like tomato, chilli and certain grass seeds. These seeds are great for seed balls due to their hardy nature, adaptability to various environments, and ability to grow with minimal maintenance. Wildflower seeds offer diversity and attract pollinators, while herbs like basil or parsley provide edible and aromatic benefits. Grass seeds help in stabilizing soil and preventing erosion, making them suitable for seed balls in areas needing vegetation cover.

Timing Matters: Sow seed balls during seasons conducive to seed germination, typically spring or fall.

Proper Placement: Ensure good soil contact for optimal germination by lightly pressing seed balls into the soil or scattering them in areas likely to receive rainfall or irrigation.

Conclusion

In conclusion, the art of creating and using seed balls presents an eco-friendly and efficient method for gardening enthusiasts. Whether aiming for a vibrant wildflower meadow or enhancing garden biodiversity, seed balls offer a simple yet impactful solution. Experiment, explore, and witness the transformative power of these small spheres in nurturing a flourishing garden ecosystem.

Happy Gardening!