Unveiling the Art and Science of Hibiscus Hybridization: Breeding Blooms for Beauty and Resilience!

Introduction:

Hibiscus, with its captivating blooms and vibrant colors, has been a garden favorite for centuries. The beauty of hibiscus lies not only in its natural charm but also in the world of possibilities that opens up through hybridization. The process of hibiscus hybridization combines both art and science, allowing horticulturists and enthusiasts to create new varieties with unique traits. In this exploration, we will dive into the intricate world of hibiscus hybridization, understanding the methods, benefits, and the fascinating journey of breeding blooms for beauty and resilience.

Understanding Hibiscus Hybridization:

Hibiscus hybridization involves the controlled cross-breeding of two different hibiscus plants to produce offspring with desirable characteristics. This process aims to combine specific traits from each parent plant, such as color, size, shape, and disease resistance, to create a new and improved hibiscus variety.

Methods of Hibiscus Hybridization:

Hand Pollination:

Hand pollination is a common method in hibiscus hybridization. Breeders carefully select parent plants based on desired traits and manually transfer pollen from the male parent (anther) to the female parent (stigma) using a brush or other tools. This controlled pollination ensures the inheritance of specific characteristics.

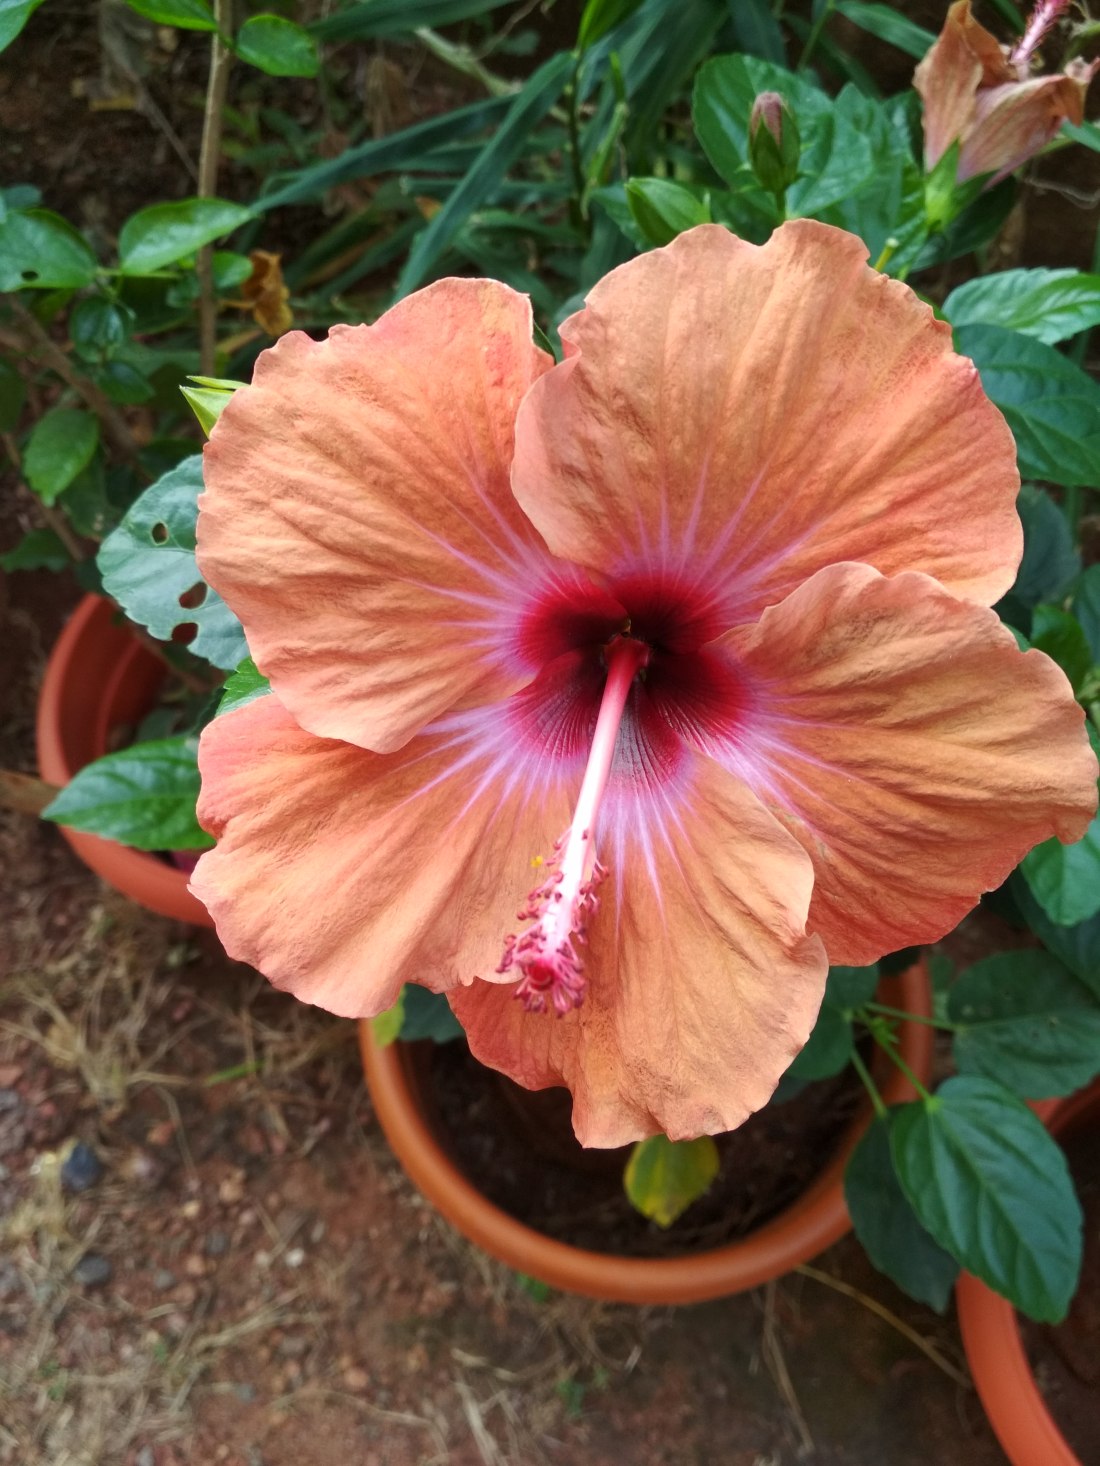
Natural Pollination:

In some cases, hibiscus hybridization occurs through natural pollination, where bees, butterflies, or other pollinators transfer pollen between hibiscus plants. While this method is less controlled, it can result in unexpected and unique hybrids.

Embryo Rescue:

Embryo rescue is a technique used when certain hibiscus hybrids may not develop properly on their own. It involves removing embryos from developing seeds and cultivating them in a nutrient-rich medium until they can be planted and grown into mature plants.


Similar Posts


Benefits of Hibiscus Hybridization:

Color Variation:

One of the primary goals of hibiscus hybridization is to introduce new and vibrant colors to the blooms. Hybridization allows breeders to create hibiscus varieties with unique shades and color patterns, expanding the palette beyond the naturally occurring colors.

Size and Shape:

Hybridization enables the modification of flower size and shape. Breeders can experiment with creating larger or smaller blooms, as well as altering petal arrangements and overall flower structure to enhance visual appeal.

Disease Resistance:

Creating hibiscus varieties with increased resistance to pests and diseases is a crucial aspect of hybridization. By combining the natural resilience of certain species, breeders can produce hybrids that are hardier and less susceptible to common hibiscus ailments.

Adaptability:

Hybridization allows for the development of hibiscus varieties that can thrive in various environmental conditions. This adaptability is particularly valuable for expanding the range of hibiscus cultivation, making it possible to grow these beauties in diverse climates.

The Fascinating Journey of Hibiscus Hybridization:

Selection of Parent Plants:

The journey begins with the careful selection of parent plants, each chosen for specific desirable traits. This may involve assessing a plant’s color, size, shape, and any unique characteristics it possesses.

Pollination and Cross-Breeding:

Whether through hand pollination or natural pollination methods, the pollen from the selected male parent is introduced to the stigma of the chosen female parent. This deliberate cross-breeding sets the stage for the creation of a hybrid.

Seed Development and Germination:

Once pollination is successful, seeds develop in the hibiscus pods. Breeders carefully collect and store these seeds until the germination process begins. Each seed harbors the potential for a unique hibiscus hybrid.

Seedling Selection and Cultivation:

As the seeds germinate, breeders carefully observe and select seedlings based on their growth characteristics and adherence to the desired traits. These selected seedlings are then cultivated to maturity.

Evaluation and Naming:

The mature hibiscus plants are thoroughly evaluated for the expression of desired traits. If the hybrid meets the breeder’s expectations, it is officially named and introduced to the world of horticulture.

Conclusion:

Hibiscus hybridization is a captivating blend of artistry and scientific precision, opening up new horizons for horticultural enthusiasts. The process allows us to witness the creation of hibiscus varieties that transcend the limitations of nature, offering an array of colors, sizes, and disease-resistant traits. As hybridizers continue to explore the possibilities, the world of hibiscus will undoubtedly bloom with new and enchanting varieties, each telling a unique story of creativity and innovation. Embrace the beauty of hibiscus hybridization and the remarkable blooms it brings forth, adding a touch of splendor to gardens around the globe. Happy hybridizing!

Happy Gardening!

Banishing Mealy Bugs: A Comprehensive Guide to Eliminating the Garden Pest!

Introduction:

Mealy bugs, those tiny, soft-bodied insects that cluster on your beloved plants, can quickly become a gardener’s nightmare. Their voracious appetite for sap weakens plants and leads to unsightly damage. However, with the right strategies, you can effectively get rid of mealy bugs and protect your garden. In this comprehensive guide, we’ll explore various methods to banish mealy bugs, ensuring a thriving and healthy garden.

Identification and Early Detection:

Before launching into eradication efforts, it’s crucial to correctly identify mealy bugs. These pests are small, cottony, and often found in clusters on the undersides of leaves, stems, or in leaf joints. Early detection is vital for effective control. Regularly inspect your plants, especially the new growth, for any signs of these pests.

Isolation of Infected Plants:

Upon detecting mealy bugs, isolate the affected plants immediately. This prevents the pests from spreading to nearby healthy plants. Place the infested plant away from the rest of your garden until the mealy bug infestation is under control.

Manual Removal:

For a small infestation, manually removing mealy bugs can be surprisingly effective. Use a cotton swab or a soft brush dipped in a mixture of water and mild soap to gently wipe away the bugs. Focus on the undersides of leaves and the joints where they tend to congregate.

Stop Proliferators:

Ants, seemingly innocuous garden visitors, can play a significant role in the spread of mealy bugs, notorious pests that can wreak havoc on your plants. Mealy bugs, known for their sap-sucking tendencies, often find a willing accomplice in ants. These industrious insects act as vectors, transporting mealy bugs from plant to plant, facilitating their infestation. To safeguard your green companions, it’s crucial to be vigilant about the presence of ants in your pots. Regularly inspect and ensure that your plants’ containers are ant-free, creating a first line of defense against the unwelcome collaboration between ants and mealy bugs. By breaking this cycle, you take a proactive step in maintaining a thriving and pest-free garden environment.

Natural Predators:

Introducing natural predators into your garden is an eco-friendly and effective way to control mealy bug populations. Ladybugs, lacewings, and predatory beetles are known to feed on mealy bugs. Create a welcoming environment for these beneficial insects by planting nectar-rich flowers or installing insect houses.

Neem Oil:

Neem oil, derived from the neem tree, is a potent natural insecticide that disrupts the life cycle of mealy bugs. Dilute neem oil according to the instructions and spray it directly on the affected plants. This not only kills existing mealy bugs but also acts as a deterrent for future infestations.


Similar Posts


Insecticidal Soap:

Insecticidal soaps are another effective and safe option for controlling mealy bugs. These soaps work by suffocating the pests without harming the plants. Apply the soap directly to the affected areas, making sure to cover the mealy bugs thoroughly. Repeat the application as needed.

Alcohol Spray:

A simple and readily available solution is a mixture of rubbing alcohol and water. Mix equal parts of rubbing alcohol and water in a spray bottle and apply it directly to the mealy bugs. The alcohol dissolves the waxy coating on their bodies, dehydrating and ultimately killing them.

Organic Pesticides:

Several organic pesticides, such as insecticidal oils and diatomaceous earth, can be effective against mealy bugs. These products are plant-friendly and can be applied according to the package instructions. Always opt for organic solutions to minimize harm to beneficial insects and the environment.

Pruning Infested Parts:

If mealy bugs have infested specific parts of a plant, consider pruning those areas. Remove heavily infested leaves or stems, ensuring that you dispose of them away from the garden. Pruning helps reduce the overall mealy bug population and encourages new, healthy growth.

Maintaining Garden Hygiene:

Preventing mealy bug infestations requires maintaining good garden hygiene. Regularly clean your garden tools, pots, and surrounding areas to eliminate potential hiding spots for mealy bugs. Properly dispose of any debris or dead plant material to deter these pests from taking residence.

Conclusion:

Dealing with mealy bugs in your garden may seem daunting, but with a strategic and proactive approach, you can successfully banish these pests. Whether you opt for natural predators, organic solutions, or manual removal, consistent monitoring and early intervention are key. Remember to stay vigilant, practice good garden hygiene, and create an environment that fosters the well-being of your plants while deterring mealy bugs. By implementing these methods, you’ll reclaim your garden and enjoy a flourishing, pest-free oasis.

 Happy gardening!

Orchids Unveiled: A Closer Look at the Diverse World of Exquisite Blooms!

Introduction

Orchids, with their enchanting beauty and intricate flowers, constitute a vast and diverse family of flowering plants. Boasting over 25,000 species and an impressive 100,000 hybrids and cultivars, these captivating blooms have found their way into homes, gardens, and hearts worldwide. In this blog post, we explore some of the broad categories of orchids, shedding light on their unique characteristics and the wide array of species that make them truly extraordinary.

Phalaenopsis Orchids: Moth’s Grace in Your Living Room

Commonly known as moth orchids, Phalaenopsis orchids captivate enthusiasts with their large, flat flowers and enduring blooms. These graceful beauties have become a staple in households, known not only for their mesmerizing appearance but also for their ease of cultivation.

Cattleya Orchids: Corsage Elegance in Every Hue

Referred to as corsage orchids, Cattleyas steal the spotlight with their impressive, showy flowers that come in a kaleidoscope of colors. Prized for their use in cut flower arrangements and corsages, Cattleya orchids exude an air of elegance and sophistication.

Dendrobium Orchids: Adaptable Wonders of Nature

Dendrobium orchids, boasting a diverse range of species, showcase a splendid variety in size, shape, and color. Their adaptability allows them to thrive in various environments, making them a favorite among orchid enthusiasts. Dendrobium orchids are the most commonly grown type of orchids because they are easy to maintain.

Oncidium Orchids: A Ballet of Colors and Shapes

Dancing lady or dancing doll orchids, commonly known as Oncidiums, take center stage with their vibrant and uniquely shaped flowers. Popular as both potted plants and garden additions, Oncidiums offer a visual spectacle that delights orchid lovers.

Vanda Orchids: Airy Elegance in Vibrant Hues

Characterized by large, flat, and vividly colored flowers, Vanda orchids present a breathtaking display of elegance. Often grown without potting media, with roots exposed to air, Vandas require a lot of bright light and regular watering. Compared to other orchids, they require a bit more care.


Similar Posts


Cymbidium Orchids: Sprays of Beauty for Every Occasion

Cymbidium orchids, renowned for producing large sprays of flowers, have secured a place in the hearts of floral enthusiasts. Often featured in corsages and arrangements, these hardy orchids can tolerate cooler temperatures, adding versatility to their appeal.

Lady’s Slipper Orchids (Paphiopedilum): Nature’s Quirky Elegance

Paphiopedilum, or Lady’s Slipper Orchids, stand out with their distinctive pouch-like lip, resembling a slipper. Available in various sizes and colors, these quirky yet elegant orchids intrigue enthusiasts with their unique form.

Masdevallia Orchids: Small Marvels in Vivid Hues

Masdevallia orchids, known for their small yet brightly colored flowers, captivate enthusiasts with their cool-growing nature. Popular among orchid aficionados, these unique blooms offer a diverse range of forms that add a touch of marvel to any collection.

Miltonia Orchids: Fragrant Pansies in Every Shade

Also known as pansy orchids, Miltonias enchant with their pansy-like appearance and often fragrant blooms. Available in a range of colors, these orchids bring a delightful fragrance to any orchid collection

Brassia Orchids: Spiders in Bloom

Often called spider orchids, Brassia orchids boast long, slender petals that resemble spider legs, creating a truly unique and intriguing flower shape. Dive into the world of Brassia as we unravel the captivating characteristics that define these orchids

Conclusion

These examples merely scratch the surface of the vast orchid family, with each genus and species possessing its own distinct charm. Orchids, found in nearly every corner of the world, showcase nature’s ability to adapt to various climates and ecosystems. Whether you’re a seasoned orchid enthusiast or a novice admirer, the diverse world of orchids offers a treasure trove of beauty waiting to be explored. Embrace the enchantment of orchids and let their unique allure add a touch of nature’s elegance to your life.

Happy Gardening!

Growing and Caring for Palms Indoors: A Guide to Lush Greenery!

Introduction

Palms are iconic houseplants known for their graceful fronds and tropical allure, offering a touch of exotic elegance to any indoor space. These versatile plants come in various shapes and sizes, making them a favorite among plant enthusiasts. Whether you’re a seasoned gardener or a beginner, caring for a palm plant at home can be a rewarding experience. Here’s a comprehensive guide on how to grow and nurture these botanical beauties indoors.

Selecting the Right Palm Plant

Before diving into care tips, it’s crucial to choose a palm species that suits your indoor environment. Some popular indoor palm varieties include the Areca Palm, Parlor Palm, Majesty Palm, and Kentia Palm. Consider factors like available space, light conditions, and the plant’s mature size when selecting your palm.

Light Requirements

Light plays a pivotal role in the health of your indoor palm. Palm species generally grow best in bright, indirect sunlight. Place your palm near a window that receives filtered sunlight or in an area where it can benefit from bright, indirect light throughout the day. Avoid direct sunlight, as it can scorch the leaves of some palm varieties.

Optimal Temperature and Humidity

Maintain a comfortable temperature range for your palm plant, ideally between 60°F to 80°F (15°C to 27°C). Palms generally prefer a humid environment, mimicking their tropical origins. Increase humidity levels by misting the foliage regularly or placing the pot on a tray filled with pebbles and water. Avoid drafts and sudden temperature fluctuations, as these can stress the plant.

Watering Routine

Proper watering is essential for palm care. Make sure that the soil stays consistently moist but avoid over-watering it. Overwatering can lead to root rot, while underwatering can cause the fronds to turn brown and dry. Allow the top inch or two of soil to dry between watering sessions. To ensure optimal growth, it is important to tailor the frequency of care to each plant’s unique needs and the surrounding environmental conditions.

Soil and Potting

Palms prefer well-draining soil to prevent waterlogging. A mix of peat, perlite, and sand works well for most palm species. Repot your palm every two to three years, or when the roots outgrow the current container. Choose a pot with drainage holes to facilitate excess water drainage, preventing root rot.


Similar Posts


Fertilization

Feed your indoor palm with a balanced liquid fertilizer designed for houseplants. To promote healthy growth, it is recommended to fertilize your plants once a month during the growing season, which typically falls in spring and summer. Reduce or halt fertilization during the plant’s dormant phase in fall and winter.

Pruning and Maintenance

Regular maintenance helps keep your palm healthy and aesthetically pleasing. Remove any brown or yellowing fronds by trimming them close to the base using clean, sharp pruning shears. To prevent the spread of diseases, it’s important to wipe the blades with rubbing alcohol between cuts.

Pest Management

While indoor palms are generally resilient, they can occasionally face pest issues. There are a few pests that can commonly affect palm plants, such as spider mites, mealybugs, and scale insects. Inspect your palm regularly for signs of infestation, such as webbing, sticky residue, or unusual spots on the leaves. Treat infestations promptly with natural or commercial remedies to prevent further damage.

Propagation

Propagating palms at home can be challenging, as many species primarily propagate through seeds or division. It’s best to purchase new plants from reputable nurseries or garden centers rather than attempting to propagate them at home.

Creating a Stunning Display

Palms make striking standalone plants but also work well in mixed plant arrangements. Combine them with other tropical plants or place them as focal points in your indoor green oasis. Experiment with different pot sizes, shapes, and decorative elements to enhance their visual appeal.

Conclusion

Growing and caring for a palm plant indoors can bring a touch of the tropics into your home. By providing the right conditions—adequate light, proper watering, suitable soil, and occasional maintenance—you can enjoy lush, vibrant palm foliage that adds a refreshing aesthetic to your living spaces. Embrace the allure of palms and revel in the natural beauty they bring to your indoor haven.

Happy Gardening!

Aeroponics Unveiled: Cultivating a Sustainable Future Without Soil!

Introduction

Aeroponics, a revolutionary approach to gardening, redefines how plants thrive without soil. This innovative method involves suspending plant roots in a nutrient-rich mist, fostering rapid growth and robust yields. Let’s delve into the world of aeroponics gardening, exploring its principles, benefits, setup, and its promising role in shaping the future of agriculture.

Understanding Aeroponics Gardening

Aeroponics stands out as a soilless cultivation technique, where plant roots receive a continuous, oxygenated mist rich in nutrients and water. Unlike traditional hydroponics, which submerges roots in water, aeroponics suspends them in the air, allowing maximum exposure to oxygen and nutrients. This method offers an optimal growing environment, promoting faster growth rates, increased nutrient absorption, and minimal resource consumption.

Advantages and Benefits

The benefits of aeroponics gardening are manifold. Firstly, it maximizes space utilization, allowing vertical stacking of plants, making it an ideal choice for urban or indoor gardening setups. Secondly, it significantly conserves water, using up to 90% less water than traditional soil farming methods. Furthermore, this approach minimizes the risk of diseases caused by soil-borne pathogens, ensuring healthier plants. Lastly, aeroponics facilitates year-round cultivation, enabling consistent harvests regardless of seasonal changes.

Setting Up an Aeroponics System

Creating an aeroponics system involves a few key components. A reservoir holds the nutrient solution, which is then pumped through fine misting nozzles or sprayers. These nozzles disperse the nutrient solution directly onto the exposed roots of the suspended plants. An enclosed space or a specialized aeroponics chamber provides a controlled environment for optimal growth. While commercial systems are available, DIY setups using readily available materials are also popular among enthusiasts.

Key Considerations for Success

Maintaining an aeroponics system requires attention to key factors. Ensuring a balanced nutrient solution is crucial, as it directly influences plant health and growth. Regular monitoring of pH levels, nutrient concentrations, and water quality is essential for optimal plant development. Additionally, proper ventilation and lighting play pivotal roles in providing an ideal environment for plant growth, facilitating photosynthesis and overall health.

Plant Selection and Growth

A wide array of plants thrives in aeroponic systems, ranging from leafy greens and herbs to flowering plants and vegetables. Leafy greens like lettuce, spinach, and kale, alongside herbs such as basil and cilantro, exhibit remarkable growth in aeroponic setups. Additionally, tomatoes, cucumbers, peppers, and strawberries also flourish, showcasing the versatility of this cultivation method across various plant types.


Similar Posts


Setting up an aeroponics system

Setting up an aeroponics system involves a few key steps:

Selecting a System: Choose between DIY setups or commercial kits. DIY options might involve creating a reservoir, a spray manifold, and a support structure for the plants. Commercial kits often come pre-designed and are easier to set up.

Choose a Location: Find a suitable location with access to power, water, and enough space for your system. It’s important to take into account various factors such as temperature, humidity, and lighting.

Assemble Components: Gather the necessary components like a reservoir, pump, tubing, spray nozzles, growing chambers (where plants will be suspended), and a timer (for the pump).

Install the Reservoir: Set up the reservoir at a height to allow for gravity-fed watering. Connect the pump to the reservoir.

Setup Growing Chambers: Mount the plants or plant holders in the growing chamber. Ensure that the roots will be suspended and exposed to the mist generated by the system.

Connect Tubing and Nozzles: Connect the tubing to the pump and position the spray nozzles within the growing chamber. Ensure they’re evenly spaced and angled to cover the root area.

Test the System: Fill the reservoir with water and nutrient solution. Turn on the pump and verify that the misting system is working correctly.

Observation and Maintenance: It is important to regularly monitor and maintain the water level, pH, and nutrient concentration in the reservoir. Clean the nozzles periodically to prevent clogging. Additionally, monitor plant health and adjust the system as needed.

Harvest and Enjoy: Once your plants start growing, monitor their progress and harvest when ready!

Remember, aeroponics systems can vary based on scale and complexity. Always follow manufacturer instructions and consider seeking advice from experienced aeroponics growers for specific guidance.

The Future of Agriculture

Aeroponics gardening represents a glimpse into the future of agriculture, offering sustainable solutions to food production challenges. Its ability to maximize resources, reduce water usage, and cultivate plants in diverse environments positions it as a viable option for addressing global food security concerns. With ongoing advancements in technology and increased adoption, aeroponics has the potential to revolutionize farming practices worldwide.

Conclusion: Embracing a Sustainable Future

In conclusion, aeroponics gardening represents a transformative shift in how we cultivate plants, promising efficient resource utilization and sustainable yields. Its ability to overcome space limitations, conserve water, and foster healthier plant growth signifies a promising future for agriculture. As technology evolves and awareness grows, aeroponics stands as a beacon of hope, offering a path towards a greener, more resilient agricultural landscape.

From urban gardening enthusiasts to commercial growers, embracing aeroponics signifies a step towards sustainable, innovative farming practices that redefine our relationship with food production and the environment.

Happy Gardening!

Growing Green: New Year’s Resolutions for Your Flourishing Garden!

Introduction:

A new year brings opportunities for growth and renewal, not just for us but also for our gardens. As you step into the fresh canvas of a brand-new year, consider setting gardening resolutions that will nurture and elevate your green spaces. Here are some resolutions to inspire a thriving garden in the coming year.

Plan with Purpose:

Begin the year by mapping out a gardening plan. Assess your garden’s strengths and weaknesses, identify spaces for improvement, and set clear goals. Whether it’s expanding the variety of plants, creating dedicated zones, or enhancing sustainability, a well-thought-out plan sets the stage for a successful garden.

Embrace Sustainability:

Pledge to adopt eco-friendly practices in your garden. Explore composting, rainwater harvesting, and organic pest control methods. Incorporate native plants that thrive in your climate, reducing the need for excessive water and chemical interventions. Commit to reducing waste and recycling materials within your garden projects.

Learn and Experiment:

Cultivate a thirst for knowledge and experimentation. Dedicate time to learn about new plants, gardening techniques, or landscaping methods. Experiment with companion planting, vertical gardening, or different soil compositions. Expand your gardening horizons by trying new varieties or introducing a different style of gardening.

Prioritize Soil Health:

Make a resolution to care for your soil. To have a healthy garden, it is crucial to have good quality soil as it serves as the foundation. Commit to enriching the soil with organic matter, regularly testing its pH levels, and ensuring proper drainage. Focus on soil amendments and mulching to improve fertility and structure, fostering a nurturing environment for plant growth.

Create Biodiversity:

Aim to foster biodiversity within your garden. Encourage a variety of flora to attract pollinators, beneficial insects, and birds. Designate spaces for native plants, herb gardens, or wildlife habitats. Create a harmonious balance that supports the ecosystem and increases resilience against pests and diseases.


Similar Posts


Regular Maintenance:

Dedicate time for consistent garden care. Develop a routine for watering, weeding, pruning, and pest control. Regular maintenance not only keeps your garden aesthetically pleasing but also promotes plant health and productivity.

Grow Your Own Food:

Resolve to cultivate a more sustainable lifestyle by growing your own produce. Set a goal to grow a specific percentage of your food supply. Start small if you’re a beginner, with easy-to-grow herbs or salad greens in containers. Gradually expand to include vegetables and fruits that suit your climate and gardening space.

Share the Bounty:

Share the joy of gardening by involving friends, family, or the community. Consider starting a community garden project or sharing your surplus produce with neighbors. Engage in gardening forums or social media groups to exchange ideas, tips, and seeds.

Embrace Garden Therapy:

Recognize the mental and physical benefits of spending time in the garden. Make a resolution to dedicate moments in the garden for mindfulness, relaxation, and rejuvenation. Incorporate garden elements that foster a peaceful ambiance, such as a meditation corner or a tranquil water feature.

Celebrate Progress:

Lastly, celebrate every success and learn from setbacks. Keep a garden journal to document milestones, observations, and ideas. Embrace the journey of nurturing your garden, knowing that each season offers new lessons and growth opportunities.

As you step into the New Year, let your garden be a canvas for growth, learning, and joy. With these resolutions, embark on a gardening journey that nurtures not just your plants but also your soul.

Happy Gardening!

The Art of Planting and Growing Irises: A Seasonal Guide!

Introduction

In the realm of blossoming beauty and effortless elegance, few flowers rival the captivating allure of irises. Their vivid hues and minimal care requirements make them a cherished addition to any garden landscape. Yet, the journey of cultivating these floral gems requires more than just planting—they demand a delicate understanding of timing, soil, and care.

This comprehensive guide unveils the artistry behind growing irises, guiding both novice and seasoned gardeners through the seasonal nuances and essential practices of nurturing these exquisite blooms. From the pivotal timing of planting iris rhizomes to the strategic intricacies of dividing and replanting, each phase contributes to an enchanting narrative of patience, nurturing, and rewarding results.

Timing Is Key: Best Time to Plant Iris Rhizomes

Irises are a garden delight with their vibrant blooms and easy maintenance. Timing is crucial when it comes to planting these beauties. In the United States, August and September mark the shipment period for iris rhizomes from growers—a strategic choice for the optimal planting season.

Dividing Iris: A Simple Maintenance Task

Late summer through early fall is the prime window for planting iris rhizomes, allowing them to settle and establish their root systems before the arrival of harsh freezes. This period isn’t just for new plantings; it’s also ideal for dividing existing irises. Dividing iris is a straightforward task that ensures the health and happiness of your plants.

Optimal Growing Conditions for Irises

Understanding where irises flourish best is essential. They thrive in full sun, relishing at least 6 to 8 hours of sunlight daily. While they can tolerate less light, robust blooming depends on sufficient sunshine. Ideally, irises should be planted in well-draining soil, as they despise soggy conditions.

Soil Preparation: Setting the Stage for Healthy Growth

Preparing the soil for iris planting involves weeding, clearing debris, and ensuring proper drainage. While irises appreciate moist soil, they fare poorly in soggy conditions. Amending heavy clay soils for improved drainage is recommended, though bearded irises can tolerate various soil pH levels.

Fertilization Debate: To Fertilize or Not?

The debate on fertilization during planting persists among gardeners. While some opt for adding fertilizer to the soil, others rely on well-amended compost. Stirring fertilizer into the soil lightly can be beneficial, ensuring it reaches the roots effectively.


Similar Posta


Planting Iris Rhizomes: The Art of Surface Planting

Planting iris rhizomes is an art form in itself. Ensuring they remain close to the soil surface is crucial, as burying them too deep hampers their growth. The tops of the rhizomes should be visible after planting, allowing them to bask in sunlight.

Strategic Spacing for Successful Growth

Spacing is another vital consideration. Planting irises 6 to 12 inches apart facilitates better air circulation, reducing the risk of fungal issues. Adequate spacing also promotes their expansion, enabling the growth of new rhizomes for future divisions.

Replanting After Division: Creating Spectacular Displays

When it’s time to replant after dividing, strategic planting in clusters of three rhizomes can result in a spectacular display of blooms. Arranging them with their pointy tips facing each other in a circle fosters healthy growth.

Watering and Care: Nurturing New Plantings

Watering new plantings during dry spells is crucial to establish their roots and ensure their vitality. Come spring, the reward for your efforts materializes in the form of stunning iris blooms.

Spring Blooms: Patience and Reward

Remember, if your irises don’t bloom in the first season post-division, be patient—the smaller rhizomes often need an additional season to flourish.

Pest Vigilance: Guarding Against Iris Borers

Amidst the joys of growing irises, vigilance against pests like the iris borer is necessary. This pest can lead to bacterial soft rot, impacting the health of your plants. Vigilance and preventive measures go a long way in maintaining the vigor of your iris bed.

Conclusion: The Simple Pleasures of Growing Irises

In conclusion, growing irises isn’t just about planting—it’s a journey of nurturing and patience. The rewards, showcased in vibrant blooms and healthy rhizomes, make the process immensely gratifying. So, whether you’re a novice or a seasoned gardener, embracing the art of growing irises brings forth simplicity and unparalleled rewards to your garden.

Happy Gardening!

Blooming Splendor: Mastering the Art of Growing and Caring Freesia Flowers!

Freesia is a beautiful flower native to South Africa, which blooms in bright colors and releases a delightful citrusy fragrance in late spring and early summer. Its upward-facing blossoms have a tubular shape, and each stem produces 5 to 10 flowers that grow on one side only. The double-flowered hybrids offer an even more stunning display. It’s worth mentioning that the stems turn at right angles just below the lowest flower, which causes the blossoms to face upwards and attract pollinators. This feature makes freesia an excellent choice for floral arrangements.

Table Of Contents

How to Select Freesia Bulbs

When selecting freesia bulbs, opt for firm, plump corms devoid of any soft spots or signs of mold. Look for larger corms as they tend to produce more robust blooms. Ensure they are free from blemishes or cuts, indicating potential damage or disease. Additionally, choose bulbs that feel heavy for their size, indicating good moisture content and vitality, ensuring a promising start to their growth journey.

Where to Plant Freesia

Freesia is a plant native to the hot and dry regions of South Africa and it thrives in similar environments when planted in the garden. It is best grown in hot and dry planting sites such as south-facing foundation gardens, curbside, and sidewalk gardens. Freesia needs cool nights to flower well, so it is important to ensure that it gets the required temperature.

To achieve the best visual effect, plant freesia in clusters of 6 to 10. You can plant them as groups of single colors or mix the colors to create a confetti effect.

How and When to Plant Freesia

If you live in zones 9 or 10, you can plant freesia corms in the fall and enjoy their colorful racemes of flowers in spring. Planting them after the last frost in spring will ensure they bloom in late summer or early fall in cooler zones. Make sure to plant the corms with their pointed ends up, 1 to 2 inches deep, and no more than 2 inches apart.

However, in zones 3 to 8, the tender corms won’t survive the winter. You’ll have to dig them up after they have bloomed and the foliage has shriveled up, but before the first frost. Store them in sand or coconut coir in a cool, dry place at around 55 degrees F until you’re ready to replant them in the spring.

Freesia Care Tips

Light

Freesia thrives in full sun, but can also tolerate light morning shade.

Soil and Water

Freesia thrives in soil that is well-drained, fertile and enriched with organic matter. When planting, avoid overwatering as it can cause the bulbs to rot. Once the bulbs start sprouting, water them regularly but moderately, especially in the absence of rainfall. During the hot summer months, freesia will go dormant and should not be watered until the next growing season.

Temperature and Humidity

Freesia plants are typically hardy in zones 9 and 10. However, if you are in zone 8 and below, their corms will not survive the winter chill, so they need to be grown as an annual. The best time to grow freesia is during cool springtime temperatures between 55 and 60 degrees. These plants can tolerate humid conditions, but they will stop blooming and go dormant if the temperatures rise above 70 degrees F.

Fertilizer

Once the young plants reach a height of 6 inches, start fertilizing them every two weeks with a liquid fertilizer as per the manufacturer’s instructions.

Pruning

Freesias do not require pruning. After blooming, it’s crucial to wait for the narrow, blade-like leaves to turn yellow, wilt, and shrivel completely before removing them. This is when the plant forms new bulblets.


Similar Posts


Potting and Repotting Freesia

Freesia is a beautiful flower that can be grown in containers or planted alongside other annuals and perennials that don’t need too much watering. To grow freesia in containers, start in early spring by filling a 5-inch-tall planting pot with a mixture of lightweight potting soil and compost that drains well. Plant 6 to 8 corms, with their pointed ends up, about 1 inch deep. This will give you a cluster of lush freesias in late summer or early fall. Another option for growing spring-blooming freesia in containers is to plant them in pots during the fall and keep them in a frost-free area where the temperature remains between 55 and 60 degrees Fahrenheit.

Pests and Problems

Insects such as aphids and thrips are attracted to freesia plants. Additionally, snails and slugs may also feed on them. Freesia plants are susceptible to various diseases, including root and stem rot, which develops in wet conditions, dry rot, and fusarium wilt, a type of fungus.

How to Propagate Freesia

Freesias can be best propagated from corms, which are bulb-tuberous underground stems. The size of the corms determines the energy they contain, and subsequently, the size of the flowers they produce. Therefore, when propagating freesias, it is recommended to choose only large and healthy corms.

To propagate the plant, gently remove the corm offsets from the parent plant, making sure that they are not damaged. When planting, keep the corms 2 inches apart or denser, following the instructions for planting freesias.

Note that when propagating freesia from corms, they may not bloom in the first season, unlike newly purchased corms.

Freesia Companion Plants

Freesia is a unique cutting flower that is not commonly grown in home gardens. It is quite expensive at florists, but planting your own freesia can be a great way to enjoy the beauty of a florist shop bouquet from your backyard. You can create a charming garden bouquet by pairing freesia with dahlias, gladiolus, lady’s mantle (Alchemilla mollis), larkspur, cosmos (Cosmos bipinnatus), amaranth, and pincushion flower (scabiosa). When creating a cutting garden, it is recommended to plant in rows for easy care and harvesting all season long. You can also add structure to the planting bed by surrounding it with a low fence.

Cutting and Arrangements of Freesia Flowers

Freesias are known for their elegant blooms and citrusy fragrance, making them a perfect choice for cut flowers that can enhance any floral arrangements with their charm. When harvesting, it is best to wait until the first few buds begin to open but are not fully bloomed yet. Cut the stems at an angle and preferably in the morning or late afternoon. After cutting, immediately place them in lukewarm water to prolong their vase life. To keep them fresh longer, trim the stems every few days under running water, and change the water regularly. Freesias blend beautifully with other garden favorites such as dahlias, gladiolus, and cosmos, adding depth and fragrance to bouquets. Their slender stems and captivating upward-facing flowers make them a favorite for artistic arrangements, ensuring a delightful fragrance graces your indoor spaces while displaying their aesthetic appeal.

Conclusion

Embracing vibrant hues and fragrant blooms, cultivating freesias can enrich outdoor spaces and offer delightful arrangements for indoor displays. These elegant flowers grow gracefully in containers and make stunning cut flowers that captivate with their beauty and charm. Growing, arranging, and savoring freesias can infuse any space with a touch of floral elegance and a citrusy fragrance.

Happy Gardening!

Choosing the Perfect Tulips for Your Garden!

Introduction

Tulips, with their vibrant colors and elegant structure, are a delightful addition to any garden. While their beauty is undeniable, choosing the right tulips and understanding how to care for them is crucial for a flourishing display. From selecting the varieties to nurturing them through seasons, here’s a comprehensive guide to help you pick and cultivate the perfect tulips for your landscape.

Understanding Varieties: Hybrid vs. Species Tulips

The tulips you commonly encounter, often found in garden centers, are hybrid tulips. They offer stunning displays but typically need annual replacement for optimal results. On the other hand, species tulips, hardy in zones 4 to 7, possess perennial characteristics, returning year after year given the right conditions. These shorter tulips boast smaller flowers with distinct, pointed petals.

Blooming Time Matters

Tulips have varying flowering durations, with early, mid, and late-season varieties. To ensure an extended and continuous bloom, opt for a mix of tulips from each category when making your selections. This thoughtful curation guarantees a prolonged and captivating showcase in your garden.

Planting Essentials: Location, Timing, and Soil

Tulips thrive in full sun, requiring at least six hours of direct sunlight daily. They also favor well-draining soil, making them ideal for rock gardens. Planting occurs in the fall, with timing dependent on your climate zone. Ensure the soil has cooled from the summer heat before planting. If your area doesn’t experience adequate chilling temperatures, consider pre-cooled bulbs for successful growth.

Soil Preparation and Planting Technique

Prepare the planting area by incorporating nutrient-rich soil (Soil: Vermicompost: Cocopeat). Mixing this soil with the native one promotes robust root development, essential for a splendid spring bloom. When planting, group tulips in sets of ten or more, burying each bulb eight inches deep with the pointy end facing upwards. Optimal spacing allows for a captivating display. Thorough watering after planting is crucial for initial growth.


Similar Posts


Potted Tulip Care

Growing tulips in containers is effortless. Plant bulbs at a depth of eight inches, and ensure the container is moved to a cool, dry location before the first frost. When outdoor growth begins, relocate the pot to a sunny spot and maintain regular watering.

Watering and Feeding

Water tulips upon planting and then weekly for the first month. Resume watering in spring when foliage emerges. Feeding post-flowering with plant food supports nutrient storage for the next season. Apply this feed again in late fall before dormancy.

Maximizing Indoor Enjoyment

To enjoy tulips indoors, cut them when the buds are tight and place them in room-temperature water in a clean vase. Adding preservatives to the water extends their lifespan, and trimming the stems periodically maintains their elegance.

Post-Blooming Care

For species of tulips to return annually, trim the flower stalks once blooms fade. Feed the bulbs, stop watering during dormancy, and trim foliage after it browns. Hybrid varieties are not perennial; remove and compost their bulbs after flowering.

Protecting Against Pests

Deer and rodents can pose a threat to tulips. Use chicken wire to protect bulbs from being dug up, and consider interplanting with deer-resistant varieties like daffodils or Crown Imperials. Utilize deer repellents for additional protection.

Conclusion

Embark on your tulip-growing journey armed with these insights! By selecting the right varieties, providing optimal care, and safeguarding against pests, you’ll create a stunning tulip display that enchants year after year. Whether in garden beds or charming pots, these tips ensure a flourishing and vibrant floral showcase.

Happy Gardening!

Cultivating Hyacinths: Your Comprehensive Growing Guide!

Introduction

Hyacinths, renowned spring blooms akin to tulips and daffodils, emerge with striking spikes of vivid colors—blues, purples, whites, pinks, apricots, and reds, precisely when winter wanes and you yearn for blossoms. Unlike their counterparts, these fragrant beauties sustain their captivating blooms for an impressive two weeks or more, adding allure to the onset of spring.

For those seeking versatility, hyacinths shine not only in garden beds but also as cut flowers, adorning indoor vases and spaces with their captivating allure. Their long-lasting blooms and fragrant presence make them a perfect choice for stunning floral arrangements that infuse homes with a touch of elegance and natural beauty.

Origins and Popularity of Hyacinths

Originating from Turkey, Syria, and Lebanon, hyacinths found their way to Europe during the 16th century and swiftly rose to prominence. The Dutch, revered for their love of bulbous flowers, had developed over 2,000 cultivars by the 18th century, emphasizing the popularity and significance of these enchanting flowers.

Planting Hyacinths: The Right Start Matters

The ideal time for planting hyacinth bulbs is late summer to early fall, ensuring they establish themselves before frost sets in. Select a spot basking in at least four hours of sunlight daily, favoring locations with full to partial sun exposure.

Ensuring loose and loamy soil is crucial, as hyacinths tend to suffer in heavy, moisture-retentive soils. Enhance soil drainage by incorporating compost, shredded pine bark, or aged manure. For heavy clay soil, raised beds offer an effective solution to improve drainage.

Mass planting hyacinth bulbs, at least 4 inches deep and 3 inches apart, intensifies their sweet fragrance and visual impact. Grape hyacinth bulbs, however, should be planted shallower, at 2 to 3 inches deep.


Similar Posts


Essential Care Tips for Thriving Hyacinths

Adequate moisture without overwatering is vital. During dry spells, ensure they receive about an inch of water weekly. Fertilize with bulb food during the spring emergence and again in early fall for optimal growth.

Post-bloom, supplement the soil with compost to provide essential nutrients for the next season’s blossoms. For enhanced vitality, allow the foliage to persist for six weeks after flowering, as these leaves serve as nutrient factories for future blooms.

For areas lacking cold winters, a special regimen involving digging up bulbs after spring foliage dies, storing them in a cool, dry place, and refrigerating for a couple of months before replanting in fall ensures their continued bloom.

Forcing Hyacinths: Indoor Bloom Marvels

To usher in a fragrant indoor bloom during winter, forcing hyacinth bulbs can work wonders. With or without soil, these methods yield delightful indoor blooms:

With Soil: Plant bulbs slightly exposed in pots, then refrigerate for at least 10 weeks. Gradually introduce them to sunlight for a stunning indoor display.

Without Soil: Employ a bulb-forcing vase, suspending pre-chilled bulbs above water. Place in a well-lit spot, changing water every two weeks, and watch them grow into charming blooms.

Dealing with Pests and Diseases

Hyacinths might face challenges like gray mold caused by excess moisture and bulb rot from overwatering. Identifying and addressing these issues promptly through appropriate measures like fungicide application or improved drainage is essential for their health.

Recommended Hyacinth Varieties

Explore an array of mesmerizing hyacinth varieties like ‘Carnegie,’ ‘China Pink,’ ‘Hollyhock,’ ‘City of Haarlem,’ ‘Peter Stuyvesant,’ ‘Gypsy Queen,’ ‘Viper Bow,’ ‘Woodstock,’ and more, each boasting unique colors and characteristics to grace your garden with splendid blooms.

Hyacinths, with their captivating hues and enduring fragrance, offer an extraordinary springtime spectacle. Their resilience and enchanting charm make them a garden favorite, enriching landscapes with vibrant colors and delightful scents. Embrace the allure of hyacinths and witness the beauty they bring to your garden.

Happy Gardening!