Unveiling the Splendor: A Guide to Growing Summer Flower Bulbs!

Introduction:

Summer is a time of vibrant colors and blooming beauty, and what better way to adorn your garden than with a dazzling array of summer flower bulbs? From the elegant lilies to the cheerful dahlias, there’s a summer bulb for every garden style and preference. In this comprehensive guide, we’ll explore the fascinating world of summer flower bulbs and discover how to grow and care for these enchanting blooms in your garden.

Understanding Summer Flower Bulbs

Summer flower bulbs are underground storage structures that contain the embryonic plants and nutrients needed for growth. Unlike seeds, bulbs produce new shoots and roots from within themselves, giving them a head start on the growing season. Many popular summer flowers, such as Asiatic lilies, calla lilies, and dahlias, grow from bulbs and tubers.

Choosing the Right Bulbs

When selecting summer flower bulbs for your garden, consider factors such as bloom time, color, size, and growing conditions. Some popular types of summer flower bulbs to consider include:

Lilies: Known for their elegant, trumpet-shaped flowers and intoxicating fragrance, lilies are a classic addition to any summer garden. Choose from a variety of colors and sizes, including Asiatic, Oriental, and hybrid lilies.

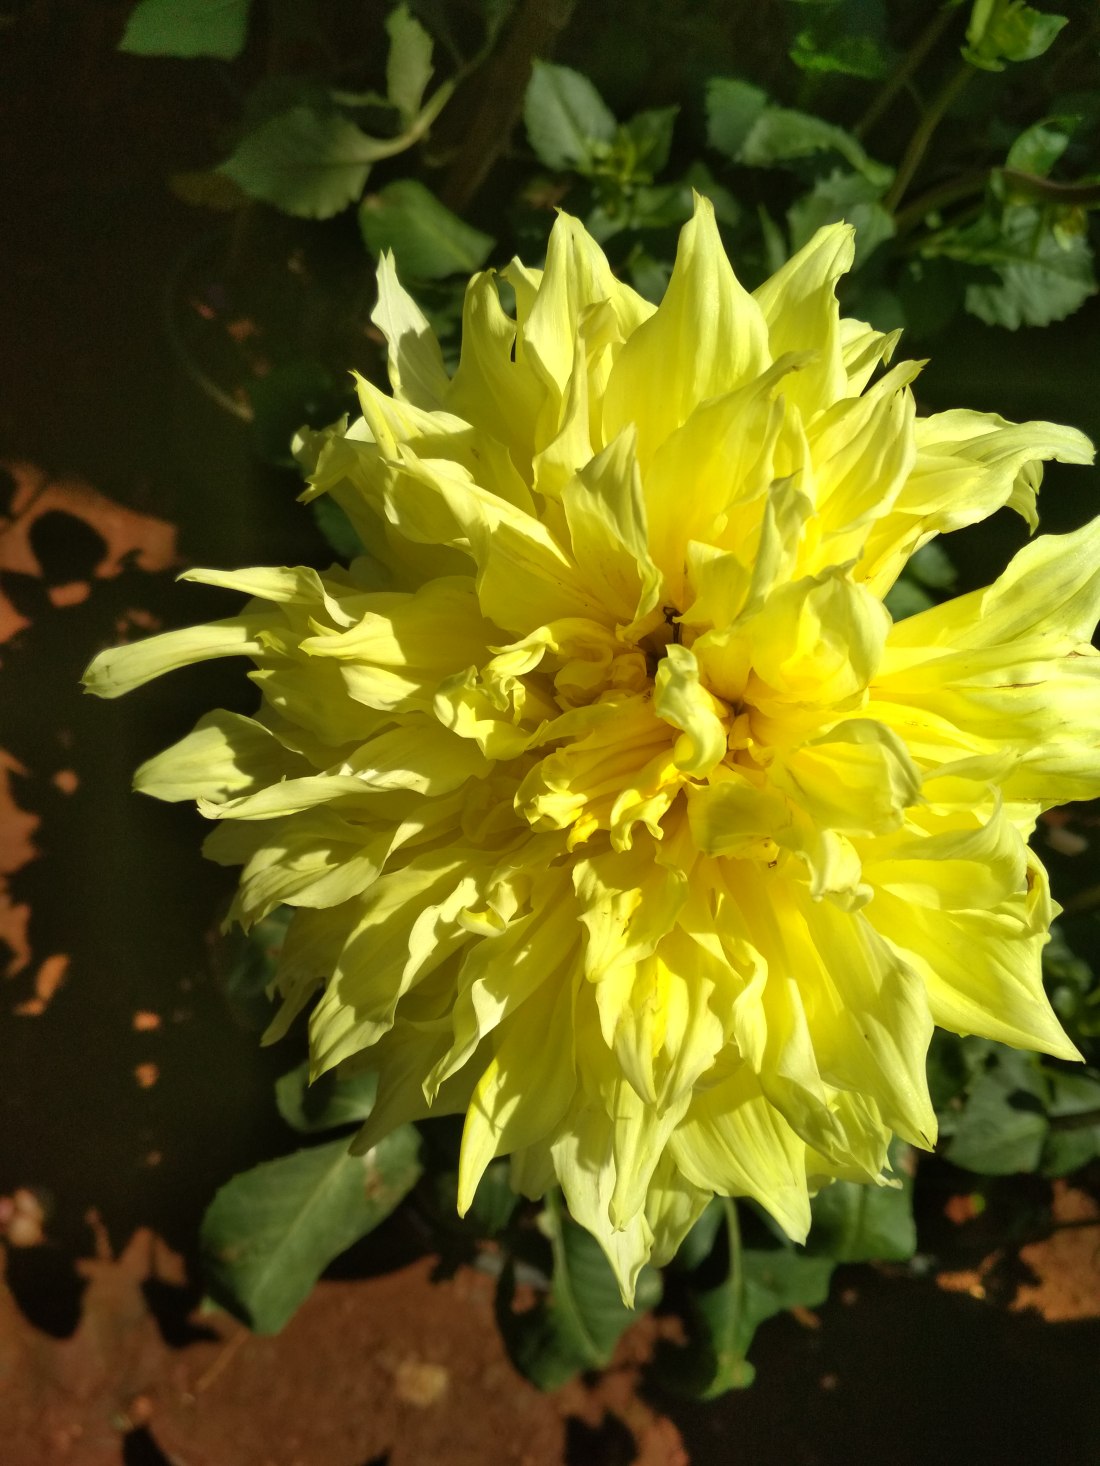
Dahlias: With their showy, dinner-plate-sized blooms and vibrant colors, dahlias add drama and flair to summer gardens. From pompon to cactus varieties, there’s a dahlia to suit every taste and garden style.

Calla Lilies: Elegant and graceful, calla lilies are prized for their sculptural blooms and glossy, arrow-shaped foliage. Available in a range of colors, including white, pink, yellow, and purple, calla lilies add a touch of sophistication to summer gardens. Plant them in borders or containers for a stunning focal point that will dazzle throughout the season.

Cannas: Loved for their tropical foliage and bold, exotic flowers, cannas are a popular choice for summer gardens. Plant them in containers or along borders for a striking burst of color and texture.


Similar Posts:


Planting Summer Flower Bulbs

Plant summer flower bulbs in spring after the danger of frost has passed and the soil has warmed up. Follow these steps for successful bulb planting:

Choose a Location: Select a sunny spot with well-draining soil for planting summer flower bulbs. Avoid regions susceptible to waterlogging or inadequate drainage.

Prepare the Soil: Loosen the soil to a depth of 8-10 inches and incorporate organic matter such as compost or aged manure to improve soil structure and fertility. Add cocopeat to retain moisture in the soil.

Planting Depth: Follow the planting depth recommendations for each type of bulb, as planting depths can vary depending on the species. It is generally recommended to plant bulbs at a depth that is three times their diameter.

Spacing: Space bulbs according to the recommended spacing guidelines for each species, ensuring adequate room for growth and air circulation.

Watering: Water newly planted bulbs thoroughly to settle the soil and provide moisture for root establishment. Continue watering throughout the growing season for optimal growth and good blooms.

Caring for Summer Flower Bulbs

Once planted, summer flower bulbs require minimal maintenance to thrive. Here are some tips for caring for your summer bulb garden:

Mulching: Apply a layer of organic mulch such as shredded bark or straw around newly planted bulbs to conserve moisture, suppress weeds, and regulate soil temperature.

Fertilizing: Feed summer flower bulbs with a balanced fertilizer or bulb-specific fertilizer in spring as new growth emerges. Repeat applications every 4-6 weeks during the growing season to promote healthy foliage and abundant blooms.

Deadheading: Regularly removing spent flowers promotes continuous blooming and prevents seed pod formation. Deadheading also helps redirect energy back into bulb storage for the following year’s growth.

Staking: Stake tall or top-heavy varieties such as gladioli and dahlias to prevent them from flopping over in strong winds or heavy rain.

Conclusion:

With their stunning colors, diverse forms, and delightful fragrances, summer flower bulbs are a must-have addition to any garden. By selecting the right bulbs, providing optimal growing conditions, and practicing proper care and maintenance, you can enjoy a spectacular display of blooms all summer long. Follow the tips outlined in this guide, and let your garden come alive with the beauty of summer flower bulbs!

Happy Gardening!

Growing Bleeding Heart Plant: A Guide to Heartwarming Beauty!

Introduction:

The Bleeding Heart plant, known for its heart-shaped flowers that dangle gracefully from arching stems, is a romantic and nostalgic addition to any garden. This enchanting perennial, scientifically known as Dicentra spectabilis, captures the hearts of gardeners with its unique blooms and fern-like foliage. If you’re looking to add a touch of whimsy and elegance to your garden, read on to discover our comprehensive guide on growing and caring for the Bleeding Heart plant.

1. Understanding the Bleeding Heart Plant

Botanical Background

The Bleeding Heart plant is native to Siberia, Northern China, Korea, and Japan. It belongs to the Fumariaceae family and is renowned for its distinctive heart-shaped flowers, which come in shades of pink, red, and white. The flowers typically appear in spring, adding a burst of color to the garden landscape.

Ideal Growing Conditions

Bleeding Hearts thrive in cool, moist conditions and prefer partial shade to full shade. They are typically grown as perennials in USDA hardiness zones 3-9, depending on the variety. While they can tolerate some sunlight, too much direct sun can scorch their delicate foliage, making them more suitable for shaded areas or dappled sunlight.

2. Planting the Bleeding Heart Plant

Soil Requirements

Well-draining soil rich in organic matter is essential for the Bleeding Heart’s health. An ideal soil pH level ranges from 6.0 to 7.0. Incorporating compost or well-rotted manure into the planting area can help improve soil structure and fertility.

Planting Depth and Spacing

Plant Bleeding Hearts at the same depth as they were in their nursery pots, typically around 1-2 inches deep. Space them approximately 18-24 inches apart to allow room for mature growth and optimal air circulation.


Similar Posts:


3. Watering and Feeding

Watering

Consistent moisture is key to the Bleeding Heart’s success. Ensure regular watering, particularly during periods of drought, to maintain even soil moisture without causing waterlogging. Applying mulch around the plant’s base aids in preserving soil moisture and controlling weed growth.

Fertilization

In the early spring, apply a balanced fertilizer following the manufacturer’s guidelines. Avoid over-fertilizing, as excessive nutrients can lead to lush foliage at the expense of flower production.

4. Maintenance and Care

Pruning and Deadheading

Deadheading spent flowers promotes ongoing blooms and helps keep a neat appearance. After the plant has finished blooming for the season, you can cut it back to ground level to promote fresh growth and rejuvenate the plant.

Winter Care

Apply mulch around the plant’s base in late fall to insulate the roots against freezing temperatures. In colder climates, additional winter protection such as covering with burlap or a layer of straw may be necessary.

5. Pests and Diseases

Common Pests

Aphids, slugs, and snails can occasionally be a problem for Bleeding Heart plants. Monitor your plants regularly and treat any infestations promptly using insecticidal soap or other organic pest control methods.

Disease Prevention

Powdery mildew and root rot are potential concerns for Bleeding Hearts. Ensuring proper spacing, facilitating adequate air flow, and refraining from overhead watering are effective strategies to prevent these problems. If signs of disease appear, treat the plant with fungicides or other appropriate treatments as recommended.

Conclusion:

The Bleeding Heart plant, with its heartwarming beauty and easy-care nature, is a delightful addition to any garden. By providing the right growing conditions, regular watering, and minimal maintenance, you can enjoy the charm of these romantic blooms year after year. Whether planted in borders, woodland gardens, or containers, the Bleeding Heart’s unique flowers and elegant foliage are sure to captivate and enchant all who behold them.

Happy Gardening!

Growing Night Queen (Epiphyllum) – A Guide to Enchanting Blooms!

Introduction:

The Night Queen, scientifically known as Epiphyllum, is a captivating plant known for its stunning nocturnal blooms and easy-care nature. Originating from the tropical regions of Central and South America, this epiphytic cactus has gained popularity among plant enthusiasts for its enchanting beauty and unique flowering habits. In this article, we’ll delve into the world of growing and caring for the Night Queen, unlocking the secrets to cultivating these mesmerizing plants in your own garden or indoor space.

1. Understanding the Night Queen (Epiphyllum)

Botanical Background

Epiphyllum, commonly known as the Night Queen or Orchid Cactus, belongs to the cactus family but lacks the typical spines associated with cacti. Instead, it features flat, leaf-like stems that provide a striking backdrop for its magnificent blooms. These blooms, which appear primarily at night, are often fragrant and come in a range of colors, including white, pink, red, and orange.

Light Requirements

Being a tropical plant, the Night Queen thrives in bright, indirect light. Place it near a window where it can receive ample sunlight but avoid direct exposure to intense midday sun, which can scorch its leaves. If grown indoors, artificial grow lights can also be used to supplement natural light.

2. Planting the Night Queen

Soil Mix

A well-draining soil mix is essential for the Night Queen’s health. A combination of peat moss, perlite, and orchid bark works well, providing the plant with the moisture retention it needs while ensuring excess water drains away efficiently.

Potting

Choose a pot with proper drainage holes to prevent waterlogging, which can cause root rot. Repotting is generally recommended every two to three years or when a plant has outgrown its existing pot. Use a pot that allows room for the plant to grow and expand its root system.

3. Watering and Feeding

Watering

Moderate watering is key to the Night Queen’s well-being. Water the plant thoroughly once the top inch of soil is dry to the touch, ensuring any excess water can drain off. In the winter, decrease the frequency of watering to reflect its natural period of dormancy.

Fertilization

Fertilize monthly during the growing season, which includes spring and summer,using a balanced liquid fertilizer at half strength. This will provide the Night Queen with the nutrients it needs to produce healthy foliage and vibrant blooms.

4. Temperature and Humidity

Temperature

Maintain a consistent temperature between 65-85°F (18-29°C) for optimal growth. The Night Queen is sensitive to cold temperatures, so avoid exposing it to drafts or sudden temperature drops, which can cause leaf damage.

Humidity

Being a tropical plant, the Night Queen appreciates higher humidity levels. If grown indoors, consider placing the plant on a humidity tray filled with pebbles and water or use a room humidifier to increase moisture levels around the plant.

5. Pruning and Propagation

Pruning

Regular pruning helps maintain the Night Queen’s shape and promotes new growth. Remove any dead, damaged, or overgrown stems using sharp, sterile pruning shears. While pruning can be performed as necessary throughout the year, it is generally best to prune plants during their dormant season to promote healthy growth and blooming.

Propagation

Propagating the Night Queen is relatively straightforward and can be done using stem cuttings. Choose a healthy stem and cut a section that is at least 6 inches long. Allow the cut end to dry and callous for a few days before planting it in a well-draining soil mix. Maintain moist soil and ensure exposure to bright, indirect sunlight until signs of new growth are evident.

Conclusion

The Night Queen, with its mesmerizing blooms and easy-care nature, is a delightful addition to any garden or indoor space. By understanding its light, water, and temperature requirements, as well as proper planting, feeding, and care techniques, you can enjoy the beauty of this enchanting plant year-round. Whether you’re a seasoned gardener or a beginner, growing the Night Queen is a rewarding experience that will captivate your senses and bring joy with its stunning displays.

Growing and Maintaining Gerbera Plants: A Complete Guide to Vibrant Blooms!

Introduction:

Gerbera plants, with their vibrant and colorful blooms, are a delightful addition to any garden or indoor space. Known for their daisy-like flowers and long-lasting blossoms, gerberas are relatively easy to grow with proper care and maintenance. In this comprehensive guide, we’ll explore everything you need to know about cultivating and nurturing gerbera plants for continuous and vibrant flowering.

Understanding Gerbera Plants:

Gerbera (Gerbera jamesonii) is a genus of ornamental plants native to South Africa, belonging to the Asteraceae family. These perennial flowering plants are cherished for their large, showy flowers, which come in a variety of colors, including red, yellow, orange, pink, and white. Gerberas thrive in moderate climates and are commonly grown as outdoor bedding plants, container plants, or cut flowers for floral arrangements.

Growing Conditions:

To ensure optimal growth and blooming, it’s essential to provide gerbera plants with the right growing conditions:

Sunlight: Gerberas prefer bright, indirect sunlight or partial shade. In hotter climates, they benefit from some protection from the intense afternoon sun to prevent scorching of the leaves and flowers.

Temperature: Gerberas thrive in moderate temperatures ranging from 65°F to 75°F (18°C to 24°C). Protect them from frost and extreme cold, as prolonged exposure can damage the foliage and flowers.

Soil: Well-draining, fertile soil with a slightly acidic to neutral pH (around 6.0 to 6.5) is ideal for gerbera plants. Add organic matter to your soil, such as compost or peat moss, to help with fertility and soil structure.

Watering: Make sure the soil is constantly damp but not soggy. Water gerberas thoroughly when the top inch of soil feels dry to the touch, and avoid overhead watering to prevent fungal diseases.

Planting and Propagation:

Gerberas can be propagated from seeds, division, or tissue culture. Here’s how to plant and propagate gerbera plants effectively:

Seed Propagation: Sow gerbera seeds in seed-starting trays filled with a well-draining potting mix. Keep the seeds moist and lightly cover with soil until germination takes place. Transplant the seedlings into individual pots once they develop true leaves.

Division: Mature gerbera plants can be divided during the dormant season or early spring. Carefully separate the clumps of rhizomes, ensuring each division has healthy roots and foliage. Plant the divisions in separate containers or directly in the garden bed.


Similar Posts:


Care and Maintenance:

Proper care and maintenance are essential for promoting healthy growth and continuous blooming of gerbera plants. Follow these tips to ensure your gerberas thrive:

Deadheading: Remove spent flowers regularly to encourage the production of new blooms and prevent the plant from diverting energy into seed production.

Fertilization: Feed gerbera plants with a balanced, water-soluble fertilizer every two to four weeks during the growing season. High-nitrogen fertilizers should be avoided as they may encourage the growth of foliage at the expense of flowers.

Pest and Disease Control: Monitor gerbera plants for common pests such as aphids, spider mites, and whiteflies. Use neem oil or insecticidal soap to quickly treat infestations. Furthermore, keep fungal diseases at bay by avoiding overhead watering and maintaining adequate air circulation.

Support: Tall varieties of gerbera plants may require staking or support to prevent the flower stems from bending or breaking. Use bamboo stakes or plant supports to provide structural support as needed.

Pruning and Deadheading:

Regular pruning and deadheading are essential for maintaining the health and appearance of gerbera plants. Follow these guidelines for pruning and deadheading gerberas:

Pruning: Remove any dead, damaged, or yellowing leaves and stems as needed throughout the growing season. To make precise cuts and stop spreading of diseases, use sharp, clean pruning shears.

Deadheading: Pinch or cut off spent flowers as soon as they fade to promote continuous blooming. Trim the flower stems back to the base of the plant or to a healthy set of leaves to encourage new flower buds to develop.

Conclusion:

Growing and maintaining gerbera plants can be a rewarding experience for gardeners of all skill levels. By providing the right growing conditions, proper care, and regular maintenance, you can enjoy a profusion of vibrant blooms throughout the growing season. Whether grown in garden beds, containers, or as cut flowers, gerberas add a splash of color and beauty to any landscape or indoor space. Incorporate these tips and techniques into your gardening routine to cultivate healthy, thriving gerbera plants and enjoy their stunning flowers year after year.

Happy Gardening!