The Ultimate Guide to Hugelkultur: Elevating Your Garden with Hugel Beds!

Introduction

Hugel Beds

Hugelkultur, also known as hugel beds, is an ancient gardening method that has been embraced by modern permaculturists for its sustainability and efficiency. Originating from Eastern Europe and Germany, this technique involves creating raised beds filled with decaying wood and organic matter. Hugel beds are celebrated for their ability to retain moisture, improve soil health, and boost plant growth. In this comprehensive guide, we’ll explore the benefits of hugel beds, how to create them, and tips for maintaining these garden powerhouses.

What is Hugelkultur?

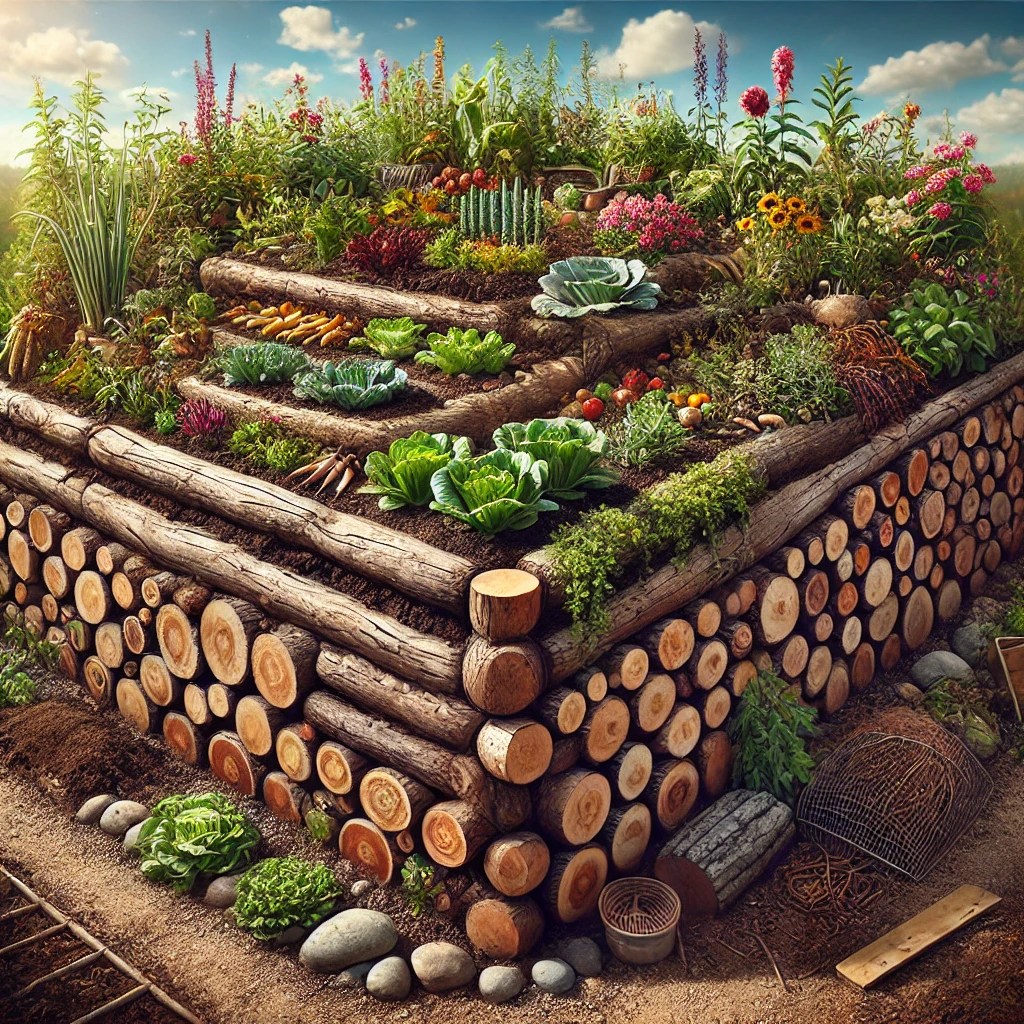
Hugelkultur, which translates to “hill culture” or “mound culture,” is a gardening method where a mound is constructed using decaying wood debris and other organic materials. The mound is then covered with soil and used as a planting bed. The decaying wood at the core of the mound acts as a sponge, absorbing and retaining water, which reduces the need for frequent watering.

Benefits of Hugel Beds

Water Retention and Conservation: One of the most significant advantages of hugel beds is their ability to retain water. The decaying wood absorbs rainwater and slowly releases it into the surrounding soil. This natural irrigation system reduces the need for frequent watering, making hugel beds ideal for areas prone to drought.

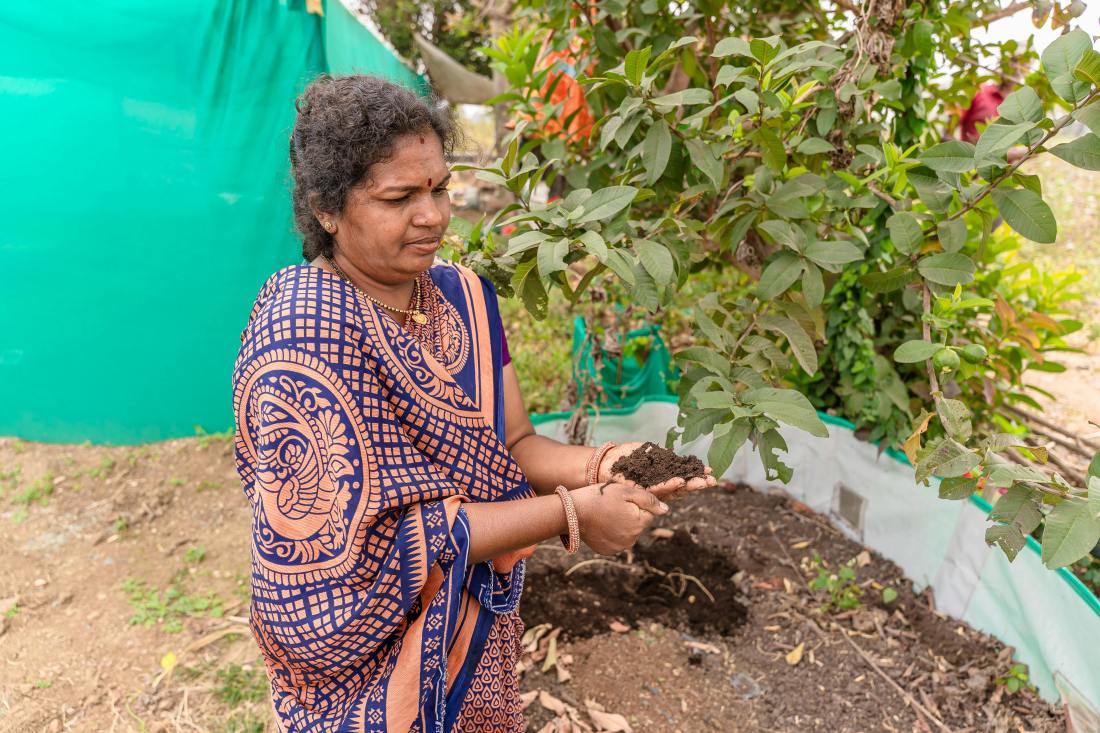
Enhanced Soil Fertility: As the wood and organic materials decompose, they enrich the soil with nutrients. This slow release of nutrients provides a long-term food source for plants, resulting in healthier and more vigorous growth. The decomposition process also encourages beneficial microbial activity, further enhancing soil fertility.

Improved Soil Structure: Hugel beds improve soil structure by increasing aeration and drainage. The mound’s layered composition prevents soil compaction and promotes root penetration. This leads to stronger root systems and healthier plants.

Pest and Weed Management: The raised nature of hugel beds can help with pest control by creating a physical barrier that deters some ground-dwelling pests. Additionally, the dense planting often associated with hugel beds can suppress weed growth, reducing the need for chemical herbicides.

Carbon Sequestration: By incorporating large amounts of woody debris into the soil, hugel beds contribute to carbon sequestration. This process helps mitigate climate change by trapping carbon in the soil and reducing greenhouse gas emissions.

Extended Growing Season: The decomposition process in hugel beds generates heat, which can create a warmer microclimate for plants. This can extend the growing season, allowing gardeners to plant earlier in the spring and harvest later in the fall.


Similar Posts:


How to Create a Hugel Bed

Creating a hugel bed involves several steps, but the process is straightforward and can be adapted to any garden size or layout.

1. Choose a Location: Select a well-drained site with good sunlight exposure. Consider the bed’s proximity to water sources and other garden features.

2. Gather Materials: You’ll need a variety of organic materials, including:

  • Large logs or branches
  • Smaller branches and twigs
  • Leaves, grass clippings, and straw
  • Compost or manure
  • Topsoil

3. Build the Base: Start by laying large logs or branches directly on the ground. These will form the core of your hugel bed. Organize them in a manner that forms a stable base.

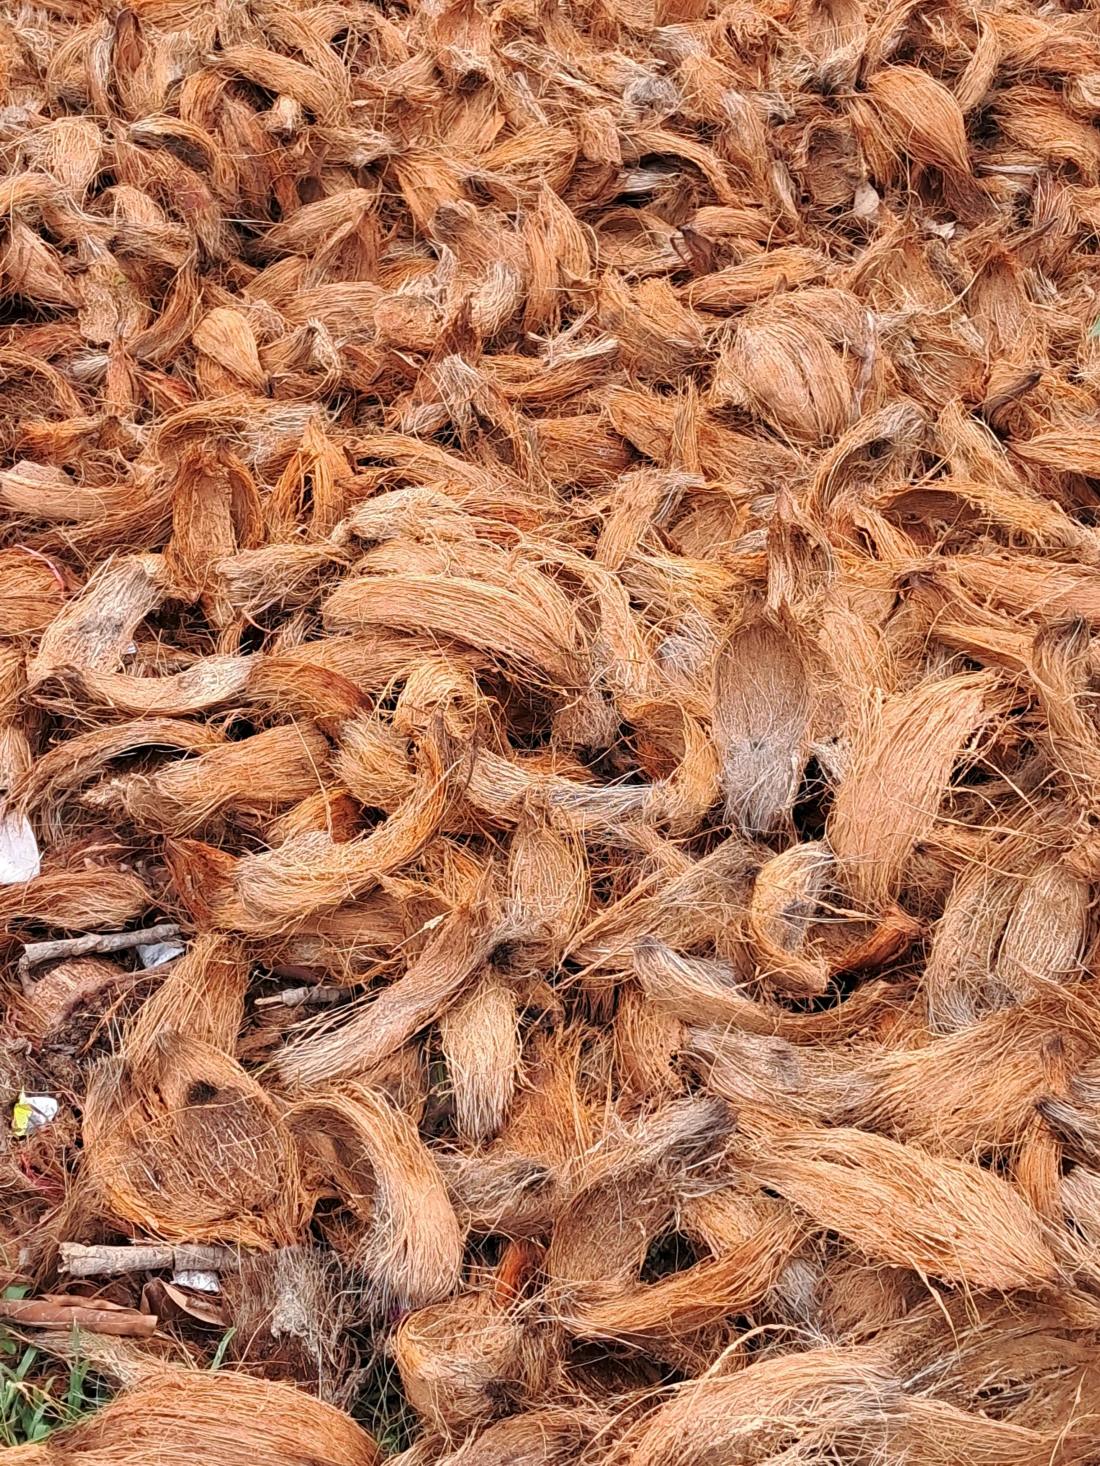
4. Add Layers: Layer smaller branches and twigs on top of the large logs. Follow with a layer of leaves, grass clippings, or straw. These materials will fill in the gaps and add more organic matter to the bed.

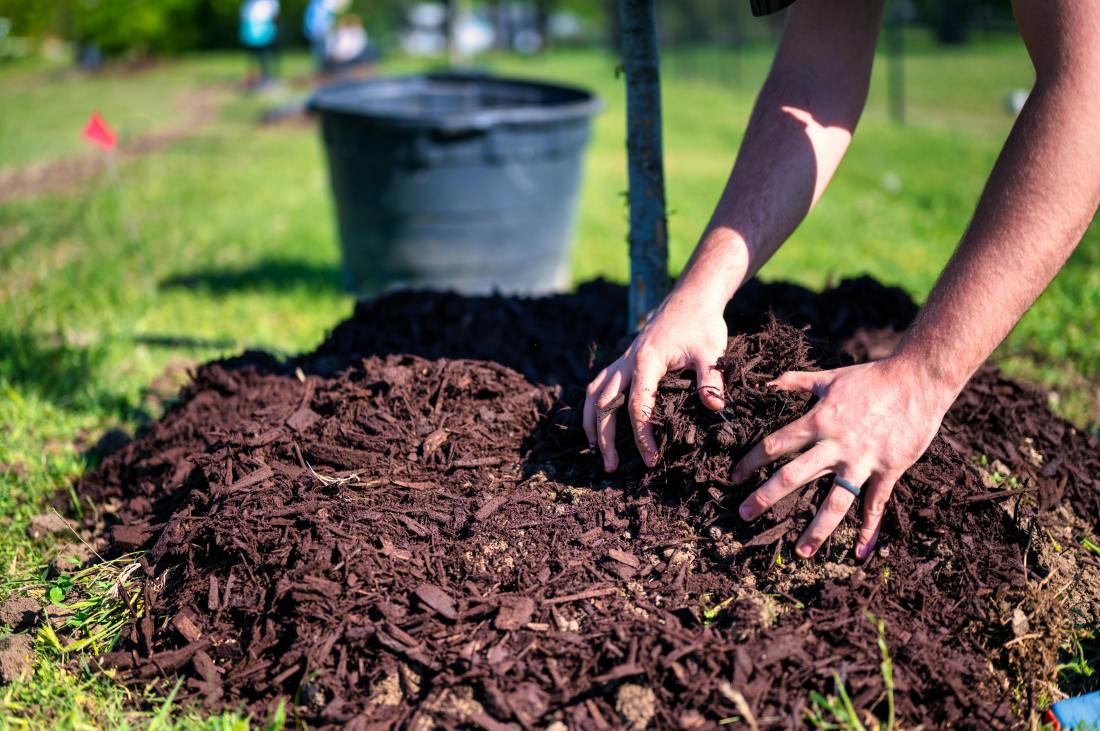
5. Add Compost or Manure: Add a layer of compost or manure to provide additional nutrients. This layer will kickstart the decomposition process and enrich the soil.

6. Cover with Topsoil: Finally, cover the entire mound with a thick layer of topsoil. The soil layer should be deep enough to allow for planting.

7. Water Thoroughly: Water the hugel bed thoroughly to settle the materials and start the decomposition process.

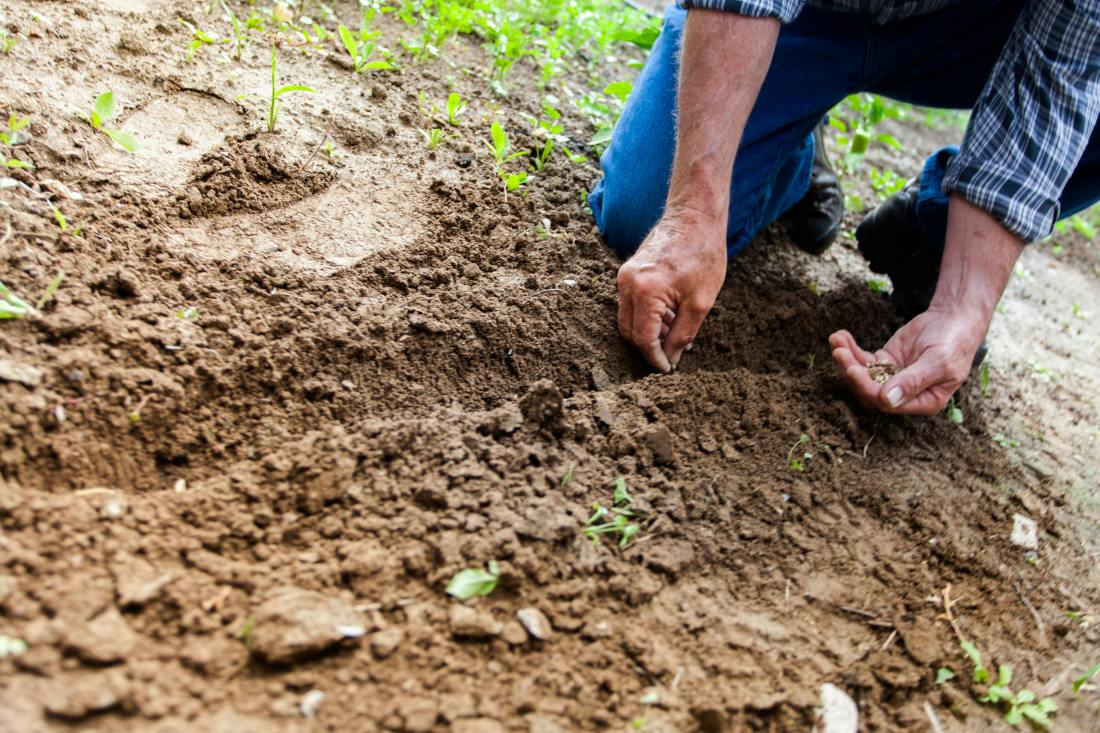
8. Plant Your Garden: Once the hugel bed is built and settled, you can start planting. Choose a mix of shallow-rooted and deep-rooted plants to maximize space and resources.

Maintaining Your Hugel Bed

Maintaining a hugel bed is relatively easy, but there are a few key practices to keep in mind:

Watering: Initially, you may need to water the hugel bed more frequently until the wood becomes fully saturated. After this period, the bed will require less water due to its natural water retention capabilities.

Mulching Add a layer of mulch to the surface of the hugel bed to help retain moisture, suppress weeds, and add organic matter as it decomposes.

Crop Rotation: Practice crop rotation to prevent soil depletion and manage pests. Rotate different plant families through your hugel bed to maintain soil health and productivity.

Periodic Inspections: Regularly check your hugel bed for signs of pests, diseases, or nutrient deficiencies. Make sure to address any issues quickly to maintain the health and vitality of your garden.

Conclusion

Hugelkultur is a time-tested gardening technique that offers numerous benefits for gardeners looking to create sustainable and productive growing spaces. By utilizing decaying wood and organic matter, hugel beds enhance soil fertility, improve water retention, and support robust plant growth. Whether you’re an experienced gardener or a novice, incorporating hugel beds into your garden can transform your gardening experience and yield impressive results. Embrace the principles of hugelkultur and watch your garden flourish!

Happy Gardening! 🌱

Is Rice Water the Secret to a Thriving Garden? Explore Its Incredible Benefits Now!

Introduction

Garden enthusiasts continually seek natural and effective solutions to boost plant growth and health. One such age-old remedy that has gained attention is rice water. Often discarded after cooking rice, this nutrient-rich liquid is brimming with benefits that can significantly contribute to your garden’s well-being. Let’s delve into the multifaceted uses of rice water in gardening, alongside its advantages and potential drawbacks.

The Nutrient Profile of Rice Water

Rice water, the starchy liquid left behind after rinsing or boiling rice, is packed with essential nutrients that are beneficial for plants. It contains:

  • Vitamins such as B1 (thiamine), B2 (riboflavin), B6 (pyridoxine), and vitamin E.
  • Amino acids: are crucial for plant growth.
  • Minerals like phosphorus and potassium that aid in root development and flowering.
  • Carbohydrates: provide an immediate energy source for plants.

Using Rice Water in Gardening

Soil Conditioner

Rice water serves as an excellent soil conditioner. The nutrients present in the water improve soil fertility, promoting the growth of beneficial microorganisms that aid in breaking down organic matter. This, in turn, enhances nutrient availability for plants, leading to healthier and more vigorous growth.

Fertilizer

One of the primary uses of rice water in gardening is as a fertilizer. Its nutrient content helps in the overall development of plants. Regular application can result in lush foliage, robust root systems, and improved flowering and fruiting. To use rice water as a fertilizer, simply dilute it with an equal amount of water and apply it to the base of your plants.

Pest Deterrent

The starch in rice water can create a protective barrier on plant leaves, making them less appealing to pests. While it may not completely eliminate pests, it can reduce their presence and prevent minor infestations from becoming major problems. Spray diluted rice water on the leaves to create this protective coating.

Seed Soaking Solution

Soaking seeds in rice water before planting can enhance germination rates. The nutrients in the water provide the seeds with a nutrient boost, giving them a head start in their growth journey. Simply soak the seeds in rice water for 12-24 hours before planting them in the soil.

Compost Booster

Adding rice water to your compost pile can speed up the decomposition process. The microorganisms in the compost benefit from the additional nutrients, breaking down organic matter more efficiently. This results in rich, nutrient-dense compost that can be used to nourish your garden.


Similar Posts:


Pros of Using Rice Water in Gardening

Cost-Effective

Using rice water is a cost-effective way to improve your garden’s health. Instead of discarding the water after cooking rice, you can repurpose it, reducing waste and saving money on commercial fertilizers and soil conditioners.

Eco-Friendly

Rice water is an eco-friendly solution that promotes sustainable gardening practices. It reduces the need for chemical fertilizers and pesticides, which can harm the environment and disrupt the balance of your garden ecosystem.

Nutrient-Rich

The nutrient profile of rice water makes it a valuable addition to your gardening routine. It provides essential vitamins, minerals, and amino acids that support plant growth and development.

Enhances Soil Health

Regular application of rice water improves soil health by promoting the growth of beneficial microorganisms. This leads to better nutrient availability and improved soil structure, resulting in healthier plants.

Versatile

Rice water can be used in various ways in the garden, from fertilizing and conditioning the soil to deterring pests and enhancing seed germination. Its versatility makes rice water a valuable asset for a gardener.

Cons of Using Rice Water in Gardening

Potential for Overuse

While rice water is beneficial, overusing it can lead to nutrient imbalances in the soil. Too much starch can create an environment conducive to the growth of harmful microorganisms, which can negatively affect plant health. It’s essential to use rice water in moderation and dilute it before application.

Odor

Rice water can develop an unpleasant odor if left to sit for too long. This can be off-putting for some gardeners and may attract unwanted pests. To avoid this, use fresh rice water or store it in the refrigerator for no more than a week.

Attracts Pests

While rice water can deter some pests, it may attract others, especially if it starts to ferment. Fermented rice water can attract flies and other insects that can become a nuisance in the garden. It’s crucial to monitor its usage and ensure it doesn’t become a pest attractant.

Limited Nutrient Spectrum

Although rice water is nutrient-rich, it doesn’t provide all the essential nutrients that plants need. Relying solely on rice water may result in nutrient deficiencies over time. It’s important to use it as part of a balanced gardening regimen, complementing it with other fertilizers and soil amendments.

Risk of Pathogens

If not properly prepared or stored, rice water can harbor pathogens that can harm plants. It’s vital to ensure that the water is clean and hasn’t been left to sit at room temperature for extended periods. Using boiled rice water can mitigate this risk, as the heat kills potential pathogens.

Conclusion

In conclusion, rice water is a valuable resource for gardeners looking to enhance their plant’s health and promote sustainable gardening practices. Its nutrient-rich profile and versatility make it an excellent addition to your gardening toolkit. However, it’s essential to use it in moderation and be mindful of potential drawbacks to ensure the best results for your garden. By incorporating rice water into a balanced gardening regimen, you can enjoy the benefits of this natural remedy while maintaining the health and vitality of your plants.

Happy Gardening!

The Use of Mulch in Gardening: A Comprehensive Guide!

Introduction

Mulching is one of the most beneficial practices in gardening, as it enhances plant health, reduces water usage, and improves soil quality. Whether you’re a seasoned gardener or a beginner, understanding how and why to use mulch can make a significant difference in your garden’s success. This SEO-friendly guide will explore the types of mulch, the benefits of using mulch, and how to apply it effectively in your garden.

What is Mulch?

Mulch refers to any material applied to the soil surface around plants to protect the soil, retain moisture, and improve its structure. It can be organic or inorganic and can serve both functional and aesthetic purposes in a garden. Organic mulch materials decompose over time, adding nutrients to the soil, while inorganic mulch primarily serves to suppress weeds and conserve moisture.

Types of Mulch

There are various types of mulch that serve different purposes depending on the plants, soil type, and garden conditions. Here are the most commonly used types of mulch:

Organic Mulch

  1. Wood Chips or Bark: These are among the most common types of organic mulch used in gardening. Wood chips and bark provide long-lasting coverage and improve soil structure as they decompose. They are particularly useful around trees, shrubs, and flower beds.
  2. Straw: Straw mulch is often used in vegetable gardens. It is excellent for preventing weed growth and retaining moisture, and it decomposes faster than wood mulch, enriching the soil more quickly.
  3. Compost: Compost can serve as both a mulch and a soil amendment. It’s nutrient-rich and improves soil health while protecting plants. However, it decomposes faster than other organic mulches, so it may need to be reapplied frequently.
  4. Grass Clippings: If you regularly mow your lawn, you can use grass clippings as mulch. Grass clippings are rich in nitrogen and decompose relatively quickly, feeding nutrients back into the soil.
  5. Leaves: Fallen leaves can be shredded and used as mulch. They add organic matter to the soil and are readily available in most gardens during the fall.
  6. Pine Needles: Pine needles are a great choice for mulching around acid-loving plants like blueberries or azaleas. They allow water to penetrate easily while suppressing weed growth.

Inorganic Mulch

  1. Gravel or Pebbles: These materials are often used in dry or desert landscapes. They don’t decompose, making them ideal for permanent mulch. However, they don’t provide nutrients to the soil and may retain heat, which can harm certain plants.
  2. Plastic Sheeting: Black plastic is sometimes used in vegetable gardens to suppress weeds and retain moisture. It works well for crops like tomatoes or peppers but should be removed during hot weather to prevent soil overheating.
  3. Landscape Fabric: This is a durable material used to control weeds and keep moisture in the soil. It’s often covered with a decorative layer of mulch to improve its appearance.

Similar Posts:


Benefits of Mulch in Gardening

Mulch offers numerous advantages to your garden, promoting healthier plants and reducing the need for watering and weeding. The following are some of the main advantages of applying mulch:

1. Moisture Retention

Mulch helps to retain moisture in the soil, which is one of its biggest benefits. By reducing evaporation, mulch helps the soil stay moist longer, which is particularly beneficial during dry seasons. Additionally, it reduces the need for regular watering, which saves both water and time.

2. Weed Suppression

Mulch acts as a barrier that blocks sunlight from reaching the soil, preventing weeds from germinating. Using a thick layer of mulch can significantly reduce weed growth, minimizing competition for nutrients and water between weeds and your plants.

3. Temperature Regulation

Mulch helps moderate soil temperatures by insulating the ground. During hot weather, mulch keeps the soil cooler, protecting plants from heat stress. In colder months, it prevents soil temperatures from dropping too quickly, allowing roots to remain active for longer periods.

4. Soil Erosion Prevention

Mulch aids in preventing wind and/or heavy rain-induced soil erosion. By covering the soil, it protects the top layer from being washed or blown away, helping maintain the soil’s structure and health.

5. Improved Soil Health

Organic mulch decomposes over time, enriching the soil with valuable nutrients. As it breaks down, it adds organic matter to the soil, improving its structure, fertility, and the ability to retain moisture and nutrients.

6. Aesthetic Appeal

Mulch can enhance the visual appeal of your garden by providing a neat, uniform appearance. Whether you prefer the look of wood chips, gravel, or shredded bark, mulch gives your garden a well-maintained, polished finish.

7. Protection Against Pests

Certain types of mulch, such as cedar or pine bark, have natural insect-repelling properties. Mulch also reduces the splash-back of soil onto plants during rain or watering, which can prevent the spread of soil-borne diseases.

How to Apply Mulch Effectively

To reap the full benefits of mulch, it’s essential to apply it correctly. Here’s a step-by-step guide on how to use mulch in your garden:

1. Prepare the Soil

Before applying mulch, prepare the soil by removing any weeds, rocks, or debris. Water the soil deeply to ensure it has enough moisture before adding mulch, especially in dry climates.

2. Layer the Mulch

For most organic mulches, apply a 2 to 4-inch thick layer around your plants. For lighter mulches like straw or grass clippings, you may need to apply a thicker layer. Avoid piling mulch directly against plant stems, as this can cause rot or attract pests.

3. Reapply as Needed

Organic mulch needs to be replaced because it will decompose over time.  Check your mulch layer periodically and add more when it has decomposed or thinned out.

4. Monitor Watering

While mulch helps retain moisture, it’s still essential to monitor the moisture levels in your soil. Make sure the mulch is not preventing water from reaching the roots, and adjust your watering schedule based on your garden’s needs.

Conclusion

Mulching is an invaluable gardening technique that offers numerous benefits, from moisture retention and weed suppression to improving soil health. By choosing the right type of mulch for your garden and applying it correctly, you can create a healthier, more sustainable growing environment for your plants. Whether you’re mulching flower beds, vegetable gardens, or around trees, incorporating mulch into your gardening routine is a simple and effective way to promote a vibrant, low-maintenance garden.

Happy Gardening!

The Use of Coco Peat in Gardening: A Comprehensive Guide!

Introduction

Coco peat, also known as coir pith or coir dust, is a natural byproduct of coconut husk processing. It is gaining immense popularity among gardeners and horticulturists due to its sustainability, versatility, and effectiveness as a growing medium. In this article, we will explore the benefits of using coco peat in gardening, how it enhances plant growth, and why it is an excellent choice for both home gardeners and commercial growers.

What Is Coco Peat?

Coco peat is derived from the fibrous husk of coconuts. After the long fibers are extracted for products like ropes and mats, the remaining material is processed to produce coco peat. It is a spongy, brown substance that has excellent water-retention properties, making it ideal for gardening. Available in various forms, such as bricks, blocks, and loose bags, coco peat is easy to use and store.

Why Use Coco Peat?

Coco peat has several advantages over traditional soil and other growing mediums. Its natural, eco-friendly properties make it an attractive option for gardeners looking to improve soil quality, enhance plant growth, and reduce their environmental footprint.

Benefits of Coco Peat in Gardening

Water Retention and Moisture Control

Coco peat can absorb up to 10 times its weight in water, making it an excellent medium for water retention. This characteristic helps maintain consistent moisture levels in the soil, preventing plants from drying out too quickly. It is especially useful for plants that require a steady water supply or in regions with dry climates.

Aeration and Root Development

Coco peat provides superior aeration to the roots of plants. Its porous structure allows for good airflow, which prevents soil compaction and promotes healthy root development. Proper aeration is essential for plants to absorb oxygen and nutrients, leading to stronger growth and higher yields.

Sustainable and Eco-Friendly

One of the biggest benefits of coco peat is its sustainability. It is a renewable resource, as coconuts are harvested multiple times a year. Unlike peat moss, which is harvested from non-renewable peat bogs, coco peat is an eco-friendly alternative that doesn’t deplete natural habitats. Using coco peat supports sustainable gardening practices and reduces your environmental impact.

Neutral pH Level

Coco peat has a near-neutral pH level, typically ranging between 5.5 and 6.5. This makes it suitable for a wide range of plants, as it doesn’t alter the pH of the soil significantly. It helps create an optimal growing environment without the need for chemical soil amendments.

Nutrient-Rich Amendments

While coco peat itself is low in nutrients, it acts as an excellent medium for mixing with fertilizers and organic matter. It enhances the nutrient-holding capacity of the soil, allowing plants to receive a steady supply of nutrients over time. This slow-release nature reduces the need for frequent fertilization, making it an efficient and cost-effective solution.

Improves Soil Structure

Coco peat is a natural soil conditioner. When mixed with garden soil, it improves the texture and structure, making the soil more friable and easier to work with. It loosens heavy clay soils and helps sandy soils retain water and nutrients, providing an ideal balance for plant growth.

Eco-Friendly Pest Control

Coco peat has natural antifungal properties, which can help protect plants from root diseases and fungal infections. Additionally, it doesn’t attract pests like some organic materials, reducing the need for chemical pest control in your garden.

Reusable and Long-Lasting

Coco peat can be reused multiple times before it begins to break down. After a growing season, it can be rehydrated and mixed with fresh materials for continued use. This longevity makes it a cost-effective option for gardeners who want to maximize the lifespan of their growing medium.


Similar Posts:


How to Use Coco Peat in Gardening

1. Hydrate the Coco Peat

Coco peat is typically sold in a compressed form, such as bricks or blocks. Before using it, you’ll need to hydrate it by soaking the block in water. A small brick of coco peat can expand up to several times its original size when soaked, creating a light and fluffy medium that’s easy to work with.

2. Mix with Soil or Compost

Coco peat can be used on its own or mixed with garden soil, compost, or other organic materials. For potting mixes, a common ratio is 50% coco peat and 50% compost or garden soil. This mixture provides the perfect balance of water retention, aeration, and nutrients for healthy plant growth.

3. Use as Mulch

Coco peat also works well as mulch. Spread a layer of coco peat on top of the soil around your plants to help retain moisture, regulate soil temperature, and suppress weeds. Unlike some other mulches, coco peat breaks down slowly and adds organic matter to the soil over time.

4. Seed Starting

Coco peat is an ideal medium for starting seeds. Its fine texture allows seeds to germinate easily, while its water-retaining properties ensure that seedlings receive adequate moisture during their early stages of growth. Once the seeds have sprouted, the coco peat can be transplanted directly into the soil without disrupting the delicate roots.

5. Hydroponics

Coco peat is widely used in hydroponic systems due to its excellent water-retention capacity and aeration properties. It can be combined with perlite or other inert materials to create a balanced growing medium for hydroponic plants. Since it doesn’t decompose quickly, coco peat provides a stable environment for plants in hydroponic systems.

Tips for Using Coco Peat Effectively

Monitor Watering Needs

While coco peat retains water exceptionally well, it’s important to monitor the moisture levels in your garden or pots. Overwatering can still lead to root rot, especially in plants that prefer drier conditions. Ensure that the soil is draining properly, and adjust your watering schedule accordingly.

Add Fertilizer

Since coco peat itself is low in nutrients, be sure to supplement it with organic fertilizers or compost. Regularly feed your plants with a balanced fertilizer to ensure they receive the nutrients they need for optimal growth.

Reuse Wisely

Coco peat can be reused, but after each growing season, it’s a good idea to refresh the medium by mixing it with new compost or organic matter. This will ensure that your plants continue to receive adequate nutrition and support.

Conclusion

Coco peat is an incredibly versatile and sustainable growing medium that offers numerous benefits to gardeners. From its excellent water-retention properties to its eco-friendly nature, coco peat can enhance the health and productivity of your garden. Whether you’re starting seeds, growing vegetables, or improving your garden soil, coco peat is a reliable and effective choice that helps create a thriving, low-maintenance garden. By incorporating coco peat into your gardening routine, you’ll not only promote plant growth but also contribute to a more sustainable and eco-conscious approach to gardening.

Happy Gardening!

Cow Dung Fertilizer: A Traditional and Highly Beneficial Organic Option!

cow dung fertilizer0

Introduction

Cow dung has long been a staple fertilizer in rural areas, prized for its availability and organic nature. Cow dung is rich in nutrients and has a 3-2-1 NPK ratio, making it suitable for almost all types of plants. It’s also environmentally friendly because it produces very few greenhouse gases. As a natural resource, cow dung is often used to enrich the soil and promote plant growth. Its dried form, known as cow dung cakes, offers several advantages that make it safer and more effective for gardening.

What is a Cow Dung Cake and How is It Made?

Cow dung is simply the waste material excreted by cows. When fresh, it contains high levels of nitrogen, which can generate excessive heat and potentially harm plants. However, when the dung is dried, it loses some of its nitrogen content, making it safer to use as a fertilizer. This dried form, known as cow dung cake, is created by simply spreading fresh cow dung in the sun until it dries completely. Once dried, it can be used as a nutrient-rich fertilizer for your garden.

Benefits of Using Cow Dung Cakes

Using cow dung cakes as fertilizer comes with several benefits that can greatly enhance your gardening experience:

  • Organic and Environmentally Friendly

Cow dung is a completely organic fertilizer, making it an environmentally friendly choice for gardening and farming. Unlike synthetic fertilizers, which can introduce harmful chemicals into the soil and water supply, cow dung enriches the soil naturally without any negative environmental impact. Using cow dung as a fertilizer helps maintain the ecological balance, promotes soil health, and supports sustainable agricultural practices. It’s a great way to nourish your plants while being kind to the planet.

  • Reduced Nitrogen Content

One of the primary advantages of cow dung fertilizer is its reduced nitrogen content. Fresh cow dung contains high nitrogen levels, which can cause root burn if applied directly. The drying process of cow dung cakes lowers this nitrogen content, making it safer and less likely to damage your plants. The main goal of creating cow dung compost is to reduce the heat generated by nitrogen, and dried cow dung cakes achieve this effectively.

  • Improved Absorption

Cow dung cakes have a better absorption rate when applied to the roots of plants. The nutrients from the cake mix with water, allowing them to be more easily absorbed by the plant roots. When applied correctly, cow dung cakes can provide nutrients more effectively than fresh cow dung.

  • Slow Release of Nutrients

Another significant benefit of cow dung cakes is their slow-release nature. As the nutrients in the cake gradually break down in the soil, they provide a consistent supply of nourishment to the plants over time. This steady release helps ensure that the plants receive the nutrients they need for sustained growth.

  • Enhanced Foliar Growth

Cow dung cakes are rich in nitrogen, which is essential for promoting healthy foliar growth. Nitrogen is a key nutrient responsible for the development of leaves, making cow dung fertilizer particularly beneficial for leafy plants.

  • Trace Elements

In addition to nitrogen, cow dung contains a variety of trace elements that are essential for plant health. These microelements help prevent leaf problems, promote better overall growth, and contribute to larger, healthier fruits, flowers, and vegetables. Without these trace elements, plants may struggle to thrive.


Similar Posts:


Tips for Using Cow Dung Cakes

To get the most out of cow dung cakes, it’s important to apply them correctly and in the right amounts. Proper usage can maximize the benefits while minimizing any potential side effects.

  • Using Cow Dung Cakes for Potted Plants

For potted plants, start by crushing the cow dung cakes into a fine powder. The ideal amount is 4 tablespoons for a 10-inch pot, adjusting the dosage based on the size of the pot. Once you’ve measured the appropriate amount, mix the powder thoroughly with the soil. You can apply this cow dung powder every two weeks during the winter months. However, it’s best to avoid using it during hot summers, as the heat can intensify the effects. After applying the powder, water the plant frequently to help the nutrients absorb into the soil. The best time to apply cow dung is in the cool evening.

  • Making Cow Dung Liquid Fertilizer

Another effective way to use cow dung cakes is to create a liquid fertilizer. This method is even safer, as it allows for better absorption and reduces the risk of nitrogen-related heat damage. To make liquid fertilizer, simply soak the cow dung cakes in a liter of water for at least 1-2 nights. Once the cakes have settled in the water, the liquid is ready to use. Dilute this liquid with 8 parts of water, and apply 100ml of the diluted mixture to a 5-inch pot, doubling the dose for larger pots. The best time to apply this liquid fertilizer is in the evening or early morning. It’s safe to use throughout the year, providing consistent nourishment for your plants.

  • Making Panchagavya

Panchagavya, also known as Panchakavyam, is a traditional mixture used in Hindu rituals and Ayurvedic medicine. It’s also widely used in gardening. It is made from five cow-derived products: cow dung, cow urine, milk, curd, and ghee12. These ingredients are mixed and allowed to ferment.

Here’s a recipe for making panchagavya, a mixture that’s used for farming:

Mix 7 kg of cow dung and 1 kg of cow ghee in a wide-mouthed container. Stir in the morning and evening for three days. Mix 10 liters of cow urine and 10 liters of water in a separate container. Stir in the morning and evening for 15 days. After 15 days, mix in 3 liters of cow milk, 2 liters of cow curd, 3 liters of tender coconut water, and 3 kg of jaggery. Add all the ingredients to a wide-mouthed container, like a mud pot, concrete tank, or plastic can. Keep the container open in the shade and stir twice a day.

You can use panchagavya as a liquid fertilizer or foliar spray:

Liquid fertilizer: Dilute panchagavya with 30 parts water. Apply this fertilizer once in a week.

Foliar spray: Filter the liquid with a cotton cloth and spray on plants weekly.

Can Cow Dung Cakes Be Used for All Plants?

Cow dung cakes can be used on a wide variety of plants, including flowering plants, fruiting trees, seasonal vegetables, leafy houseplants, cacti, and succulents. However, it’s crucial to follow the correct dosage and application methods to avoid any adverse effects.

Preventive Measures When Using Cow Dung

While cow dung is a valuable fertilizer, there are a few precautions to keep in mind:

Avoid Using on Seedlings: Never apply cow dung to seedlings that are less than a month old, as they are too delicate to handle the nutrients.

Avoid in Hot Summers: Do not use cow dung during hot summers or on sunny days. The best time to apply is during cool evenings.

Monitor Usage: Overuse of cow dung fertilizer can lead to leaf burn, so it’s essential to use it sparingly.

Remove Weeds: Sometimes cow dung contains seeds of grass or other weeds. Keep a watch, and if weeds start to grow, remove them immediately; otherwise, they will absorb all the nutrients from the soil.

For the safest and most effective results, consider decomposing cow dung cakes into compost before using them. This composted form can be applied to any plant at any time without the risk of damage.

Cow dung cakes offer a traditional, organic way to enrich your garden, providing essential nutrients while being safe and easy to use.

Conclusion

Cow dung is a powerful and versatile natural fertilizer that has been used for centuries. Its many benefits, such as being low in nitrogen, improving nutrient absorption, promoting steady growth, encouraging foliar development, and providing essential trace elements, make it an excellent choice for healthy plant growth. Furthermore, as an organic and eco-friendly option, cow dung helps support sustainable gardening practices while enriching the soil without harmful chemicals. By using cow dung cakes or compost correctly, you can boost the health and productivity of your plants, making your garden flourish naturally.

Happy Gardening!

The Ultimate Guide to Gardening: Do’s and Don’ts for a Flourishing Garden!

Introduction

Gardening is a delightful hobby that allows you to connect with nature, beautify your surroundings, and even produce your own fruits and vegetables. However, like any other endeavor, gardening requires knowledge and care to be successful. In this article, we’ll go over the key dos and don’ts in this in-depth guide to assist you in creating a successful garden.

The Do’s of Gardening

1. Do Plan Before Planting

Do: Research the plants suitable for your climate, soil type, and sunlight conditions. Plan the layout of your garden to ensure adequate spacing between plants and easy access for maintenance.

2. Do Prepare the Soil

Do: Invest in good quality soil or amend your existing soil with compost and organic matter to improve its fertility and structure. Healthy soil is the first step and the basis of a successful garden.

3. Do Water Wisely

Do: Water your plants deeply but infrequently to encourage deep root growth. Use a soaker hose or drip irrigation system to deliver water directly to the root zone and minimize water waste.

4. Do Mulch

Do: Apply a layer of organic mulch like straw, wood chips, or compost to help retain moisture, suppress weeds, and regulate soil temperature. Mulching is an excellent way to conserve water and improve soil health.

5. Do Regular Maintenance

Do: Regularly check for weeds, pests, and diseases and take prompt action to address any issues. Prune dead or damaged branches, and fertilize your plants as needed to promote healthy growth.

6. Do Rotate Crops

Do: Practice crop rotation to prevent soil depletion and reduce the risk of pests and diseases. Rotate plants from different families to maintain soil fertility and overall garden health.

7. Do Compost

Do: Start a compost pile or bin to recycle kitchen scraps, yard waste, and other organic materials into nutrient-rich compost for your garden. Composting is an eco-friendly way to improve soil fertility and reduce waste.


Similar Posts:


The Don’ts of Gardening

1. Don’t Overwater

Don’t: Avoid overwatering your plants as it can lead to root rot and other moisture-related problems. To determine when to water, use a moisture meter or feel the soil with your finger.

2. Don’t Plant Invasive Species

Don’t: Avoid planting invasive species that can outcompete native plants and harm local ecosystems. Research the plants you choose to ensure they are not considered invasive in your area.

3. Don’t Use Chemical Pesticides

Don’t: Resist the temptation to use chemical pesticides and herbicides as they can harm beneficial insects, pollinators, and even your plants. Whenever possible choose natural and organic pest control techniques.

4. Don’t Neglect Pest Control

Don’t: Ignoring pest and disease issues can quickly escalate and cause widespread damage to your garden. Keep a close eye on your plants and take preventative action to keep pests and diseases under control.

5. Don’t Plant Too Deep

Don’t: Avoid planting your seeds or seedlings too deep as it can hinder germination and root development. Follow the planting instructions provided for each plant to ensure proper depth.

6. Don’t Overfertilize

Don’t: Overfertilizing can lead to nutrient imbalances, burn your plants’ roots, and harm beneficial soil organisms. Use fertilizers sparingly and follow the manufacturer’s instructions for application rates.

7. Don’t Ignore Sunlight Requirements

Don’t: Ignoring the sunlight requirements of your plants can result in poor growth and reduced yields. Plant sun-loving plants in sunny spots and shade-loving plants in shaded areas to ensure they thrive.

Conclusion

Gardening is a fulfilling and rewarding activity that offers numerous benefits for your physical and mental well-being. By following these do’s and don’ts, you can create a flourishing garden that brings joy and beauty to your outdoor space while respecting nature and the environment.

Remember, gardening is a learning process, and it’s okay to make mistakes along the way. The key is to observe, adapt, and enjoy the journey as you nurture your garden to its fullest potential.

Happy Gardening!

Top 10 YouTube Channels for Gardening Enthusiasts: Your Green Thumb Guide!

Introduction:

In recent years, YouTube has blossomed into a hub of gardening expertise, offering a plethora of channels dedicated to nurturing greenery, cultivating thriving gardens, and sharing gardening wisdom. Whether you’re a seasoned horticulturist or just dipping your toes into the soil for the first time, these YouTube channels serve as invaluable resources, providing inspiration, guidance, and practical tips to help you grow your gardening skills. Let’s explore the top 10 YouTube channels in the gardening niche that are blooming with knowledge and inspiration.

1. Garden Answer:

With over 1.5 million subscribers, Garden Answer, hosted by Laura LeBoutillier, is a must-watch channel for gardening enthusiasts. Laura’s vibrant personality shines through as she shares expert advice on plant care, garden design ideas, and DIY projects. From stunning floral arrangements to creative container gardening ideas, Garden Answer offers endless inspiration for both indoor and outdoor gardeners.

2. Epic Gardening:

Kevin Espiritu’s Epic Gardening channel is a treasure trove of practical gardening tips, covering everything from urban gardening to hydroponics. With a focus on organic gardening methods and sustainable practices, Kevin shares insightful tutorials, product reviews, and gardening experiments to help viewers grow their own food and create thriving green spaces.

3. Gardening Is My Passion:

Gardening Is My Passion channel is hosted by Dr. Suraj Prakash Agarwal who is not only a dedicated college professor but also an avid gardening enthusiast. With his wealth of knowledge and passion for cultivating greenery, he provides expert guidance on nurturing various plants, including flowering plants, vegetables, and fruits. Additionally, Dr. Agarwal shares valuable insights on selecting the right planters, choosing suitable fertilizers, and implementing effective maintenance techniques to ensure thriving gardens.

4. MIgardener:

Luke Marion’s MIgardener channel is dedicated to empowering gardeners of all skill levels to grow their own food and live a healthier lifestyle. With an emphasis on organic gardening techniques and budget-friendly solutions, Luke shares practical advice on seed starting, soil building, and pest management, making gardening accessible to everyone.

5. California Gardening:

If you’re gardening in California or a similar climate, California Gardening is the channel for you. Hosted by the knowledgeable and affable Shiv, this channel offers expert advice on growing fruits, vegetables, and ornamental plants in the California climate. From citrus trees to succulents, Shiv covers a wide range of topics to help Californian gardeners thrive.


Similar Posts


6. The Rusted Garden:

Gary Pilarchik’s The Rusted Garden channel is a go-to resource for vegetable gardeners seeking practical advice and helpful tips. Gary’s down-to-earth approach and extensive gardening knowledge shine through as he covers topics such as seed starting, companion planting, and organic pest control, helping viewers grow bountiful harvests year-round.

7. HuwRichards:

Huw Richards channel is dedicated to teaching viewers how to grow their own food using organic and no-dig gardening methods. With a focus on sustainability and self-sufficiency, Huw shares valuable insights on composting, mulching, and crop rotation, making gardening both rewarding and environmentally friendly.

8. Growing Your Greens:

John Kohler’s Growing Your Greens channel is all about growing nutrient-dense fruits and vegetables using organic gardening practices. With a focus on urban gardening and small-space gardening solutions, John shares tips on vertical gardening, container gardening, and maximizing garden yields, helping viewers grow food even in limited spaces.

9. James Prigioni:

James Prigioni’s gardening channel offers a wealth of practical advice on topics such as composting, raised bed gardening, and plant propagation. With a laid-back and approachable style, James shares his passion for gardening and encourages viewers to get their hands dirty and connect with nature.

10. BBC Gardeners’ World Magazine:

The official YouTube channel of the popular BBC gardening show, Gardeners’ World offers expert advice, garden tours, and practical tips for gardeners of all skill levels. Hosted by renowned horticulturist Monty Don, this channel covers a wide range of topics, from planting techniques to seasonal garden maintenance, providing valuable insights for gardeners around the world.

Conclusion:

Whether you’re looking to grow your own food, create a vibrant flower garden, or transform your outdoor space, these top 10 YouTube channels in the gardening niche offer a wealth of knowledge, inspiration, and practical tips to help you to achieve your goal. From expert advice on plant care to creative garden design ideas, these channels cater to gardeners of all skill levels and interests, making them essential resources for anyone with a green thumb. So, roll up your sleeves, grab your gardening tools, and let these YouTube channels guide you on your gardening journey to green-thumb greatness!

Happy Gardening!

Sustainable Gardening Practices: Cultivating a Greener Tomorrow!

Introduction

Gardening is more than nurturing plants; it’s a harmonious dance with nature. Embracing sustainable practices not only nurtures your garden but also contributes positively to the environment. Here’s a comprehensive guide to sustainable gardening practices that promote eco-friendly and regenerative habits.

Understanding Sustainability in Gardening:

Sustainable gardening prioritizes the health of the ecosystem, aiming for a balanced and self-sustaining garden that minimizes negative impacts on the environment. It involves reducing waste, conserving resources, and fostering biodiversity.

Soil Health and Fertility:

Healthy soil is the backbone of a sustainable garden. Practice no-till or low-till methods to preserve soil structure and microbial life. Add compost, organic matter, or mulch to improve fertility, retain moisture, and reduce erosion. Consider cover cropping to prevent nutrient leaching and improve soil health.

Avoid using chemical fertilizers, instead use vermicompost or kitchen wastes. Follow practices like companion planting to make good use of soil and space. Plant legumes to increase the nitrogen in the soil.

Water Conservation:

Efficient water use is critical in sustainable gardening. Install drip irrigation systems or use soaker hoses to minimize water wastage. Collect rainwater in barrels or cisterns for irrigation purposes. Mulching is an effective method to help the soil retain moisture, which in turn reduces the need for frequent watering.

Native Plants and Biodiversity:

When choosing plants for your garden or landscape, it’s a good idea to select native species that are well-suited to the climate and soil conditions in your region. These plants will be better adapted to the local environment, which means they’ll require less maintenance and be more resistant to pests and diseases. So, before you start planting, do a little research to find out which native plants will thrive in your area. They require less water and maintenance while supporting local wildlife. Create diverse habitats by incorporating a variety of plants to attract pollinators, beneficial insects, and birds, fostering a healthy ecosystem.

Chemical-Free Gardening:

Avoid synthetic pesticides and chemical fertilizers that can harm beneficial insects, soil organisms, and waterways. Embrace organic pest control methods like companion planting, crop rotation, and using natural predators or homemade remedies to manage pests.

Use plant-friendly insects like ladybugs. They mainly feed on aphids, scales and their eggs, and other pests like mealybugs and whiteflies.

Finally remember the quote “If something is not eating your plants, then your garden is not part of the ecosystem”.


Similar Posts


Sustainable Garden Design:

Plan your garden layout to maximize space and resource efficiency. Utilize companion planting, intercropping, or vertical gardening to optimize growing areas. Incorporate hardscaping elements like rain gardens or bioswales to manage water runoff effectively.

Recycling and Waste Reduction:

Practice composting to recycle garden and kitchen waste into nutrient-rich soil amendments. Use biodegradable or reusable materials for garden beds, pots, and other gardening supplies to reduce waste.

Energy-Efficient Practices:

Optimize energy use by choosing manual tools over power tools whenever possible. Utilize solar-powered lighting for pathways or garden features. Composting and mulching also aid in reducing energy use by minimizing the need for mechanical processes.

Seasonal Gardening and Planting:

Adapt your garden to seasonal changes. Plant cool-season crops in spring and fall, and warm-season crops in summer. Embrace crop rotation to improve soil fertility and minimize pests and diseases.

Community and Education:

Engage in community gardening efforts or join local gardening groups to share knowledge and resources. Educate yourself on sustainable practices through workshops, books, or online resources to continuously improve your gardening methods.

Conclusion:

Sustainable gardening isn’t just a trend; it’s a responsibility towards the planet. By implementing these practices, you’re nurturing not just your garden but the larger ecosystem. Embrace the role of a steward of the earth, cultivating a garden that thrives harmoniously with nature. Small steps in sustainable gardening can yield significant positive impacts on the environment. Happy gardening, and here’s to a greener tomorrow!

Happy Gardening!

Effective Strategies for Eliminating Whiteflies from Your Garden!

Introduction

Whiteflies, those tiny, pesky insects, can wreak havoc on the health and vibrancy of your garden. These minuscule pests feed on plant juices, causing yellowing, wilting, and stunted growth in various garden plants. However, fret not! Here’s a comprehensive guide on how to banish whiteflies from your garden using both natural and effective methods.

Identifying Whiteflies

Before diving into eradication methods, recognizing these pests is crucial. Whiteflies are tiny, moth-like insects, often found in clusters on the underside of leaves. They leave behind a sticky residue called honeydew, promoting the growth of sooty mold.

Detrimental Effects on Plant Health

Whiteflies might seem innocuous due to their small size, but their impact on garden plants can be quite devastating. Here’s how these tiny insects cause damage:

Feeding Habits: Whiteflies feed on plant sap by piercing the phloem vessels, depriving plants of essential nutrients. This continuous feeding weakens plants, leading to yellowing, wilting, and stunted growth.

Toxin Secretion: As whiteflies feed, they excrete a sticky substance called honeydew. This honeydew serves as a breeding ground for sooty mold, a dark fungus that covers leaves, hindering photosynthesis and further weakening plants.

Transmission of Diseases: Whiteflies act as vectors for various plant viruses. When they feed on infected plants, they pick up the virus and transmit it to healthy plants, causing diseases that can lead to severe damage or death of the plant.

Mass Infestation: These pests reproduce rapidly, forming dense colonies on the underside of leaves. Their sheer numbers can overwhelm plants, causing stress and ultimately impacting their ability to thrive.

Reduction in Crop Yield: In agricultural settings, whiteflies can significantly reduce crop yields. Infestations can lead to economic losses due to diminished productivity and compromised plant health.

Natural Remedies to Combat Whiteflies

Spraying with Neem Oil: Neem oil, a natural insecticide, disrupts the life cycle of whiteflies. Dilute it with water and apply it to the affected plants, focusing on the undersides of leaves.

Introduce Beneficial Insects: Predatory insects like ladybugs, lacewings, and certain species of parasitic wasps feed on whiteflies, helping to control their population naturally.

Homemade Insecticidal Soap: Mix liquid soap with water and spray it on the infested plants. This solution suffocates whiteflies, effectively reducing their numbers.


Similar Posts


Cultural Practices for Prevention

Pruning Infested Leaves: Regularly inspect your plants and remove heavily infested leaves to prevent the spread of whiteflies.

Hosing Down Plants: Use a strong jet of water to dislodge whiteflies from plants. To interrupt their lifecycle, it is recommended to repeat this process every few days. Please make sure to follow this procedure regularly.

Yellow Sticky Traps: Hang yellow sticky traps around affected plants. Whiteflies are attracted to the color yellow and get trapped on these sticky surfaces.

Chemical Control Methods

When natural remedies prove insufficient, resort to chemical solutions:

Insecticidal Sprays: Chemical insecticides, labeled specifically for whiteflies, can be used as a last resort. Follow instructions meticulously and avoid harming beneficial insects.

Systemic Insecticides: These are absorbed by the plant, making it toxic to whiteflies. Exercise caution and follow directions closely when using systemic treatments.

Note: Avoid using these chemicals for edible plants such as vegetables and herbs; they should only be considered as a last resort.

Preventive Measures for Long-Term Control

Regular Monitoring: Maintain vigilance over your garden to catch whitefly infestations early, preventing widespread damage.

Diverse Plantings: Promote biodiversity in your garden to minimize the risk of severe infestations. Companion planting can deter whiteflies from targeting specific plants.

Conclusion

In conclusion, battling whiteflies demands a multi-faceted approach. Combining natural remedies, cultural practices, and, if necessary, targeted chemical control methods, can effectively rid your garden of these persistent pests. Remember, consistency and early intervention are key to maintaining a healthy and thriving garden ecosystem.

Whether it’s organic solutions, cultural practices, or targeted interventions, reclaiming your garden from whiteflies is achievable with persistence and the right strategies in place.

Happy Gardening!