Protecting Your Garden During Parties: Keeping it Safe from Damage!

Introduction

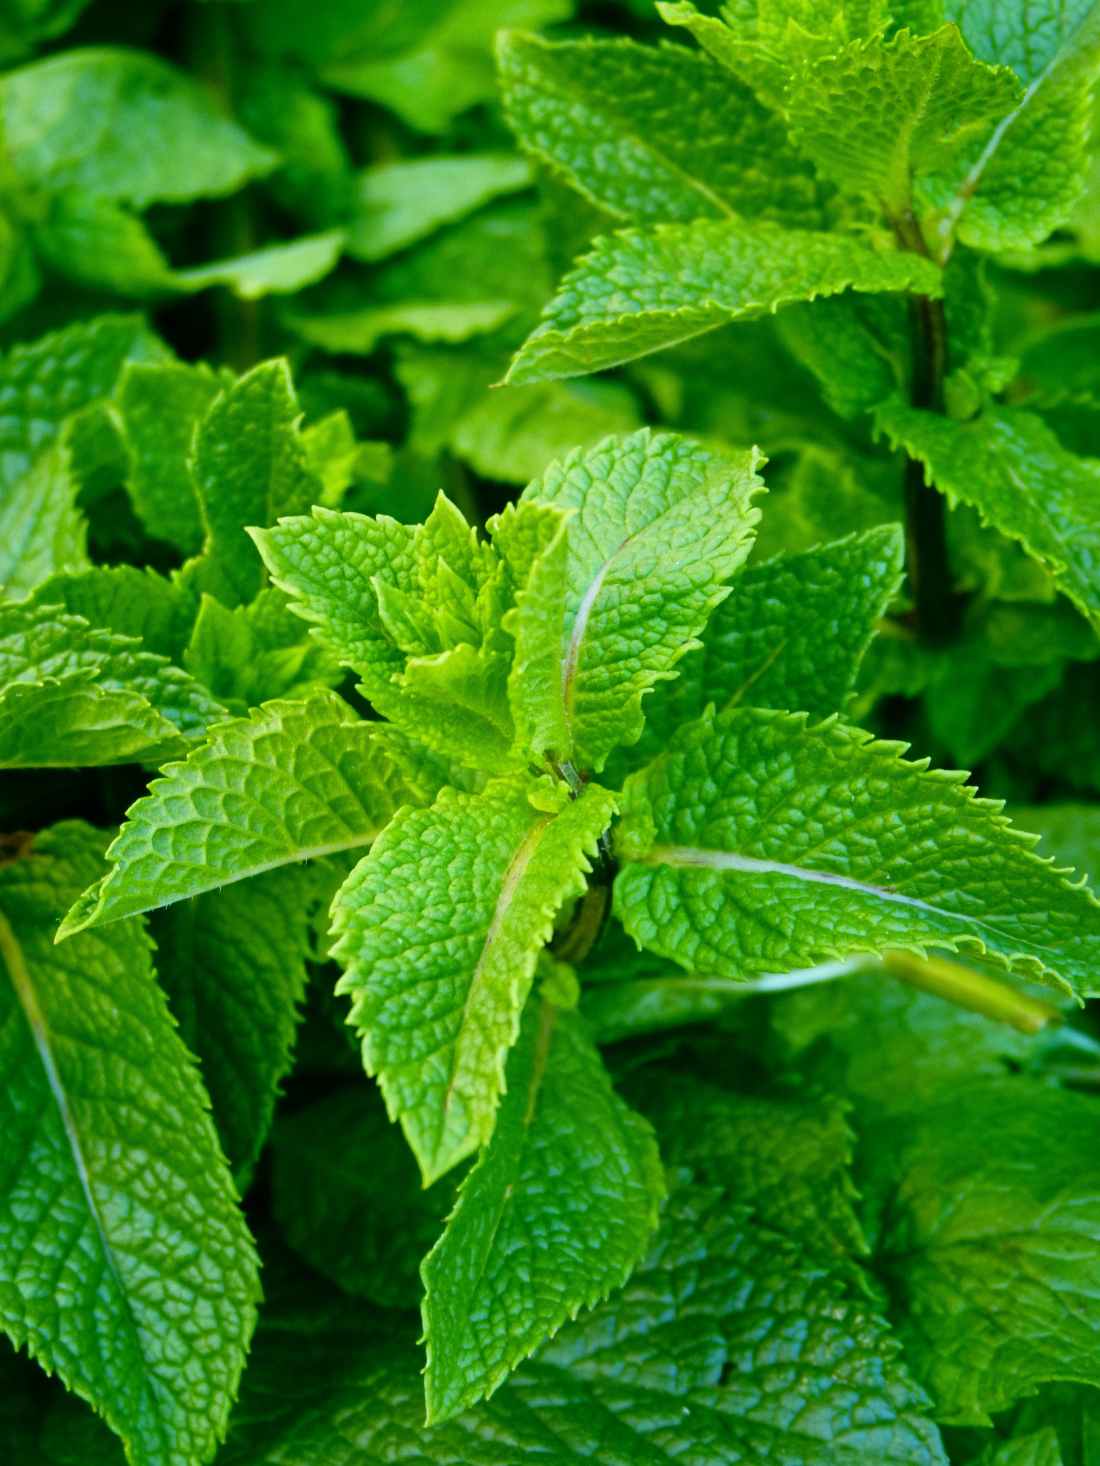
Gardens are serene sanctuaries, a blend of nature’s beauty meticulously crafted by your hands. However, when hosting a party or any function in your garden, ensuring its protection from potential damage becomes crucial. While celebrations bring joy, they can also inadvertently cause harm to your precious garden. With thoughtful planning and a few precautions, you can safeguard your garden from potential harm during gatherings. Here’s how:

1. Define Boundaries:

Establish clear boundaries to guide guests and prevent accidental trampling or damage to delicate plants. Use fencing, subtle barriers, or decorative elements to demarcate sensitive areas and paths. This not only protects your garden but also enhances its aesthetic appeal.

2. Choose Durable Furniture:

Opt for sturdy, weather-resistant furniture that won’t damage your garden beds or lawn. Avoid sharp-edged furniture that might scrape against plants or tear the grass. Providing ample seating and designated areas for gathering can help direct foot traffic away from delicate areas.
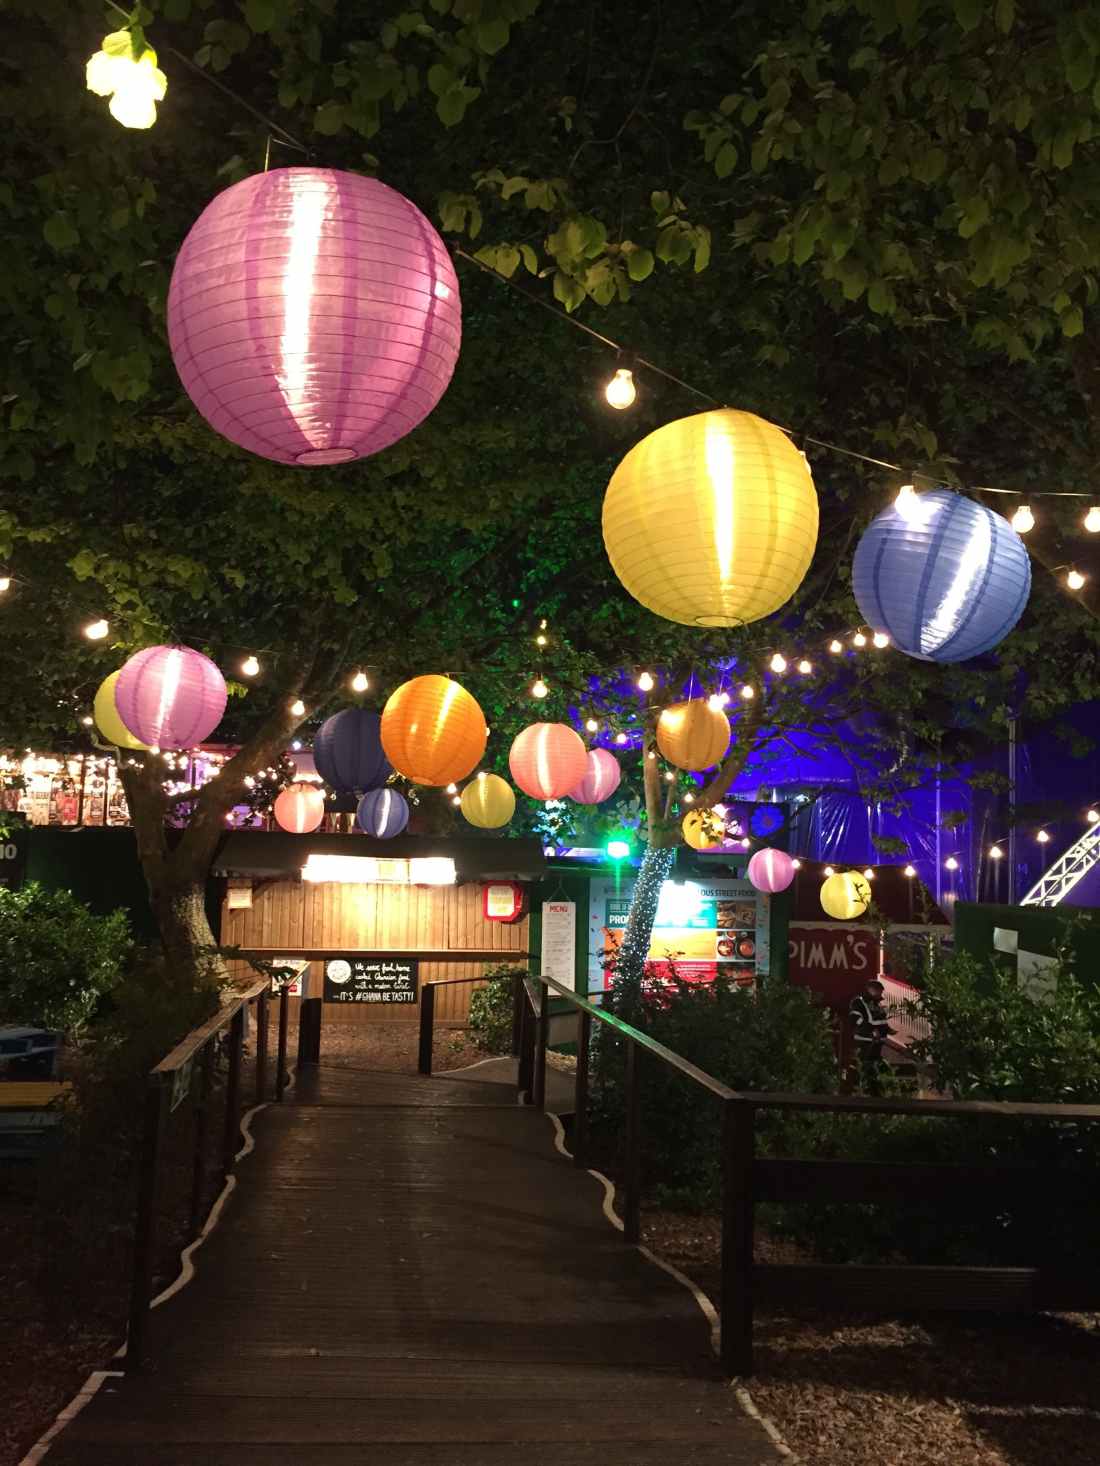
3. Light it Right:

Illuminate the garden strategically to avoid mishaps. Place lighting fixtures strategically along paths, near flower beds, and around delicate areas. This not only ensures safety for guests but also safeguards your garden by preventing accidental trampling or damage.

4. Select Garden-Friendly Decor:

Be mindful of the decorations you choose. Avoid decorations that could potentially harm plants or lawns. Opt for potted plants, lanterns, or non-invasive decorations that complement your garden without causing damage.

5. Offer Guided Paths:

Create clear pathways for guests to follow, guiding them through the garden while protecting the plants. Use gravel, stepping stones, or designated walkways to direct foot traffic and discourage guests from wandering into off-limits areas.


Similar Posts


6. Say No to Firecrackers

Firecrackers can be dazzling and exciting during celebrations, but they pose a significant threat to our environment, especially to our cherished plants. The loud noises and harmful chemicals emitted by fireworks can wreak havoc on delicate plants, causing stress, damage, and sometimes even death.

Here are a few ways to shield your plants from the harmful effects of firecrackers:

  • Covering: Use cloth or protective coverings to shield plants from debris and chemicals released by fireworks. This simple step can significantly reduce the impact of pollutants on your green companions.
  • Watering: Before the festivities begin, water your plants thoroughly. Moist soil can help mitigate the effects of heat or sparks that might come in contact with the ground.
  • Pruning: Trim any overhanging branches or foliage near areas where fireworks might be set off. This reduces the risk of direct contact and potential damage.
  • Indoor Placement: If possible, temporarily move potted plants indoors or to a safer location away from the festivities. This offers them a reprieve from the noise and pollution.

7. Communicate Carefully:

Communicate with your guests about the garden’s significance and the need to preserve its beauty. Politely inform them about sensitive areas and request their cooperation in keeping the garden pristine.

8. Prepare for Weather Changes:

Be ready for unexpected weather changes. Have a backup plan or shelters in place to protect both your guests and the garden from sudden rain, wind, or excessive sunlight.

9. Supervise and Monitor:

Assign a few individuals to supervise the garden during the event. They can gently guide guests, ensure compliance with garden rules, and take quick action in case of any potential mishaps.

10. Cleanup and Restoration:

After the event, conduct a thorough check of the garden. Attend to any damages immediately, replant or repair as needed, and restore the garden to its original state. Prompt action can often mitigate any potential long-term harm.

Conclusion:

Your garden represents your dedication and love for nature’s beauty. Protecting it during gatherings requires thoughtful planning and communication. By implementing these precautions, you can enjoy hosting events in your garden while preserving its beauty and tranquility for many more gatherings to come.

Remember, while we celebrate, it’s equally important to safeguard the natural world around us. By taking a few precautions, we can ensure that our plants remain healthy and undisturbed during times of festivity. Remember, a little care goes a long way in safeguarding your green haven.

Happy Gardening!

Winter Plant Care and Protection: Safeguarding Your Garden Against Frost and Cold Weather!

Introduction

As winter descends, ensuring the health and vitality of your garden demands strategic plant care and protective measures. The plummeting temperatures and frosty conditions pose threats like frost damage, frozen roots, and winter scald, leaving plants vulnerable. Understanding the unique needs of different plants and employing various protective methods are crucial to safeguarding your garden’s greenery during the cold season.

Diverse Cold Tolerance in Plants

Not all plants weather winter in the same way. Understanding the varying levels of cold tolerance is essential. Some resilient plants, such as carrots, kale, broccoli, spinach, lettuce, chard, cilantro, cress, leeks, onions, and radicchio, thrive in colder temperatures. They require specific methods of protection to endure the winter months and continue flourishing once the cold subsides.

Methods of Winter Plant Protection

A range of protective measures can shield your plants from the harsh winter elements. Mulching stands out as a vital technique, effectively insulating the soil and roots against extreme cold. Covering plants acts as a barrier, trapping essential heat and moisture around them. Wrapping vulnerable stems and foliage shields them from biting cold winds. Moving delicate plants to sheltered or warmer locations can be a simple yet effective method. Adequate watering prevents dehydration and elevates soil temperature, contributing to the plants’ resilience.

Materials for Winter Plant Protection

Selecting the right materials is crucial in safeguarding your plants without causing harm. Leaves, straw, wood chips, burlap, frost cloth, plastic, bubble wrap, cardboard, and newspaper are commonly used protective coverings. Applying these materials with care is essential to avoid suffocating or overheating the plants. It’s crucial to remove them when the weather improves to prevent any adverse effects on plant health.


Similar Posts


Essential Winterizing Practices for Your Garden

Preparing your garden for winter involves a series of vital practices to ensure its well-being. Pruning, a fundamental step, involves removing dead or diseased branches to maintain plant health. Fertilizing replenishes vital nutrients, fortifying plants against the rigors of the cold season. Weeding helps minimize competition for resources, allowing plants to thrive. Cleaning the garden beds and surrounding areas prevents pests and diseases from proliferating. Harvesting remaining produce not only ensures freshness but also prevents rotting, fostering a healthy environment.

Vigilance in Monitoring and Early Intervention

Amidst the cold and frost, it’s crucial to maintain a proactive stance in observing your garden. Regularly monitor the conditions and the health of your plants. Keep an eye out for signs of stress or damage caused by the winter elements. Look for wilting, discoloration, or browning of foliage, which can signal potential issues. Early detection of problems enables swift action, preventing further damage and ensuring a better chance of plant recovery.

Building a Winter Gardening Community: Sharing Knowledge and Experiences

Additionally, fostering a sense of community and knowledge-sharing among fellow gardeners can be invaluable. Engage with local gardening groups or online forums where experiences and insights are exchanged. Learning from others’ experiences, especially those gardening in similar climates, can provide valuable tips and guidance for winter plant care and protection. Sharing knowledge fosters a sense of solidarity and can offer unique perspectives on dealing with winter challenges in gardening.

Conclusion

Maintaining a thriving garden through winter entails diligent care and vigilance. Employing suitable protective methods and understanding the individual needs of your plants are pivotal in ensuring their survival and prosperity through the cold months. As the temperatures drop, investing time and effort in winter plant care and protection ensures a robust and vibrant garden when the frost fades away.

Winter might be a dormant period for many plants, but it’s an active time for gardeners. By staying attuned to your garden’s needs and employing effective protective measures, you’re not just preserving your garden’s health; you’re nurturing a resilient and thriving ecosystem that will reward your efforts when the warmer seasons return.

Happy Gardening!

Sustainable Gardening Practices: Cultivating a Greener Tomorrow!

Introduction

Gardening is more than nurturing plants; it’s a harmonious dance with nature. Embracing sustainable practices not only nurtures your garden but also contributes positively to the environment. Here’s a comprehensive guide to sustainable gardening practices that promote eco-friendly and regenerative habits.

Understanding Sustainability in Gardening:

Sustainable gardening prioritizes the health of the ecosystem, aiming for a balanced and self-sustaining garden that minimizes negative impacts on the environment. It involves reducing waste, conserving resources, and fostering biodiversity.

Soil Health and Fertility:

Healthy soil is the backbone of a sustainable garden. Practice no-till or low-till methods to preserve soil structure and microbial life. Add compost, organic matter, or mulch to improve fertility, retain moisture, and reduce erosion. Consider cover cropping to prevent nutrient leaching and improve soil health.

Avoid using chemical fertilizers, instead use vermicompost or kitchen wastes. Follow practices like companion planting to make good use of soil and space. Plant legumes to increase the nitrogen in the soil.

Water Conservation:

Efficient water use is critical in sustainable gardening. Install drip irrigation systems or use soaker hoses to minimize water wastage. Collect rainwater in barrels or cisterns for irrigation purposes. Mulching is an effective method to help the soil retain moisture, which in turn reduces the need for frequent watering.

Native Plants and Biodiversity:

When choosing plants for your garden or landscape, it’s a good idea to select native species that are well-suited to the climate and soil conditions in your region. These plants will be better adapted to the local environment, which means they’ll require less maintenance and be more resistant to pests and diseases. So, before you start planting, do a little research to find out which native plants will thrive in your area. They require less water and maintenance while supporting local wildlife. Create diverse habitats by incorporating a variety of plants to attract pollinators, beneficial insects, and birds, fostering a healthy ecosystem.

Chemical-Free Gardening:

Avoid synthetic pesticides and chemical fertilizers that can harm beneficial insects, soil organisms, and waterways. Embrace organic pest control methods like companion planting, crop rotation, and using natural predators or homemade remedies to manage pests.

Use plant-friendly insects like ladybugs. They mainly feed on aphids, scales and their eggs, and other pests like mealybugs and whiteflies.

Finally remember the quote “If something is not eating your plants, then your garden is not part of the ecosystem”.


Similar Posts


Sustainable Garden Design:

Plan your garden layout to maximize space and resource efficiency. Utilize companion planting, intercropping, or vertical gardening to optimize growing areas. Incorporate hardscaping elements like rain gardens or bioswales to manage water runoff effectively.

Recycling and Waste Reduction:

Practice composting to recycle garden and kitchen waste into nutrient-rich soil amendments. Use biodegradable or reusable materials for garden beds, pots, and other gardening supplies to reduce waste.

Energy-Efficient Practices:

Optimize energy use by choosing manual tools over power tools whenever possible. Utilize solar-powered lighting for pathways or garden features. Composting and mulching also aid in reducing energy use by minimizing the need for mechanical processes.

Seasonal Gardening and Planting:

Adapt your garden to seasonal changes. Plant cool-season crops in spring and fall, and warm-season crops in summer. Embrace crop rotation to improve soil fertility and minimize pests and diseases.

Community and Education:

Engage in community gardening efforts or join local gardening groups to share knowledge and resources. Educate yourself on sustainable practices through workshops, books, or online resources to continuously improve your gardening methods.

Conclusion:

Sustainable gardening isn’t just a trend; it’s a responsibility towards the planet. By implementing these practices, you’re nurturing not just your garden but the larger ecosystem. Embrace the role of a steward of the earth, cultivating a garden that thrives harmoniously with nature. Small steps in sustainable gardening can yield significant positive impacts on the environment. Happy gardening, and here’s to a greener tomorrow!

Happy Gardening!

Crafting and Sustaining Stunning Ponds and Water Features in Your Garden!

Introduction

Introducing ponds and water features into your garden elevates its charm, creating serene, nature-inspired spaces. From initial construction to ongoing maintenance, here’s a comprehensive guide to building and preserving these aquatic delights.

Designing Your Water Haven

Constructing a water feature commences with thoughtful planning. Assess your garden’s layout, determining the ideal location and size for the pond or water element. Factor in sunlight exposure, proximity to utilities, and accessibility for maintenance.

Building a Serene Oasis

Excavation marks the inception of your water feature. Dig the desired pond shape, ensuring varied depths for aquatic flora and fauna. Install a sturdy liner to retain water, and incorporate filtration systems or pumps for circulation and cleanliness.

Aquatic Plant Selection and Arrangement

Select aquatic plants suiting your water feature’s depth and purpose. Include oxygenators, floaters, and marginal plants to enhance biodiversity and oxygenate the water. Arrange them strategically, ensuring harmony between aesthetics and functionality.

If your pond receives ample sunlight, it’s recommended to plant some floating aquatic plants to prevent the growth of algae. Alternatively, you can plant water lilies and lotuses, which will not only add to the aesthetics of your pond but also help control algae growth. Incorporating aquatic plants like water lilies or lotuses adds vibrant colors and texture to your pond while offering shade and shelter for aquatic life. On the other hand, if your pond is located in a shady area or receives partial sunlight, it is advisable to go for non-flowering plants such as American eelgrass, parrot feather watermilfoil, water lettuce, etc. These plants will thrive in low-light conditions and will still be able to provide the necessary oxygen and nutrients to your pond.

Accentuating with Features and Décor

Enhance your water feature with embellishments like rocks, stones, or driftwood, mimicking natural water environments. Integrate waterfalls, fountains, or cascades to introduce soothing sounds and elevate visual appeal.

Consider installing lighting around the water feature to create stunning visual effects during evenings, transforming your garden into a magical oasis. Lastly, introduce seating areas or cozy corners near the water feature, inviting moments of relaxation and contemplation amidst the tranquil ambiance.


Similar Posts


Sustaining Water Quality and Health

Regular maintenance preserves the ecosystem’s equilibrium. Monitor water quality parameters, perform occasional cleanings, and tend to plant growth to sustain a balanced and thriving aquatic environment.

Consider installing a filtration system to sustain a healthy aquatic environment. Use fish such as guppies and mollies to control mosquito larvae. For larger ponds, consider introducing a small tortoise.

Winter Preparation and Seasonal Care

Shield your water feature from harsh winter conditions by installing heaters or ensuring adequate depth to prevent freezing. Adjust maintenance routines according to seasonal shifts, supporting plant health and preserving water quality year-round.

Safety and Considerations

Implement safety measures, especially if you have children or pets. Erect barriers or coverings to prevent accidents and ensure proper supervision around water features. Additionally, check local regulations or consult professionals to ensure compliance with safety standards when building and maintaining water features.

Conclusion

Embrace the tranquility of nature with skillfully crafted ponds and water features in your garden. From meticulous design and construction to routine maintenance and seasonal care, these aquatic marvels infuse serenity and visual allure, enriching your outdoor haven. Whether it’s the soothing sound of flowing water or the vibrant life thriving within, water features bring an enchanting dimension to your garden’s landscape.

Happy Gardening!

The Art of Selection: Choosing the Right Plants for Your Garden!

Introduction

Your garden is a canvas waiting to be painted with the vibrant colors of nature. Selecting the right plants is akin to choosing the perfect palette, setting the tone for a picturesque landscape. Whether you’re a seasoned gardener or a novice with a green thumb yearning for inspiration, understanding the fundamentals of plant selection is pivotal in creating a flourishing outdoor sanctuary.

Tailoring Choices to Your Residence

When choosing plants for your garden, your residence plays a crucial role in dictating the available options. Whether you reside in a flat or an independent house, and whether it’s owned or rented, significantly impacts your plant choices. For independent homeowners, the selection is more diverse, with possibilities ranging from fruit-bearing trees to expansive flowering plants. However, for those in flats or rented spaces, the options might be more restricted. Opting for easily transportable, smaller plants that bloom quickly becomes essential to accommodate potential moves. Consider foliage plants, herbs, or compact vegetables that align with the specific environmental conditions while ensuring mobility for future relocations.

Understanding Your Garden’s Environment

Before diving into the world of flora, acquaint yourself with your garden’s unique microclimate. Assess factors such as sunlight exposure, soil type, drainage, and available space. Different areas in your garden may experience varying sun exposure throughout the day, influencing plant growth. Understanding these conditions helps in choosing plants that thrive in your garden’s specific environment.

Assessing Plant Hardiness Zones

Refer to the USDA Plant Hardiness Zone Map or its regional equivalents to determine the plants best suited for your geographical location. These zones provide essential information about temperature ranges, assisting in selecting plants that withstand local climate conditions. Choosing plants within your hardiness zone ensures better chances of successful growth and resilience against adverse weather.

Matching Plants to Garden Goals

Consider your gardening objectives when selecting plants. Are you aiming for a vibrant flower garden, a productive vegetable patch, or a serene, foliage-filled landscape? Understanding your goals helps in curating a plant selection that aligns with your vision. Research plants’ growth habits, potential size, flowering seasons, and maintenance requirements to harmonize with your garden’s purpose.


Similar Posts


Selecting Plants for Visual Appeal

Texture, color, and form play significant roles in garden aesthetics. Blend various plant shapes and sizes to create a visually stimulating landscape. Contrast large-leaved plants with delicate foliage or incorporate a mix of vibrant flowers amidst evergreen shrubs for an eye-catching display. Strategic plant placement enhances the garden’s allure, creating focal points and seamless transitions.

Considering Maintenance and Care

Factor in the time and effort required for plant maintenance. Some plants demand meticulous care, frequent pruning, or specific soil conditions. Determine your availability for gardening tasks to select plants that align with your schedule and maintenance preferences. Opting for low-maintenance plants or native species often eases the gardening workload.

Exploring Diversity and Native Species

Introduce biodiversity by incorporating native plants into your garden. Native species are adapted to local conditions, requiring less water and maintenance while providing crucial support to local wildlife. Experiment with a diverse range of plants to attract pollinators and beneficial insects, contributing to a balanced ecosystem.

Final Considerations and Conclusion

Choosing the right plants for your garden involves a blend of scientific understanding, personal preference, and artistic vision. Understanding your garden’s environment, climate, and the characteristics of each plant species is also essential. By aligning your choices with your gardening goals, visual preferences, and maintenance capacity, you can craft a vibrant, thriving garden that mirrors your unique vision and connection to nature.

Embrace the journey of experimentation and discovery as you navigate the myriad options available. Each plant holds the promise of adding beauty, character, and life to your garden, transforming it into a personalized oasis of tranquility and natural splendor. May your garden flourish with a tapestry of colors, textures, and scents, becoming a testament to your love for nature’s artistry and the joy of cultivating a living, breathing masterpiece in your backyard.

Happy Gardening and may every plant you choose add a touch of wonder and delight to your outdoor haven!

Herb Gardening 101: How to Cultivate a Flourishing Herb Garden in Your Home!

Introduction:

Herb gardening offers a delightful way to infuse your culinary endeavors with fresh flavors and elevate the aesthetics of your home. Whether you’re a seasoned gardener or a novice, cultivating a thriving herb garden is an enriching and rewarding experience. This comprehensive guide will walk you through the essentials of starting and maintaining a successful herb garden right in your own home.

Understanding Your Herbs:

Begin by selecting herbs that align with your culinary preferences and growing conditions. Herbs like basil, rosemary, thyme, mint, and parsley are popular choices due to their versatility and ease of growth. Consider their sunlight requirements, soil preferences, and watering needs to create an optimal environment for each herb.

Choosing the Right Location:

For optimal growth, it’s recommended to choose a spot for your herb garden that receives plenty of sunlight. Most herbs tend to do well in areas that are exposed to full sunlight. Ensure adequate drainage and good air circulation to prevent issues like root rot and fungal diseases. For indoor herb gardens, windowsills or areas receiving ample natural light are ideal.

Preparing the Soil:

Well-draining soil is crucial for herb cultivation. Incorporate organic matter like compost or peat moss to enhance soil fertility and drainage. Aim for a slightly acidic to neutral pH level, typically between 6.0 and 7.0, to create an optimal growing environment for your herbs.

Planting Your Herbs:

When planting your herbs, maintain appropriate spacing between each plant to allow for proper airflow and growth. Consider using containers or raised beds for better control over soil quality and moisture levels. Follow planting guidelines specific to each herb to ensure optimal growth.


Similar Posts


Caring for Your Herb Garden:

Regular watering is essential, but be mindful not to overwater your herbs. To prevent waterlogged conditions, it’s best to let the soil dry out slightly between waterings. Pruning and harvesting your herbs regularly promote healthy growth and stimulate new foliage.

Combatting Pests and Diseases:

Keep a vigilant eye for common pests like aphids, mites, and fungal infections that can affect herb plants. Consider natural pest control methods like neem oil or companion planting to deter pests without harsh chemicals.

Harvesting and Enjoying Your Herbs:

To get the most intense flavors out of herbs, it’s best to harvest them in the morning. Use sharp scissors or shears to trim the plants, leaving sufficient foliage for regrowth. Enjoy the freshest flavors by incorporating your homegrown herbs into culinary delights or drying them for future use.

Conclusion:

Embarking on an herb gardening journey is a fulfilling endeavor that brings the joys of fresh flavors and fragrances right to your doorstep. By following these fundamental steps, you can cultivate a thriving herb garden, adding a touch of greenery and zest to your home-cooked meals.

Start your herb garden today and savor the delights of homegrown herbs in your culinary creations!

Happy Gardening!

Bountiful Gardens: The Power of Rainwater Harvesting in Gardening!

Introduction

In the realm of gardening, water stands as a precious resource. Amidst concerns of water scarcity and environmental sustainability, rainwater harvesting emerges as a sustainable practice with immense benefits for cultivating flourishing gardens. Harnessing rainwater isn’t just an eco-friendly choice; it’s a powerful technique to nourish your garden while conserving water resources.

Rainwater harvesting for gardening is a method that involves collecting and storing rainwater for later use in watering plants, enriching soil, and sustaining green spaces. This eco-conscious approach not only lessens dependence on traditional water sources but also amplifies the health and vitality of your garden in myriad ways.

Importance of Rainwater Harvesting for Gardening:

  • Eco-Friendly and Sustainable: Rainwater harvesting minimizes reliance on municipal water supplies or groundwater, thereby reducing your carbon footprint and lessening strain on natural water sources.
  • Nutrient-Rich Water Source: Rainwater is devoid of harmful chemicals and possesses natural nutrients vital for plant growth, providing a healthier alternative to chemically treated water.
  • Conservation of Resources: By capturing rainwater, this method ensures you maximize water availability and reduces water wastage, supporting a sustainable approach to gardening.

Methods of Rainwater Harvesting for Gardening:

  • Rain Barrels and Cisterns: These storage units collect rainwater from rooftops, diverting it through gutters into barrels or tanks for later use in garden irrigation.
  • Rain Gardens: Designed to capture and absorb rainwater runoff, these gardens are planted in low-lying areas and act as natural filters while recharging groundwater.
  • Permeable Surfaces: Install permeable pavements or surfaces that allow rainwater to infiltrate the soil directly, replenishing groundwater levels and supporting garden growth.

Benefits of Rainwater Harvesting in Gardening:

  • Natural Nutrient Source: Rainwater is free from chlorine or other chemicals often found in tap water, providing plants with a pure, nutrient-rich source of hydration.
  • Sustainable Irrigation: The stored rainwater can sustain your garden during dry spells or watering restrictions, ensuring continuous growth and vitality of plants.
  • Cost-Efficient: By reducing reliance on municipal water, rainwater harvesting can lower your water bills while providing an effective irrigation solution.

Similar Posts


Tips for Implementing Rainwater Harvesting:

  • Proper Storage: Ensure rain barrels or tanks are clean and covered to prevent contamination and breeding of mosquitoes or algae.
  • Regular Maintenance: Periodically clean gutters, filters, and storage units to maintain water quality and prevent blockages.
  • Use of Screen Filters: Install screen filters to prevent debris or contaminants from entering rainwater collection systems.

Step By Step Process:

Harvesting rainwater for your garden is a sustainable and eco-friendly way to ensure a steady water supply. Here are steps to harvest rainwater effectively:

  • Rain Barrel Setup: Place a rain barrel beneath a downspout or gutter to collect rainwater. Ensure the barrel has a secure lid to prevent debris, mosquitoes, and evaporation.
  • Barrel Positioning: Position the barrel on a raised platform to improve water pressure. It should be stable and situated close to the garden for easier access.
  • Filter System: Install a mesh screen or filter at the entry point to prevent leaves, twigs, and other debris from entering the barrel.
  • Gutter Diversion: Direct the downspout or gutter directly into the rain barrel using a diverter. This allows you to control when the rainwater fills the barrel.
  • Overflow Outlet: Include an overflow outlet near the top of the barrel. Attach a hose to redirect excess water away from the foundation to avoid waterlogging.
  • Regular Maintenance: Clean the barrel and filter periodically to ensure the system remains efficient. Check for leaks or damage.
  • Water Usage: Use the harvested rainwater to irrigate your garden. Connect a hose or use a watering can for easy distribution.
  • Conservation: Conserve rainwater during dry spells and use it judiciously for your plants, prioritizing when watering is most crucial.

By implementing these steps, you can effectively harvest rainwater to nurture your garden while minimizing water waste and reducing your environmental impact.

Conclusion:

Rainwater harvesting is a sustainable, eco-friendly practice that offers immense benefits for gardening enthusiasts. By harnessing the power of rain, gardeners can create thriving landscapes while actively contributing to water conservation efforts. Implementing rainwater harvesting techniques not only elevates gardening practices but also embodies a commitment to environmental stewardship.

Incorporating rainwater harvesting in gardening isn’t just a choice; it’s a conscious step toward sustainable living that fosters healthy, vibrant gardens while preserving precious water resources for future generations.

Happy Gardening!

Guarding Your Greenery: Effective Ways to Keep Cats Out of Your Garden!

Cats are delightful companions, but their penchant for exploring can sometimes conflict with your garden’s well-being. Cats bring joy, but their love for exploring can pose challenges for your garden. Whether they see it as a playground or a litter box, their presence might lead to damaged plants or a messy garden. Fortunately, several cat-friendly methods can protect your precious green space without causing harm to your feline friends. Here are proven methods to protect your plants from your furry friends while ensuring a cat-friendly environment.

Natural Repellents:

Leverage scents cats dislike, like citrus, lavender, or citrus peels, around the garden. Using natural deterrents like citrus-scented sprays or essential oil-infused cotton balls can discourage cats from frequenting your plants.

Texture Dislike:

Cats dislike walking on certain textures. Utilize materials like pine cones, chicken wire, or gravel around your plants to make the surface uncomfortable for them to walk on.

Mulching Techniques:

Cover the soil with materials cats dislike, such as stone mulch or pinecones, to discourage them from using it as a litter box. This tactic maintains the garden’s aesthetics while preventing feline intrusion.


Similar Posts


Plant Cat-Friendly Greens:

Designate a specific area in your garden or a separate raised bed for cat-friendly greens like catnip or catmint. This not only diverts their attention but also provides a dedicated space for them to enjoy without disturbing the rest of your garden.

Motion-Activated Sprinklers:

Install motion-activated sprinklers or deterrent devices that release bursts of water or noise when cats approach. These systems startle but do not harm the cats, teaching them to stay away from the garden.

Provide Alternatives:

Allocate a cat-friendly area in your yard, like a sandbox or a cozy spot with cat grass, toys, and scratching posts. By giving them an enticing space of their own, they may be less inclined to invade the garden.

Secure Fencing:

Create barriers with humane fencing, ensuring it is high enough to discourage jumping but not to trap the cats. Use cat-proof barriers or specially designed fencing to keep them away from specific areas.

Conclusion

Remember, consistency is key when implementing these methods. Be patient, as it might take time for cats to learn new boundaries. With these strategies, you can maintain a harmonious coexistence between your greenery and your beloved feline companions.

Happy Gardening!

Effective Strategies for Eliminating Whiteflies from Your Garden!

Introduction

Whiteflies, those tiny, pesky insects, can wreak havoc on the health and vibrancy of your garden. These minuscule pests feed on plant juices, causing yellowing, wilting, and stunted growth in various garden plants. However, fret not! Here’s a comprehensive guide on how to banish whiteflies from your garden using both natural and effective methods.

Identifying Whiteflies

Before diving into eradication methods, recognizing these pests is crucial. Whiteflies are tiny, moth-like insects, often found in clusters on the underside of leaves. They leave behind a sticky residue called honeydew, promoting the growth of sooty mold.

Detrimental Effects on Plant Health

Whiteflies might seem innocuous due to their small size, but their impact on garden plants can be quite devastating. Here’s how these tiny insects cause damage:

Feeding Habits: Whiteflies feed on plant sap by piercing the phloem vessels, depriving plants of essential nutrients. This continuous feeding weakens plants, leading to yellowing, wilting, and stunted growth.

Toxin Secretion: As whiteflies feed, they excrete a sticky substance called honeydew. This honeydew serves as a breeding ground for sooty mold, a dark fungus that covers leaves, hindering photosynthesis and further weakening plants.

Transmission of Diseases: Whiteflies act as vectors for various plant viruses. When they feed on infected plants, they pick up the virus and transmit it to healthy plants, causing diseases that can lead to severe damage or death of the plant.

Mass Infestation: These pests reproduce rapidly, forming dense colonies on the underside of leaves. Their sheer numbers can overwhelm plants, causing stress and ultimately impacting their ability to thrive.

Reduction in Crop Yield: In agricultural settings, whiteflies can significantly reduce crop yields. Infestations can lead to economic losses due to diminished productivity and compromised plant health.

Natural Remedies to Combat Whiteflies

Spraying with Neem Oil: Neem oil, a natural insecticide, disrupts the life cycle of whiteflies. Dilute it with water and apply it to the affected plants, focusing on the undersides of leaves.

Introduce Beneficial Insects: Predatory insects like ladybugs, lacewings, and certain species of parasitic wasps feed on whiteflies, helping to control their population naturally.

Homemade Insecticidal Soap: Mix liquid soap with water and spray it on the infested plants. This solution suffocates whiteflies, effectively reducing their numbers.


Similar Posts


Cultural Practices for Prevention

Pruning Infested Leaves: Regularly inspect your plants and remove heavily infested leaves to prevent the spread of whiteflies.

Hosing Down Plants: Use a strong jet of water to dislodge whiteflies from plants. To interrupt their lifecycle, it is recommended to repeat this process every few days. Please make sure to follow this procedure regularly.

Yellow Sticky Traps: Hang yellow sticky traps around affected plants. Whiteflies are attracted to the color yellow and get trapped on these sticky surfaces.

Chemical Control Methods

When natural remedies prove insufficient, resort to chemical solutions:

Insecticidal Sprays: Chemical insecticides, labeled specifically for whiteflies, can be used as a last resort. Follow instructions meticulously and avoid harming beneficial insects.

Systemic Insecticides: These are absorbed by the plant, making it toxic to whiteflies. Exercise caution and follow directions closely when using systemic treatments.

Note: Avoid using these chemicals for edible plants such as vegetables and herbs; they should only be considered as a last resort.

Preventive Measures for Long-Term Control

Regular Monitoring: Maintain vigilance over your garden to catch whitefly infestations early, preventing widespread damage.

Diverse Plantings: Promote biodiversity in your garden to minimize the risk of severe infestations. Companion planting can deter whiteflies from targeting specific plants.

Conclusion

In conclusion, battling whiteflies demands a multi-faceted approach. Combining natural remedies, cultural practices, and, if necessary, targeted chemical control methods, can effectively rid your garden of these persistent pests. Remember, consistency and early intervention are key to maintaining a healthy and thriving garden ecosystem.

Whether it’s organic solutions, cultural practices, or targeted interventions, reclaiming your garden from whiteflies is achievable with persistence and the right strategies in place.

Happy Gardening!

A Complete Guide to Crafting and Using Seed Balls for Gardening Success!

Introduction

In the realm of gardening, the ingenious concept of seed balls has gained remarkable popularity for its simplicity and effectiveness. These small, compact spheres encapsulate seeds within a mixture of clay, compost, and other natural materials. They offer a convenient and efficient way to sow seeds while aiding in plant germination and growth. Here’s a comprehensive guide on how to prepare and utilize seed balls to foster lush gardens.

Understanding Seed Balls

Seed balls, also known as seed bombs, serve as protective casings for seeds, shielding them from harsh environmental conditions like wind, birds, and excessive sunlight. This technique was inspired by ancient agricultural practices and has evolved into a modern-day technique for conservation and gardening.

Ingredients for Seed Balls

Creating seed balls requires a simple blend of clay, compost, and seeds. Clay acts as a protective casing, compost provides nutrients for initial growth, and seeds are, of course, the potential plants. Additional ingredients like water and soil amendments may be added for specific seed requirements.

Step-by-Step Guide to Crafting Seed Balls

Gather Materials: Acquire clay powder or finely ground natural clay, quality compost, desired seeds, and optional amendments like organic fertilizers.

Mix Ingredients: Combine clay and compost in a ratio of 3:1 or 4:1, adjusting to ensure a manageable consistency. Gradually add water while mixing until the mixture reaches a moldable, dough-like texture.

Incorporate Seeds: Integrate the seeds evenly into the clay-compost mixture, ensuring they’re well distributed throughout.

Form Balls: Pinch off small portions of the mixture and roll them into small balls, roughly 1-2 centimeters in diameter. Allow the balls to dry for 24-48 hours in a dry, cool place.


Similar Posts


Utilizing Seed Balls in Gardening

Seed balls offer a versatile approach to gardening:

Enhanced Germination: The protective coating of the seed balls provides an ideal environment for seeds to germinate.

Biodiversity Promotion: Seed balls aid in dispersing seeds and encouraging biodiversity in gardens, especially in challenging terrains or barren areas.

Easy Planting: Simply scatter the seed balls in desired locations, whether in garden beds, wildflower patches, or urban landscapes.

Tips for Successful Seed Ball Gardening

Choose Appropriate Seeds: Opt for native or adaptive seeds suited to your local climate and soil conditions. Seeds that work well for making seed balls typically include wildflowers, herbs like basil or parsley, vegetables like tomato, chilli and certain grass seeds. These seeds are great for seed balls due to their hardy nature, adaptability to various environments, and ability to grow with minimal maintenance. Wildflower seeds offer diversity and attract pollinators, while herbs like basil or parsley provide edible and aromatic benefits. Grass seeds help in stabilizing soil and preventing erosion, making them suitable for seed balls in areas needing vegetation cover.

Timing Matters: Sow seed balls during seasons conducive to seed germination, typically spring or fall.

Proper Placement: Ensure good soil contact for optimal germination by lightly pressing seed balls into the soil or scattering them in areas likely to receive rainfall or irrigation.

Conclusion

In conclusion, the art of creating and using seed balls presents an eco-friendly and efficient method for gardening enthusiasts. Whether aiming for a vibrant wildflower meadow or enhancing garden biodiversity, seed balls offer a simple yet impactful solution. Experiment, explore, and witness the transformative power of these small spheres in nurturing a flourishing garden ecosystem.

Happy Gardening!