A Year-Round Guide to Seasonal Gardening: Planting and Caring for Each Season!!

Introduction:

Gardening isn’t just a spring and summer affair; it’s a year-round journey filled with possibilities and rewards. Whether you’re a seasoned gardener or a newbie with a green thumb yearning to flourish, this comprehensive guide will walk you through the ins and outs of seasonal gardening. From the vibrant blooms of spring to the cozy joys of winter, each season presents unique opportunities to nurture your garden and watch it thrive.

Winter Season:

Indian winters can be mild to cold, depending on the region. It’s a period of rest and renewal. The development rate of plants substantially slows down, and many go dormant throughout the winter, so they require extra care. Here are some tips to help you care for your plants during the winter:

  • Protect from Cold:

Cover tender plants with frost cloth or burlap during frosty nights to shield them from the cold.

  • Watering:

While plants require less water in winter, don’t let them dry out completely. Water deeply but less frequently to avoid waterlogged roots.

  • Sunlight:

Ensure that plants receive sufficient sunlight, as winter days can be shorter. Trim overgrown branches that might be blocking sunlight.

  • Pruning:

Prune your plants to remove dead or diseased branches. This encourages new growth in the spring.

  • Use Windbreaks:

 For areas that experience cold winds, create windbreaks using cloth or screens to protect plants from windburn.

  • Reduce Fertilization:

Plants are usually in a state of dormancy during winter, so avoid heavy fertilization. Make only occasional use of a balanced, slow-release fertilizer.

  • Indoor Plants:

If you have potted plants, consider bringing sensitive ones indoors to protect them from the cold.

  • Plant Cover Crops:

If you have a vegetable garden, consider planting cover crops like mustard or clover to protect and enrich the soil during winter.


Similar Posts


Rainy Season:

Taking care of your plants during the rainy season is all about finding that balance. While the extra water from the rain is great, it is crucial to take care of plants during the rainy season to ensure their healthy development, avoid water-related problems, and maintain ideal moisture levels. Here are some tips to help you care for your plants during the rainy season:

  • Ensure Proper Drainage:

To prevent waterlogging, make sure your pots and garden beds have proper drainage. Elevate pots on bricks or blocks to allow excess water to drain away.

  • Control Fungal Diseases:

Rainy seasons can lead to fungal growth. Apply preventive fungicides to your plants and avoid overwatering. Water indoor plants in the morning so that leaves have time to dry before evening.

  • Prune and Trim:

Remove any dead or diseased branches or leaves to discourage the growth of fungi and pests. Proper air circulation is important.
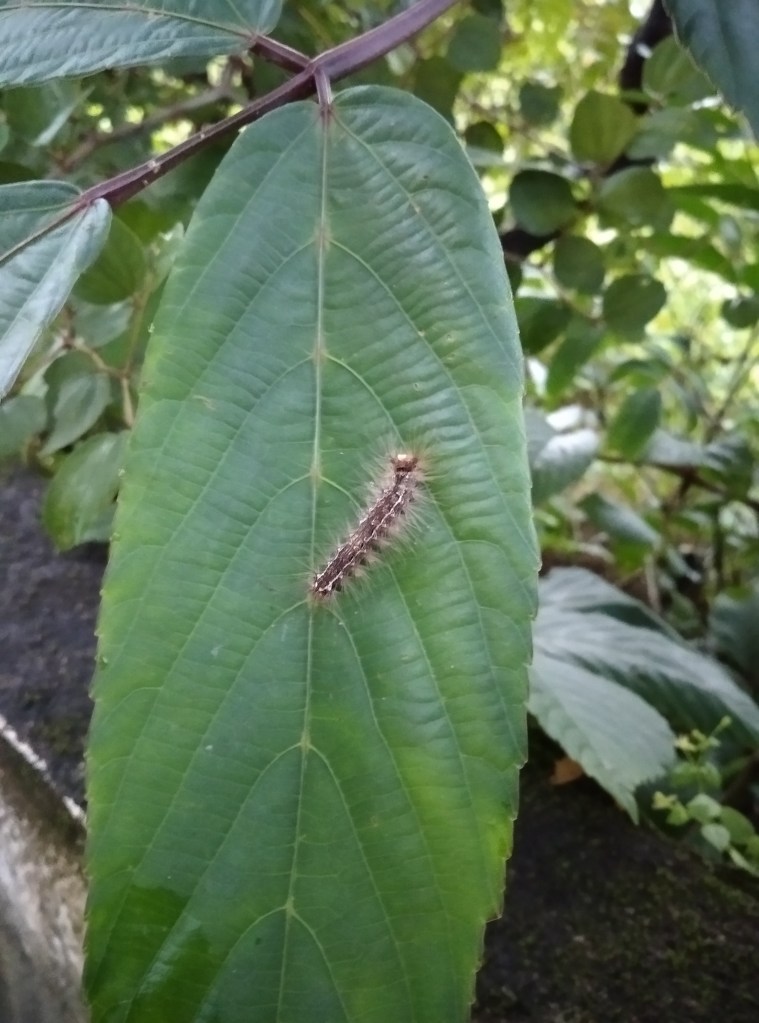
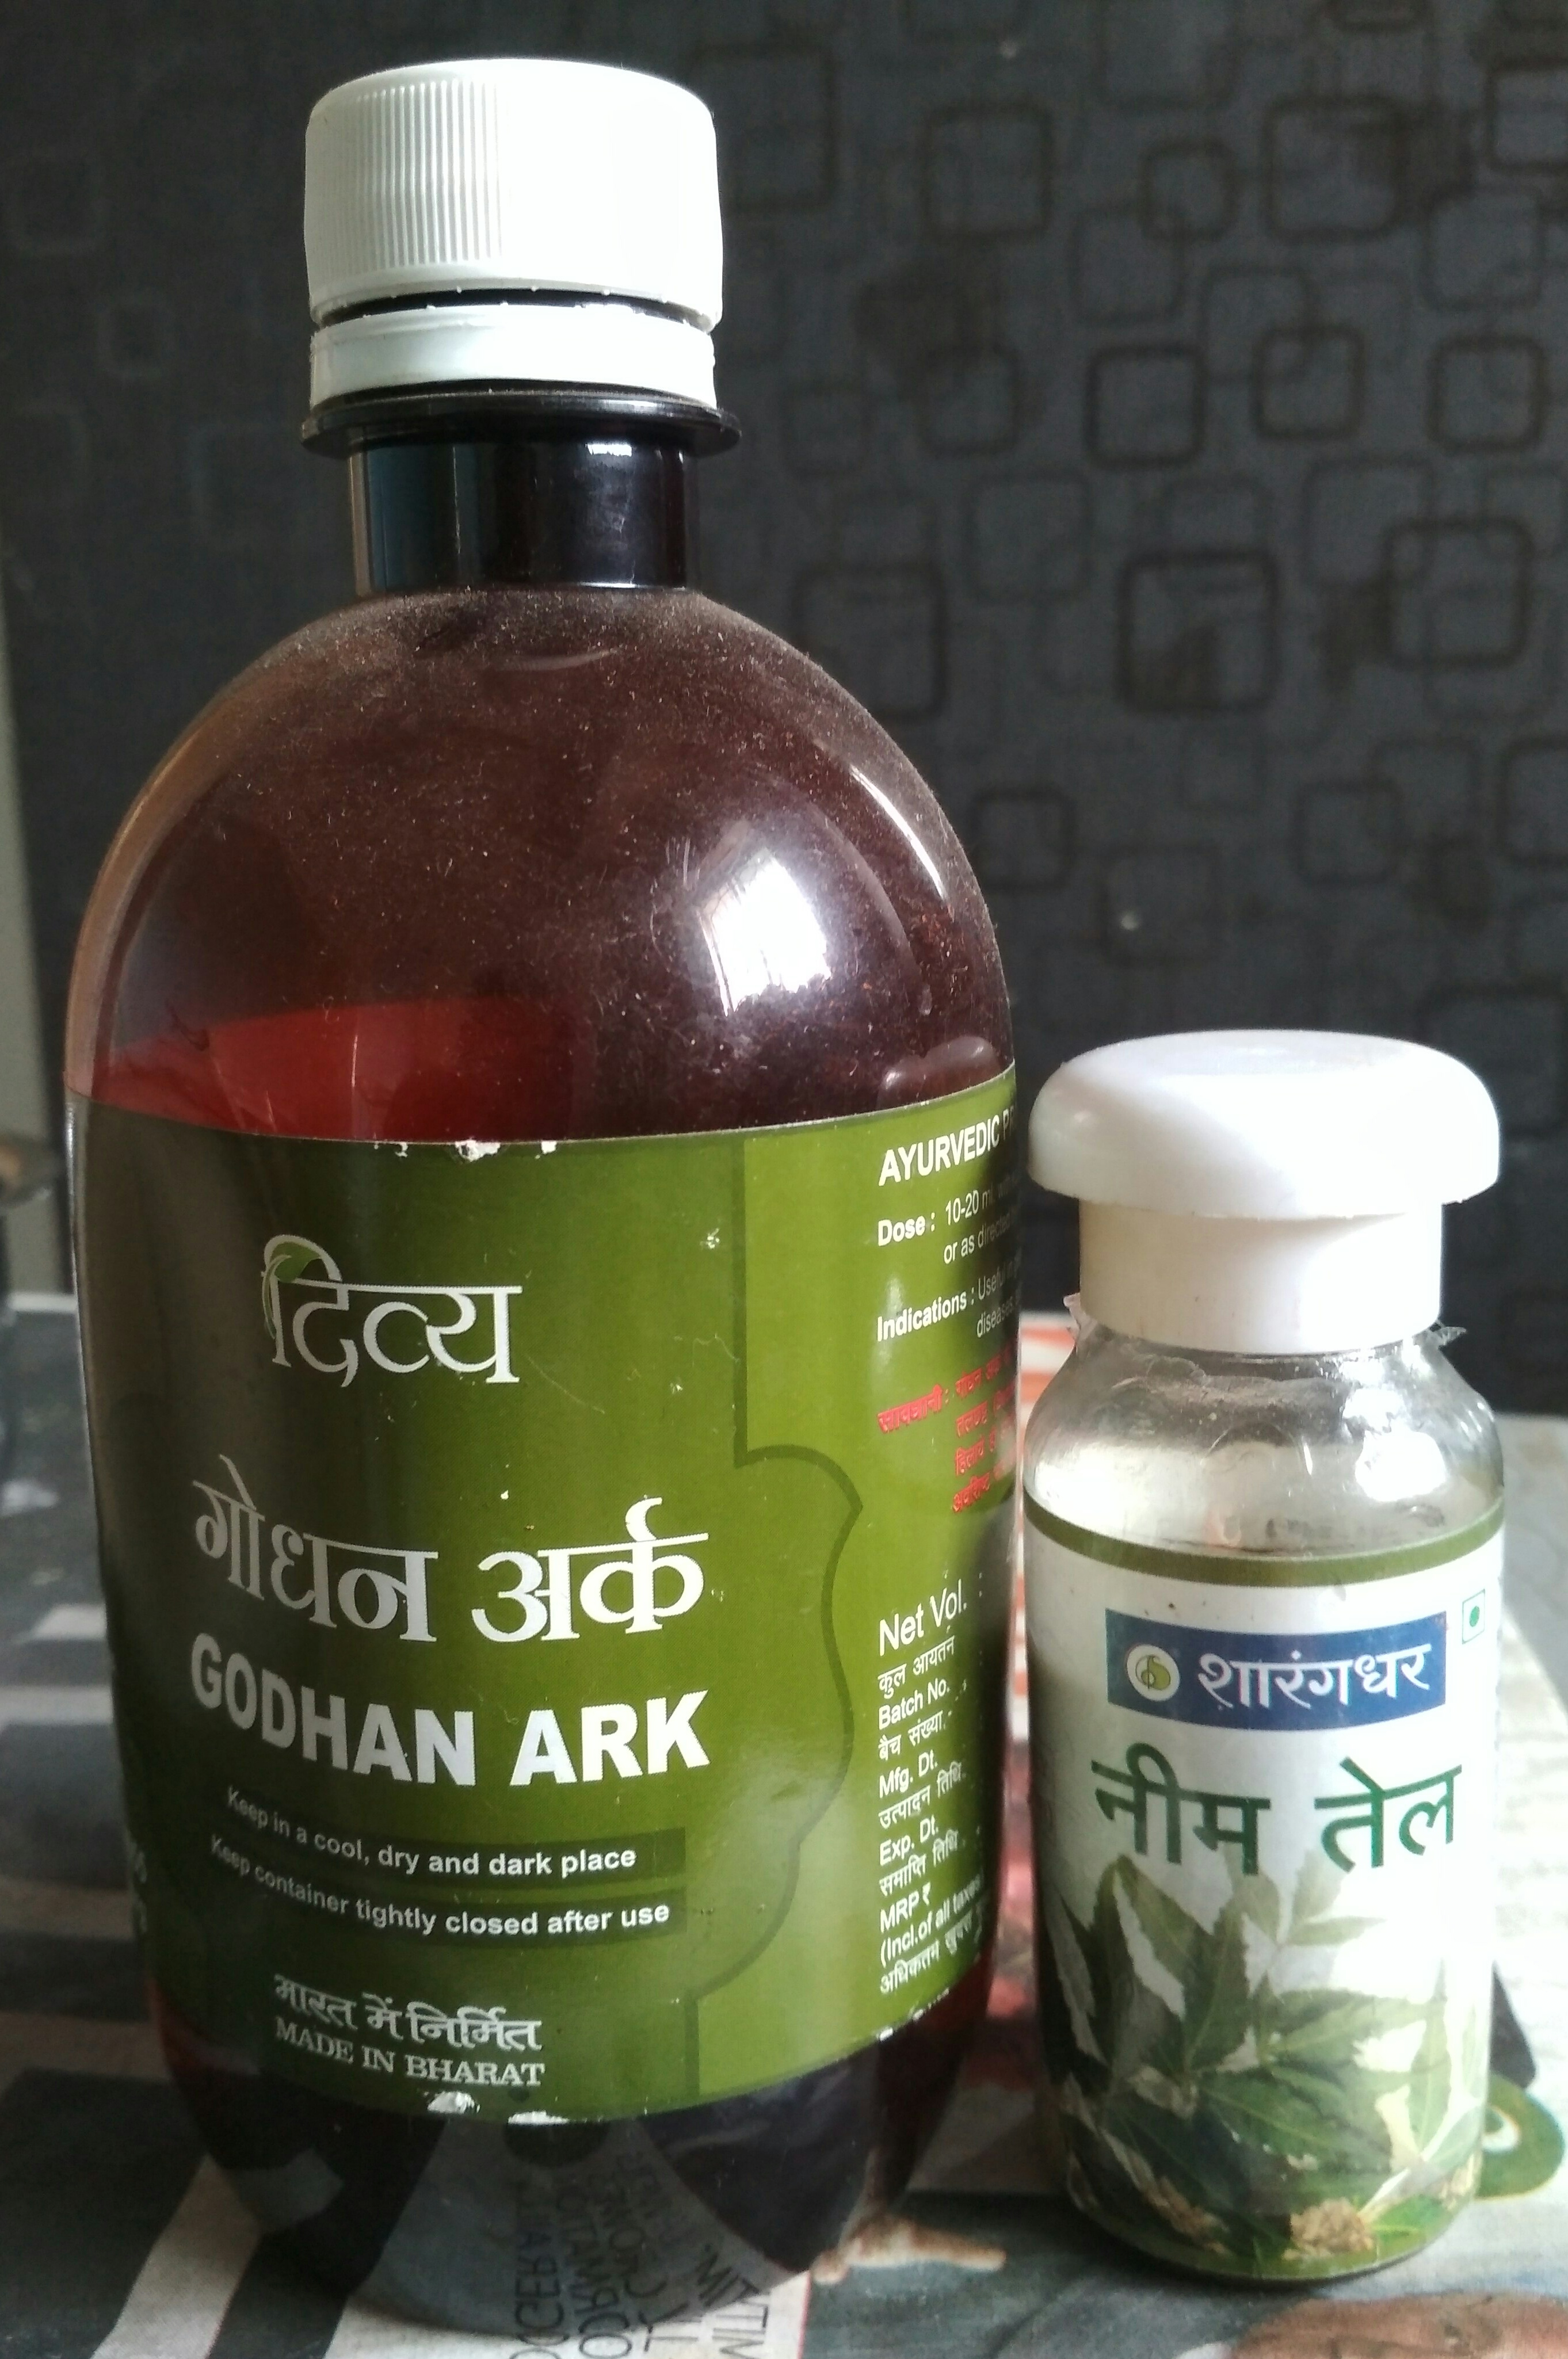
  • Pest Control:

Rain can bring out pests. Regularly inspect your plants for signs of infestations and treat them promptly with natural remedies or appropriate pesticides.

  • Avoid Overwatering:

While plants (indoor plants) need water, be cautious not to overwater them. Check the soil moisture before watering to prevent root rot.

  • Use Mulch:

Apply a layer of organic mulch around plants to prevent soil erosion, reduce splashing, and regulate soil temperature and moisture.

Summer Season

Caring for plants during the hot and often challenging summer season requires attention to watering, protection from intense sunlight, and overall plant health. Here’s a guide to help you care for your plants during the summer:

  • Watering:

Water deeply and less frequently to encourage plants to develop strong root systems. This helps them access water from deeper into the soil. Water early in the morning or late in the evening to minimize water loss due to evaporation. Avoid wetting the foliage to prevent fungal diseases. Water at the base of the plant. Monitor your plants’ water needs closely; the heat can cause them to dry out more quickly.

  • Mulching:

Apply a layer of organic mulch (such as straw, wood chips, or compost) around the base of your plants. This helps retain soil moisture, regulate soil temperature, and prevent weed growth.

  • Shade and Sun Protection:

Provide shade to delicate plants during the hottest part of the day, especially in regions with scorching temperatures. Use shade cloth, row covers, or plant taller plants to create natural shade.

  • Pruning:

Regularly prune dead or yellowing leaves to improve air circulation and prevent the growth of diseases. Trim back overgrown branches to promote better growth and shape.

  • Fertilization:

Use a balanced, slow-release fertilizer to provide essential nutrients to your plants. Avoid excessive fertilization, as it can kill the plants especially if you are using chemical fertilizer. To prevent excess heat, fertilize the plants in the evening after watering.

  • Potted Plants:

Potted plants can heat up quickly in the summer. Move them to a slightly shaded area to protect them from intense sunlight. Water potted plants more frequently since they tend to dry out faster than plants in the ground.

  • Heat-Tolerant Plants:

Opt for heat-tolerant and drought-resistant plant varieties that are better suited for the Indian summer. Succulents, cacti, adenium, and native plants are good options.
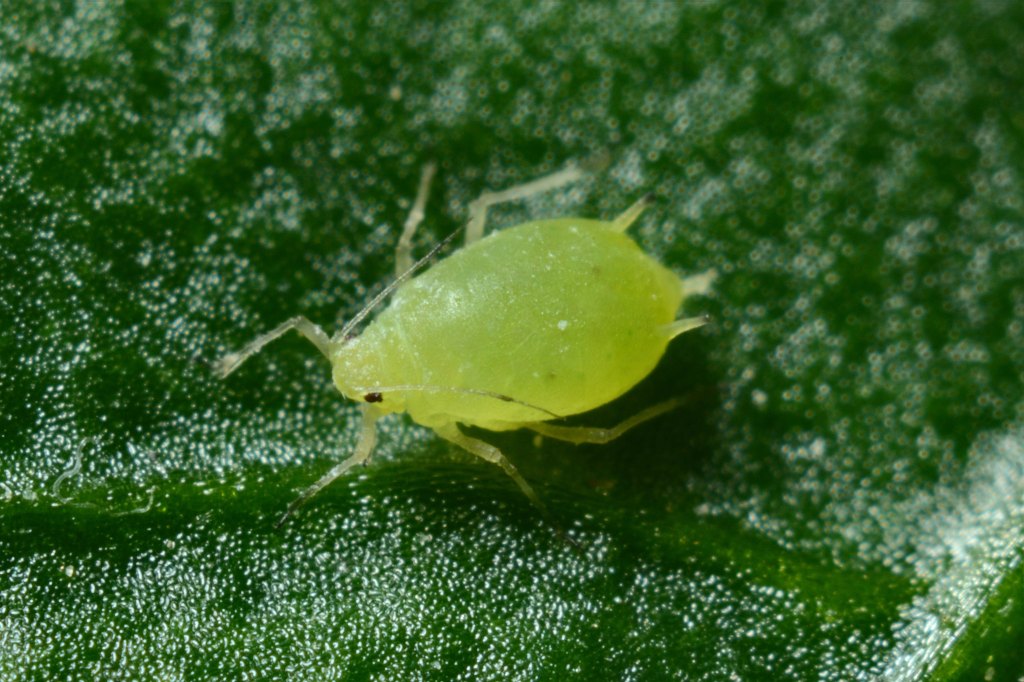
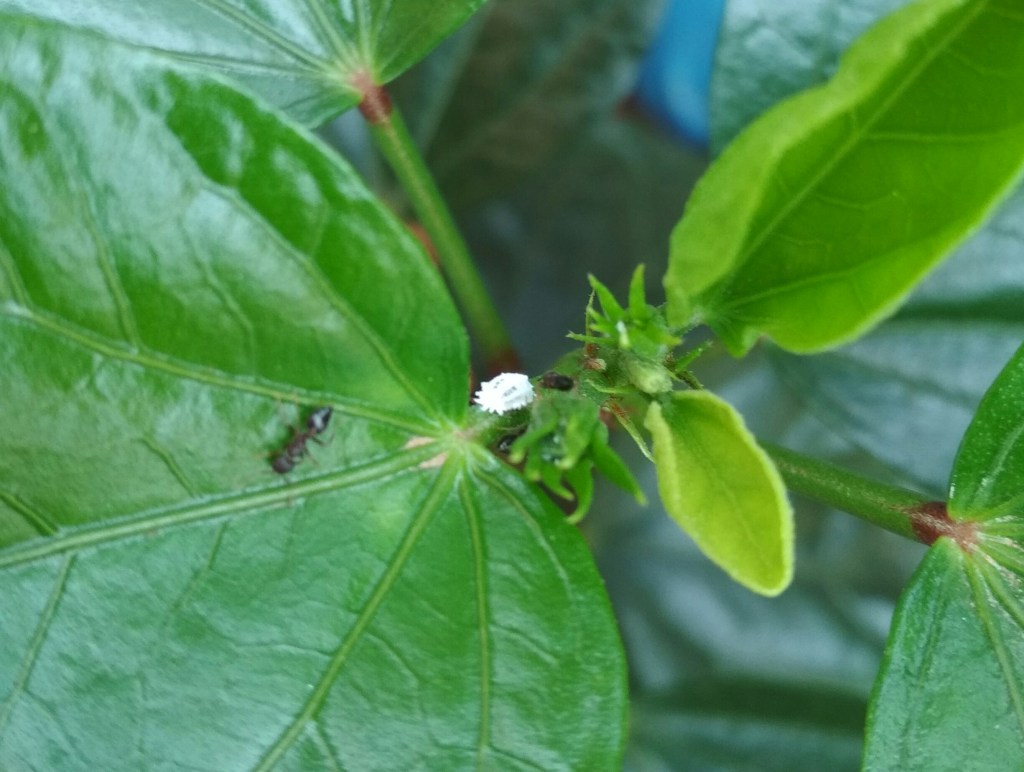
  • Pest Management:

Regularly inspect your plants for signs of pests and disease. The most frequent pests that attack plants in the summer are aphids and mealybugs. Use natural remedies or appropriate pesticides if necessary. Healthy plants are more resistant to pests and diseases, so maintaining proper care is essential.

  • Wind Protection:

Strong winds can increase water evaporation and stress on plants. Use windbreaks or plant taller plants as barriers to reduce wind impact.

  • Watering Techniques:

Use a soaker hose or drip irrigation system to water plants directly at the soil level. This minimizes water waste and avoids wetting foliage.

  • Consistent Care:

Consistency is key. Regularly care for your plants and observe their condition. Adjust your care routine based on their needs.

  • Shade-loving Plants:

If you have areas with limited sunlight, consider growing shade-loving plants to create a cooler and more comfortable environment.

By following these tips and tailoring them to the specific needs of your plants, you can help them thrive and survive the challenges posed by the hot summer.

Remember that the specific care required can vary depending on the types of plants you have and the microclimate of your region. Observing your plants closely and adjusting your care routine accordingly is key to successful gardening during each season.

Conclusion:

Embarking on a year-round journey of seasonal gardening is an enriching experience that connects you with the rhythm of nature. Each season brings its own magic, challenges, and rewards. By understanding the unique demands of each period and tailoring your efforts accordingly, you’ll cultivate a garden that’s not only a testament to your dedication but also a haven for nature’s beauty. So, roll up your sleeves, grab your gardening tools, and let the enchanting cycle of seasonal gardening begin!

Happy Gardening!

The Sublime Beauty of Aquatic Gardening: A Harmony of Life and Water!!

Introduction:

Aquatic gardening, a captivating blend of nature and artistry, has taken the world by storm. This serene and visually stunning practice allows enthusiasts to create living masterpieces that thrive beneath the surface of the water. From tranquil koi ponds to vibrant water lily landscapes, aquatic gardening offers a captivating escape into a world where plants and aquatic life coexist harmoniously. In this article, we delve into the enchanting realm of aquatic gardening, exploring its benefits, essential elements, and practical tips for creating your own aquatic heaven.

The Allure of Aquatic Gardening:

Aquatic gardening brings a unique blend of aesthetics, tranquility, and environmental impact. The sight and sound of water gently flowing through lush aquatic plants evoke a sense of calm and serenity, making it a popular choice for both outdoor and indoor spaces. This practice not only enhances the visual appeal of a space but also contributes to ecological balance by providing habitats for various aquatic creatures.

Essential Elements of Aquatic Gardening:

  1. Aquatic Plants: The foundation of any aquatic garden, these plants come in various forms, from submerged to emergent, and each plays a crucial role in maintaining water quality and providing shelter for aquatic organisms.
  2. Water Features: Ponds, streams, and fountains are the heart of aquatic gardens. They provide the necessary water flow, aeration, and circulation essential for the health of both plants and aquatic life.
  3. Fish and Wildlife: Koi, goldfish, guppy, molly and other ornamental fish not only add vibrant colors but also help maintain a balanced ecosystem by consuming algae and insects. Frogs, dragonflies, and water insects are also attracted to these environments.
  4. Hardscaping: Rocks, pebbles, and aquatic-safe ornaments add texture and contrast to your aquatic garden. They provide hiding places for fish and can be strategically placed to guide water flow.
  5. Artificial fountains/pumps: Artificial water pumps are great for landscape decorations and are simple to install and maintain.

Creating Your Aquatic Garden:

  1. Choosing the Right Plants: Research and select aquatic plants suitable for your climate and the size of your water feature. Consider a mix of submerged, floating, and emergent plants for a diverse and balanced ecosystem. When designing an indoor aquatic garden, take into account the plants that need less sunlight. There are numerous possibilities if you grow outdoors.
  2. Design with Balance in Mind: Plan the layout of your garden to achieve a harmonious balance between water and plants. Create different depths within your pond or water feature to accommodate various types of aquatic vegetation.
  3. Water Quality Management: Regularly test and maintain water quality through proper filtration, circulation, and aeration systems. Adequate water quality is essential for the health of both your plants and aquatic inhabitants.
  4. Fish Care: If you opt for ornamental fish, ensure their well-being by providing proper nutrition, monitoring water temperature, and maintaining a suitable environment.
  5. Maintenance Routine: Regularly remove debris, prune overgrown plants, and manage algae to keep your aquatic garden looking pristine. Seasonal maintenance tasks, such as winterizing plants, are also essential.

Types Of Aquatic Plants

There is a wide variety of aquatic plants that can be grown in aquatic gardening setups. Here are some common types of aquatic plants that are popular in aquatic gardening:

  • Water Lilies (Nymphaea spp.): Water lilies are iconic aquatic plants known for their floating leaves and beautiful flowers. They come in various colors and sizes, and they provide shade and visual appeal to ponds and water gardens.They are classified into 3 main categories:
  1. Tropical : are heavy bloomer but go into dormancy in winter
  2. Hardy: have big blooms compared to tropical but frequency of blooms is less. They don’t go into dormancy and bloom all season.
  3. ISG: These are cross hybrid between tropical and hardy, so they give heavy bloomer like tropical, and the flower size is big as hardy.
  • Lotus (Nelumbo spp.): Similar to water lilies, but lotus plants have large, round and aerial leaves and stunning flowers. Flower size is also big. They are often grown in deeper water and are prized for their cultural significance in various cultures. Like water lilies they are also classified as tropical and hardy.
  • Marginal Plants: These plants thrive at the edges of water bodies, with their roots submerged and their foliage above the waterline. Examples include cattails, irises, rushes, and various ornamental grasses.
  • Floating Plants: Floating plants are ideal for controlling algae growth by shading the water’s surface. They also provide cover for aquatic animals. Popular choices include water hyacinth, water lettuce, mosaic plant, duckweed, and azolla.
  • Submerged Plants (Oxygenators): Submerged plants help maintain water quality by oxygenating the water and absorbing excess nutrients. Common choices include anacharis, hornwort, and various species of pondweed.
  • Bog Plants: Bog plants are suited for planting in wet areas around the pond’s perimeter or in bog filters. They include plants like marsh marigold, pennywort, pitcher plants, water bamboo, and astilbe.
  • Bulbs and Rhizomes: Some aquatic plants grow from bulbs or rhizomes. Examples include water canna, water hawthorn (Aponogeton spp.), japonica and various water lily and lotus varieties.
  • Submerged Aquatic Plants for Aquariums: In aquariums, aquatic gardening includes a variety of submerged plants that provide both aesthetic appeal and improved water quality. Plants like java moss, anubias, Vallisneria, and crypts are commonly used.
  • Aquatic Mosses: Mosses, such as Christmas moss and Java moss, can be attached to hardscape or allowed to float freely in the water. They create natural, textured environments in aquariums and terrariums.
  • Paludarium and Riparium Plants: These setups combine aquatic and terrestrial planting areas. Plants like pothos, ferns, and philodendrons are used in these designs to bridge the gap between water and land.

When selecting aquatic plants for your aquatic gardening project, consider factors like the water’s depth, sunlight exposure, temperature, and the specific needs of the plants. A well-balanced combination of different types of aquatic plants can create a visually appealing and ecologically balanced water garden or aquarium.

Conclusion:

Aquatic gardening is a captivating journey that marries the beauty of nature with the creative expression of human design. It allows enthusiasts to establish breathtaking aquatic landscapes that not only soothe the senses but also foster a balanced ecosystem. By understanding the essential elements and following practical tips, you can embark on a rewarding journey to create your own aquatic oasis, where the interplay of water, plants, and life forms paints a canvas of tranquility and natural splendor. Dive into the world of aquatic gardening and unlock the serenity that water and nature combined can bring.

Happy Gardening!!

Embrace Green Living Indoors: A Comprehensive Guide to Indoor Gardening!

Indoor Gardening refers to growing plants indoors it may be your home, office, or any other enclosed area. Urban regions are now seeing a surge in indoor gardening. It has also become a part of interior design. Plants not only beautify your home but will also improve the quality of the air. It is considered good from Vastu’s point of view also. There are different types of gardening like container gardening, vertical gardening, terrariums, hydroponics, etc. The most common type among them is container gardening which we will be discussing in this article.

Before beginning indoor gardening, there are a few things you need to keep in mind:

Selecting Plants

The selection of indoor plants depends mainly on your house structure. How much space is available, availability of sunlight, movement of people in the house, and purpose of gardening. If you want to grow vegetables, then you can grow plants such as tomatoes, eggplant, onion, and cabbage. These plants require sunlight so you need to keep them in south facing corner of the house or you can keep them in the gallery. If you want to grow herbs, then you can grow basil, ginger, and aloe vera. If you want to grow decorative plants, then you can grow money plants, spider plants, snake plants, English ivy orchids, and bamboo plants.

Placement

The placement of the plant depends on the types of plants and also the convenience of the people in the house. Don’t keep plants in a place where there is regular movement. Also, keep plants away from pets or toddlers. keep a plate below the container so that the excess water want flows over the floor. And empty it frequently to avoid mosquito larvae.

Light Source

Sunlight is very important for the growth of plants. With the help of sunlight, plants prepare their food through a process known as photosynthesis. The requirement for sunlight may be different for different varieties of plants. Plants that require more sunlight should always be placed in south facing direction as I have mentioned earlier. Plants like orchids require indirect sunlight for flowering. These should be kept near the window which gets partial or indirect sunlight.

You can also use an artificial light source such as led light for growing your indoor plants.

Growing Medium

The growing medium is very important in growing any plant. Since you are growing your plants indoors it’s better to use a well-drained potting mix. Avoid using cocopeat as it keeps the soil moist. If you are using it then don’t overwater your plants. The growing medium should be composed of garden soil, vermicompost, and sand(2:2:1). Again the potting ratio and the medium may differ depending on the plants.

Fertilizer

The requirement for indoor plants is less as compared to garden plants, especially for pothos(money plants), spider plants, snake plants, and English ivy. If you are growing vegetables or herbs or flowering plants then you need to fertilize them regularly. Fertilize these plants once in 15 days. Avoid using organic fertilizer. You can use vermicompost. You can also prepare your fertilizer from your kitchen waste.

Pest control

As I mentioned earlier foliage plants like pothos spider plants and snake plants are hardy, they don’t require much care. Only vegetables, herbs, and flowering plants are prone to diseases and get affected by pests. Common types of bugs are aphids, mealy bugs, and caterpillars. As it said precaution is better than cure. It’s better to make your plants resistant to diseases rather than treating infected plants. For these spray dilutes neem oil on leaves twice a month.

Water requirement

This is another factor you need to consider while gardening. As indoor plants require very less sunlight the water requirement will also be less. You can water them once in two days. Aloe vera and orchids require very less water. You can water these plants once a week. For orchids, you can put ice cubes.

Repotting

Repotting is required if the plant becomes weak or it grows too big. If your plants suddenly start shedding leaves or the leaves become yellow or the plant doesn’t grow or flower then it’s better to report the plants. after removing the plants from the container check their roots. If the roots are rotted then cut those roots and dip them in water containing fungicide or you can simply clean them by rubbing them with cotton dipped in neem oil. Keep it in a shade for a day then report it.

Types Of Indoor Plants

You can grow anything indoors if you provide proper light, potting mix, and fertilizer. But it is difficult and a little costly to do so. Therefore I am listing some indoor plants which you can grow easily in your house or office.

Foliage Plants

  • Money Plant
  • Peace Lily
  • Spider Plant
  • Rubber Plant
  • Ficus Plant

Flowering Plants

  • Orchid
  • Hoya carnosa
  • Anthurium
  • Christmas Cactus
  • Kalanchoe

These plants require a sufficient amount of sunlight for flowering. So keep these plants in a south-facing window or on your balcony

Herbs or Medicinal Plants

  • Tulsi/Basil
  • Alovera
  • Mint
  • Ginger
  • Garlic

Vegetables

  • Pepper
  • Tomato
  • Potato
  • Brinjal
  • Beans
  • Lady’s Finger
  • Onion

These plants also require a good amount of sunlight, so it’s better to keep them on a balcony that gets good sunlight.

The first two categories of plants are good for beginners. After getting some experience start growing the last two categories of plants.

Benefits Of Indoor Gardening

1. The first benefit is you can grow any Grow Anything At any time irrespective of the weather.

2. Indoor plants improve air quality by taking carbon dioxide and giving out oxygen. Plants like peace lilies, pothos, and spider plants also absorb toxins.

3. The temperature of the house is lowered by indoor plants.

4.Plants are theraupatic.They help in reducing stress levels.

5. Plants increase productivity by sharpening our focus.

Now you must have come to know the vast benefits of indoor gardening. So start your indoor garden by buying your first plant. All The Best.

Happy Gardening!!!

How to begin with Gardening: 5 easy steps for beginners!

Everyone loves to go for a walk in a garden, but how about making your own garden and enjoy its beauty every day. This modern life has made us so busy that we have forgotten to enjoy the little things in our life. But the corona pandemic made us realize the actual meaning of life. When the lockdown was imposed everyone has stayed in their home and enjoyed their family life. Some people started with their hobbies which they have left long before because of a busy life. People who have never entered the kitchen started to cook. And some of them started with gardening.

I have seen many posts by people on Facebook who have started gardening but are having many troubles in maintaining their plants. Many were posting their plants which are either dead or on the verge of dying. As a novice, they forgot to follow some basic rules. So here I am giving you 5 easy steps especially for the beginners who have just started or want to start Gardening.

Step:1 Start with the basics

Chilli saplings

If you are a beginner, then avoid making common beginner’s mistakes. People tend to buy plants that look beautiful and different nursery sites make this task easier. If you have just started gardening, then my advice is to start from your home first. In your home, there are many vegetables or spices which can be easily grown without much effort. It saves your time as well as money. For example, chili, tomato, coriander, cumin can be easily grown and give good yield too. Apart from that, you can also grow ginger and potato by cutting their tip(ginger)/eye(potato). You can regrow mint after using the leaves and planting its stem either in soil or just putting it in water. As these are frequently used in your kitchen you can start with these instead of buying seeds and plants from nurseries or online websites which will save your money as well as time. After gaining some expertise, you can start buying plants that are easy to maintain like a spider plant, pothos, wandering jew, aparajita, etc. After that, you will be fully ready to grow any of your desired plants.

Step 2:Know your weather

This is a very important step that many beginners ignore. You should remember that all plants cannot be grown in all regions. Different plants have different requirements. You cannot grow cactus in heavy rainfall regions the same way as spices cannot be grown in the desert. If you are buying any plants especially online make sure the weather condition in your place is suitable for the growth of that plant. So before buying any costly plants on the net just check the description which will mention the average temperature for the growth of that plant.


Similar Posts:


Step 3: Always use organic fertilizer

Fertilizer is very important for the growth and fruiting of any plant. If you browse on the net you will get 100 s of fertilizers sold by different websites. Avoid buying these as there are chances that they may kill your plants if not used in proper proportions especially if those fertilizers turn out to be chemical ones. You will also get organic fertilizers online but as a beginner, it’s better to use homemade fertilizers like kitchen wastes which include used vegetables, fish water, rice water. If cow dung(dry) is available in your area you can use that too. Always cover this waste with a layer of soil to avoid rot and smell. If you feel you can’t use these then buy only organic fertilizer from your local nurseries or online websites.

Step 4: Remember there is a big difference between theory and practical

On YouTube, there are many videos on growing plants. Many of them don’t show the results. I have tried many of them like growing cardamom plants from seeds or growing rose cutting using potatoes and failed miserably. Before following any YouTube video check the comment section. See what other people are saying. Even if you follow these instructions there are chances that you may not get the desired result. The reason is mentioned in step no 3. The videos which are shown are from places which have different weather conditions than yours. And many videos are just made by beginners who just want to earn money from google ads. Don’t blindly follow these videos.

Step 5: Check the progress

Planting is not enough. The plant should be properly taken care of. You should check the progress of your plants regularly. Check whether the plant is growing properly. If not try to find the causes. Water it properly, give fertilizers after some period, check whether the plant has any bugs or the leaves are yellow or curled or dry, and take care accordingly.

If you follow the above steps soon you will become a successful gardener. So what you are waiting for? Start now, Happy Gardening!!!

Easiest Vegetable to Grow This Summer!

Summer apart from being the hottest season is the best time for gardening provided you have plenty of water. In this season grow some vegetables in your garden and enjoy a chemical-free meal. If you are new to gardening then start by planting these vegetables. These vegetable are not only easy to grow but are very easy to maintain. So here is a list of vegetable which you can grow in this summer:

Pepper Pepper is a must in Indian dishes whether it is a curry, gravy or chutney. Growing pepper is very easy. They are grown from seeds. You will get these seeds easily in the market. But no need to waste money on these seeds. Instead of that try my method. If you are using dry pepper then you can easily get these seeds from the pepper. There will be lots of seeds in the bottom of the container. You can use these seeds. But if you are buying fresh pepper like me then keep those pepper out of the refrigerator. After some days the unused pepper will become red and finally get dried. Now remove seeds from these pepper. These seeds are ready for planting. I always use these seeds as I don’t have a refrigerator. These seeds can be directly planted in pots. Within two days they start germinating. After 7 days, transfer the seedlings in a bigger container containing a potting mix. The potting mix should include soil, cocopeat, and fertilizer. After 20 days the plant will start flowering and after 35 days the pepper will be fully developed.

Flowers of Pepper Plant

Tomato Tomato is used in curry, sauce, chutney and in making gravy. Tomato can be grown in the same way as the pepper. I always remove the seeds of the tomato before cooking as I have read somewhere that they are not good for health especially for kidney(I read it in a health magazine). Instead of throwing these seeds in dustbin I plant in a pot. And the rest procedure is same as pepper. The only difference is the tomato plant require support. They cannot bear the weight of tomatoes. So once the plants start flowering give them proper support.

Tomato

Eggplant Eggplant or brinjal are used in many different cuisines. This plant can be grown from seeds as well as from seedlings. I have recently bought seedling of this plant from the local market for Rs.10. Total of 10 seedlings were there. If you are planting seeds then remember that these seeds take quite a long time(about 7 to 14 days) to germinate. Once they are germinated it takes about one to two month for the plants to start flowering. Once they start flowering give enough water otherwise the flowers will fall. Within 20 days of flowering, the vegetable is ready to harvest.

Flowers of eggplant

Similar Posts


Onion Onions are used in salads, curry, gravy, and many other dishes. Like pepper and tomato onions are also commonly used vegetables. Onions can also be grown from seeds. Like eggplant, I have bought onion seedlings also from the local market. You must have noticed that in moist condition onions start sprouting. Plant these sprouts in the soil. These sprouts will develop and give flowers and these flowers later develop into seeds. You can use these seeds or buy fresh seeds from the market or any online sites. But I suggest you buy seedlings, instead of seeds. As you know onions grow underground so these seedling has to be planted in loose and well-drained soil. Otherwise, the onion won’t grow. Within the span of 2 months, the onions will be ready for harvesting.

Onion Seedlings

Amaranth Leaves Amaranth leaves are green or beetroot red in color. Very easy to cultivate and have amazing health benefits due to its high concentration of protein, minerals. and vitamins. They have tiny black color seeds which are easily available in the market. In my place, local farmers sell it throughout the year. They sell it in a bottle cap. One cap costs Rs.20. You can also prepare your own seeds by following my technique. Whenever you buy amaranth leaves from the market, cut the tip and remaining leaves and use it for cooking. Don’t throw the remaining plant. In that select some healthy plants which have good roots and plant it in a pot. After some days the plant will grow and will start flowering. After the flowers are dried remove it. Now when you crush these dried flowers you can see tiny black seeds. These seeds can be used to grow new amaranth plants.

Green Amaranth Plant

Malabar Spinach (Basella alba) This vegetable is also known as “Vaali Bhaji”. Most famous and widely used vegetable in summer. We eat it along with “Paige” also called as Ganji in Kannada.
Paige is made by boiling rice in large amounts of water. Summer is the best season to eat as well as to grow this green vegetable. Its a soft-stemmed vine and grows up to 10 meters. Normally it is propagated through its stem. I always grow this vegetable by planting its stem. But it can also be grown from seeds. The seeds are juicy and black in color. I have never seen its seeds in my market or any of the online site. But you can save its seeds from your plant for next yield. Once the vine starts flowering, its growth stops. It requires moist soil but avoids too much watering. This vegetable is rich in vitamin and calcium.

Leaves of Malabar Spinach


Hibiscus: Queen Of My Garden!

This blog is dedicated to all hibiscus lovers. Here I am writing about a brief history of hibiscus and how I went gaga for this lovely blossom. I stay in the western coast of India. Right now, I own 36 varieties of hibiscus and searching for new varieties in the nursery and also online sites. Plz, help me in my endeavor.

I searched many websites for different varieties of hibiscus but unable to find any useful sites. There are some sites which offer common varieties but the price ranges between Rs.250 to Rs.500. I found one useful site which offers many varieties, but the price is over my budget as they are selling it in dollars. If you want to check, then this is the link.

Normally, I buy all of my garden plants from a nearby nursery. Each hibiscus plant costs Rs. 50 each (without pots). These plants are always in a healthy condition and have lots of buds.

These are the photos of hibiscus which I own.

History

Lets know about a brief history of hibiscus. Hibiscus is a perennial plant and belongs to the family Malvaceae. It can grow up to 10meters. There are about 300 species of hibiscus. The exact origin of hibiscus is unknown but they are found throughout the tropic.

Unknown Facts

These lovely flowers in addition to adding beauty to your garden also have many benefits. The leaves and flowers of hibiscus plants are used in many herbal shampoos and conditioners. They also have medicinal properties and are used in many Ayurvedic medicines especially the white flowers. Even we use the leaves and flowers of white hibiscus for our hair. We boil it and then apply that lukewarm water to our scalp and leave it for 20 minutes. It reduces hair fall, makes hair smooth, and also absorbs heat and you will feel very relaxed.


See Also:

American and Taiwan variety hibiscus
My water lily collection

How I Take Care of my Hibiscus

I have planted all my hibiscus in plastic pots as I stay in a rented apartment. While taking care of any plants you have to consider three main points

1)Proper Watering

2)Fertilizer

3)Pest Control

Watering

depends on the season. In the rainy season, the rainwater is enough, so I don’t go for watering. In winter they require very less water i.e. once in a day. Early morning is the best time to water this plant. Since it will be very cold outside, so I prefer evening as it also suits my schedule. In summer, hibiscus require a large amount of water. I water them twice a day early in the morning and late evening.

Fertilizer

I always prefer organic farming as I don’t want to pollute the soil as well as the environment. I use kitchen waste like vegetables, eggshells, used tea, fish water, and coconut shells. Apart from this I also use an organic fertilizer which I buy from the nursery. They sell it for Rs. 20/kg. I use this fertilizer once in a week (on Sunday as I have a holiday). I use about one tablespoon for each plant.

Pest control

This is a major part of any plant care. If you do proper watering and used good fertilizer but not done anything for pest control, then your efforts will be in vain. The main pests which affect your hibiscus plants are aphid, mealybugs, thrips, caterpillar and ants.

Aphid: These pets are usually found in clusters and are black, white or green in color. They suck the juices from foliage. If you do not control these pests, they will kill your entire plant. Four of my hibiscus plants died because of this pest.

Aphid

Mealybugs: These little unwanted guests will destroy your entire garden. Hibiscus foliage is their favorite food. These pests not only kill hibiscus but also affect other plants like rose, tomato and eggplant. Very difficult to control.

Mealybug

Thrips: These pests cause hibiscus buds to drop before flowering as they lay eggs inside the buds. I faced this problem a lot. These pests are difficult to detect as your plant will be in a healthy condition and you cannot see these pests. Only when you open the fallen bud you can see the patches inside it that also with a magnifying glass.

Buds Affected with Thrips

Caterpillar: These will affect your plant during the rainy season. They will eat away all the leaves within few hours. Sometime the leaves will be folded. When you open this fold, you can see tiny green caterpillar.

Caterpillar

Ants: These won’t directly affect your plant, but they help in the propagation of above-mentioned pests.

Ants

For all these pests I am using neem oil and cow urine as pesticides. I mix 1 tablespoon of cow urine or neem oil in 500ml of water and spray it on entire plant once in a week. This works as a precautionary measure but won’t help your plants if it is badly affected by pests.

In such case you have to use soap water or shampoo water. When my plant was affected with mealy bugs, I tried this method and it worked. As I told you that I always do organic farming, so I am using herbal shampoo once in a week. Again, the spray includes 1 tablespoon of herbal shampoo in 500ml of water.

If you still can’t get rid of these pests, then pruning is the only option. Prune the affected leaves and branches and throw it in far places or burry them as there are chances that they may return through wind or ants.

Encourage beneficial insects like lady bugs (only work with temperatures 62-88°F) which eats about 50 aphids a day.  There are other useful insects like green lacewing and pirate bugs which helps in controlling the harmful pests in a natural way.

Lady bug


Thank you so many guys for reading this post. I hope this information is useful to you. If you know any website or nursery which deliver plants to Goa, plz give me information regarding that. Plz, add your suggestions in the comment box. Tell me how many hibiscus plants you have and from where you bought these plants. Plz, share photos of your hibiscus flowers too.

Happy Gardening!!!