From Garden to Teacup: Cultivating Aparajita for Beauty and Health!

Introduction

Aparajita
Multipetal Aparajita Flower

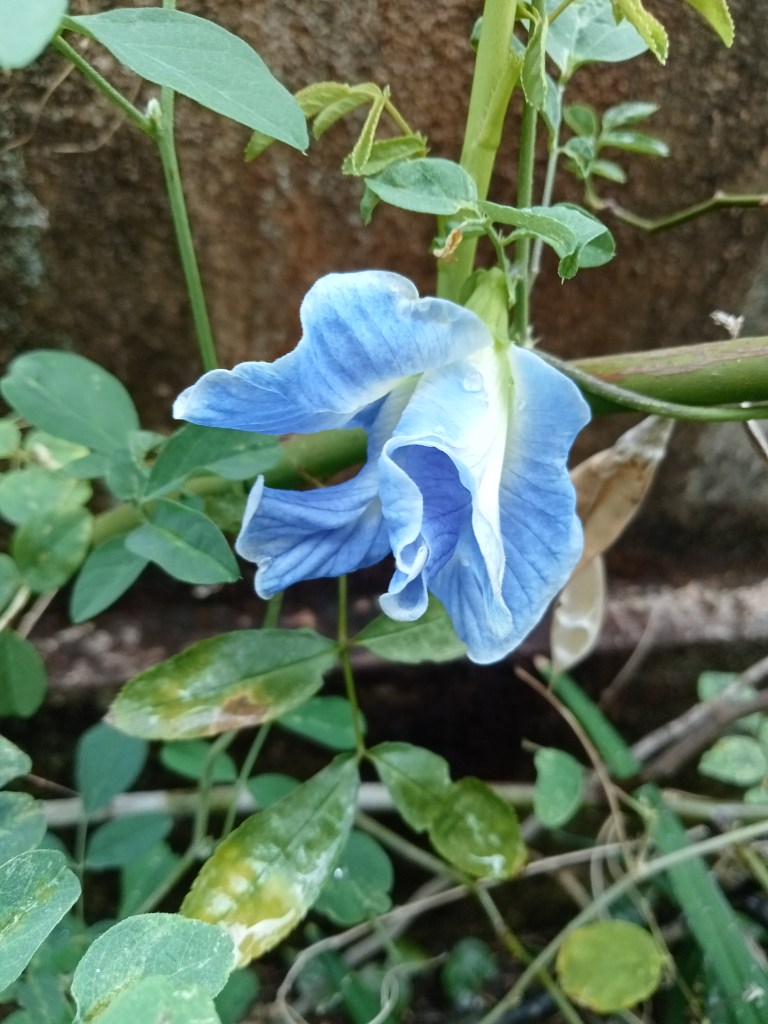
Aparajita, also known as the butterfly pea or Asian pigeonwings, is a strikingly beautiful plant renowned for its vivid blue flowers. Scientifically known as Clitoria ternatea, this versatile plant is not only cherished for its ornamental value but also for its medicinal properties and culinary uses. Native to tropical Asia, Aparajita is easy to grow and can thrive in a variety of conditions. This article provides a comprehensive guide on how to cultivate and care for the Aparajita plant.

Characteristics of Aparajita

Before diving into the cultivation process, it’s essential to understand the unique characteristics of the Aparajita plant:

Botanical Name: Clitoria ternatea

Common Names: Butterfly pea, Blue pea, Asian pigeonwings, Aparajita

Family: Fabaceae

Plant Type: Perennial herbaceous plant

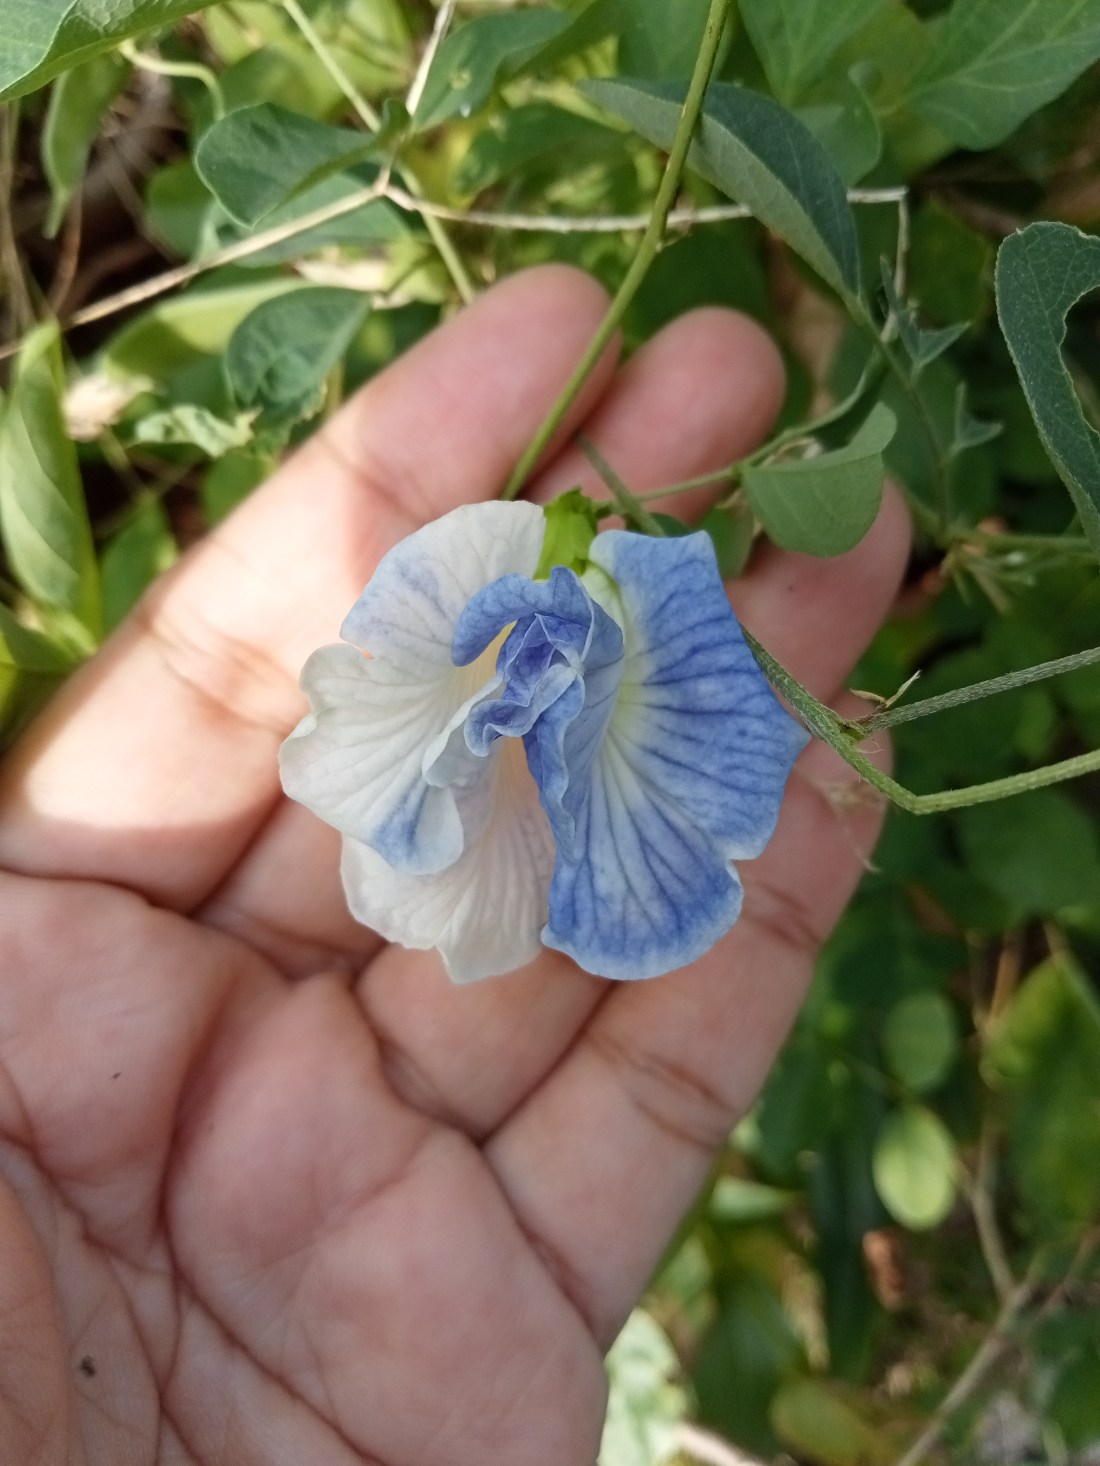
Flower Color: Vibrant blue (also available in white and lavender varieties)

Growth Habit: Climbing vine

Benefits of Growing Aparajita

The Aparajita plant offers several benefits, making it a valuable addition to any garden:

Ornamental Value: The striking blue flowers add a touch of elegance to gardens and landscapes.

Medicinal Properties: Aparajita is known for its health benefits, including antioxidant, anti-inflammatory, and cognitive-enhancing properties.

Culinary Uses: The flowers are used to make herbal teas, natural food coloring, and refreshing drinks.

Soil Improvement: As a member of the legume family, Aparajita helps fix nitrogen in the soil, improving soil fertility.

How to Grow Aparajita

Growing Aparajita is relatively simple and requires basic gardening skills. Here is a detailed, step-by-step tutorial to get you going:

1. Choosing the Right Location

Aparajita thrives in warm, sunny locations. Pick a place that gets direct sunlight.  The plant can tolerate partial shade, but full sun ensures the best flowering.

2. Soil Preparation

Aparajita prefers well-draining soil with a neutral to slightly acidic pH (6.0-7.5). Loamy soil that is enriched with organic matter is ideal for promoting healthy plant growth. To improve soil fertility and drainage, mix compost or well-rotted manure into the soil before planting.

3. Propagation

Aparajita can be propagated through seeds or cuttings. Here’s how to do it:

Seeds: Soak the seeds in warm water for 24 hours to enhance germination. Sow the seeds directly in the garden or in seed trays filled with potting mix. The potting mix should be consistently moist until germination occurs, which typically takes 1 to 2 weeks.

Cuttings: Take cuttings that are 6 to 8 inches long from healthy, mature plants. Dip the cut end into the rooting hormone after trimming off the lower leaves. Plant the cuttings in a pot with moist potting mix and keep them in a warm, humid environment until roots develop.


Similar Posts:


4. Planting

Once the seedlings or rooted cuttings are ready, transplant them into the garden. Space the plants about 2-3 feet apart to allow for their climbing habit. If growing as a vine, provide support such as trellises, fences, or arbors for the plants to climb.

5. Watering

Aparajita requires moderate watering. The soil should be consistently moist but it should not be soggy. Depending on the weather, give the plants a deep watering once or twice a week. During the summer season water the plants daily. Applying mulch around the base of plants helps retain soil moisture and suppress weeds.

6. Fertilization

To promote healthy growth and flowering, feed the Aparajita plant with a balanced fertilizer every 4-6 weeks during the growing season. Organic options such as compost, well-rotted manure, or fish emulsion are excellent choices.

7. Pruning and Training

Pruning regularly helps to maintain the shape of the plant and encourages more blooms. Trim back any dead or damaged growth, and pinch the tips of the vines to promote bushier growth. As the vines grow, tie them gently to train them to climb the support structure.

8. Pest and Disease Management

Aparajita is relatively pest-resistant, but it can occasionally be affected by aphids, spider mites, and whiteflies. Inspect the plants regularly and use organic pest control methods such as neem oil or insecticidal soap if needed. To prevent fungal diseases, make sure there is adequate spacing and airflow around your plants.

Lavender Color Aparajita Flower

Harvesting and Uses

The vibrant blue flowers of Aparajita are the most sought-after part of the plant. Here’s a guide on how to harvest and use them:

1. Harvesting

Harvest the flowers early in the morning when they are fresh and fully open. Gently pluck the flowers by hand or use scissors to avoid damaging the plant. Regular harvesting encourages more blooms.

2. Culinary Uses

Aparajita flowers are used in various culinary applications:

Herbal Tea: Steep fresh or dried flowers (blue color) in hot water to make a refreshing herbal tea. The tea has a mild, earthy flavor and is often enjoyed with honey and lemon.

Natural Food Coloring: The vibrant blue pigment from the flowers is used as a natural food coloring in desserts, beverages, and rice dishes. A few drops of lemon juice transform the blue color into purple, producing amazing visual effects.

Beverages: Aparajita flowers are used to make colorful and nutritious drinks. Butterfly pea flower tea, also known as blue tea, is a popular beverage known for its health benefits.

3. Medicinal Uses

For generations, traditional medicine has made use of Aparajita. Some of its medicinal benefits include:

Cognitive Health: Aparajita is believed to enhance memory and cognitive function. In Ayurvedic medicine, it is often used as a brain tonic.

Antioxidant Properties: The flowers contain antioxidants that help protect cells from damage caused by free radicals.

Anti-Inflammatory Effects: Aparajita has anti-inflammatory properties that can help reduce inflammation and pain.

Conclusion

Growing Aparajita (Clitoria ternatea) is a rewarding experience that combines beauty, utility, and tradition. With its stunning blue flowers, health benefits, and ease of cultivation, the Aparajita plant is a valuable addition to any garden. By following the steps outlined in this guide, you can successfully grow and enjoy the many benefits of this remarkable plant.

Happy Gardening! 🌸🌿

Taro Plants: A Comprehensive Guide to Growing and Caring for Taro!

Introduction

Taro (Colocasia esculenta), also known as elephant ear or dasheen, is a tropical plant that is grown primarily for its starchy root, although its large, heart-shaped leaves are also a culinary delight in many cultures. Known for its rich history and versatility, taro is a popular crop in Asia, Africa, the Pacific Islands, and the Caribbean. Whether you’re interested in its culinary uses, cultural significance, or simply as a beautiful ornamental plant, taro is an excellent addition to any garden. In this article, we’ll explore how to grow, care for, and use taro plants in your garden.

What is Taro?

Taro is a perennial plant that thrives in warm, humid climates. It’s a part of the Araceae family and is often recognized for its large, lush leaves, which can grow up to two feet long. The plant produces a corm, or starchy underground root, which is edible after being cooked. In addition to its edible corms, taro’s leaves are also used in cooking, although they must be cooked thoroughly to remove naturally occurring toxins.

Taro is a staple food in many cultures, especially in Polynesian, Southeast Asian, and African cuisines. It’s packed with nutrients, including fiber, vitamin C, potassium, and magnesium, making it both a healthy and versatile ingredient.

Benefits of Growing Taro Plants

Growing taro offers several benefits, from its culinary uses to its ornamental appeal. Here are some key reasons to consider adding taro plants to your garden:

Nutrient-Rich Food: Taro roots and leaves are excellent sources of essential vitamins and minerals, making them a great addition to a healthy diet.

Culinary Diversity: Taro is used in a variety of dishes, from mashed roots to soups and stews, and its leaves can be used in savory dishes as well.

Ornamental Appeal: Taro’s large, decorative leaves add a tropical touch to your garden or landscape. The leaves’ unique shape makes taro a popular choice in ornamental gardening.

Cultural Significance: Growing taro can be a way to connect with cultural traditions, as the plant is considered sacred in some cultures, particularly in Polynesia.

How to Grow Taro Plants

Taro is relatively easy to grow, provided you live in the right climate. The plant thrives in tropical to subtropical environments, where temperatures remain above 60°F (16°C) throughout the year. Here’s a step-by-step guide to growing taro plants in your garden.

1. Climate and Location

Taro requires a warm, humid environment with plenty of sunlight. It thrives in USDA hardiness zones 9-11, but can be grown as an annual in cooler climates, provided you plant it after the last frost.

Temperature: Taro needs consistently warm temperatures between 70-90°F (21-32°C) to grow well.

Sunlight: Taro plants prefer partial to full sun, but in very hot climates, partial shade can protect them from sunburn.

2. Soil Preparation

Taro prefers well-draining, rich, and loamy soil. It can tolerate waterlogged conditions, making it ideal for planting near ponds or in swampy areas. If you’re planting in a garden bed, prepare the soil by incorporating organic matter like compost to ensure it’s nutrient-rich and retains moisture.

Soil pH: Taro grows best in slightly acidic soil with a pH between 5.5 and 6.5.


Similar Posts:


3. Planting Taro

Taro is typically propagated through its corms. You can purchase taro corms from a nursery or use small, healthy corms from a store-bought taro root.

Planting Depth: Plant taro corms 4-6 inches deep in the soil, with the pointed end facing up.

Spacing: Space the plants about 18-24 inches apart to allow room for their large leaves to spread.

4. Watering

Taro is a water-loving plant, and regular watering is essential for its growth. Maintaining steady moisture in the soil without making it soggy is crucial. If growing taro in a pond or water garden, the plant can tolerate being submerged in shallow water.

Frequency: Water regularly to maintain moist soil, especially during dry spells. Make sure the soil is not completely dry.

5. Fertilizing

Taro plants require frequent fertilizing because they are heavy feeders. Use a balanced fertilizer (10-10-10) every month during the growing season to promote strong growth and healthy corm development.

Organic Alternatives: You can also use organic fertilizers like vermicompost, fish emulsion, or well-rotted manure to provide the necessary nutrients.

6. Caring for Taro Plants

Taro plants require minimal maintenance once established, but there are a few key care tips to ensure healthy growth:

Mulching: For moisture retention and weed control, mulch the area surrounding the base of the plants. It’s best to use organic mulch, such as leaves or straw.

Pest Control: Taro plants can be susceptible to pests like aphids, spider mites, and caterpillars. Use organic pest control methods like neem oil or insecticidal soap to keep these pests in check.

Pruning: For the plant to remain healthy and attractive, remove any damaged or yellowing leaves.

Harvesting Taro

Taro plants are typically ready for harvest 8-12 months after planting, depending on the variety and growing conditions. You can harvest both the corms and the leaves, but make sure to handle them properly, as they can be toxic if not prepared correctly.

1. Harvesting Corms

When the leaves begin to die back, it’s a sign that the corms are ready for harvest. Use a garden fork or spade to carefully dig up the corms without damaging them. The corms can be cooked immediately or stored in a cool, dry place for later use.

2. Harvesting Leaves

Taro leaves can be harvested once they are large and fully mature. Always cook the leaves thoroughly before eating to neutralize the calcium oxalate crystals, which can cause irritation if consumed raw.

Culinary Uses of Taro

Taro is used in a wide variety of cuisines. Both the corms and leaves are edible when cooked properly. Here are some popular culinary uses for taro:

Mashed Taro: Similar to mashed potatoes, boiled taro corms can be mashed and seasoned with herbs and spices.

Taro Chips: Thinly sliced taro can be fried or baked to create crispy, delicious chips.

Stews and Soups: Taro corms add a starchy, hearty texture to soups and stews.

Taro Leaves: In many cultures, taro leaves are used in dishes like luau (a Polynesian dish) and callaloo (a Caribbean dish), Pathrode (an Indian dish).

Conclusion

Taro is a valuable addition to any garden, providing both aesthetic appeal and nutritious, versatile food. Whether you’re growing it for its edible corms, its lush foliage, or its cultural significance, taro is a rewarding plant that requires relatively little effort to grow. By following the tips outlined in this guide, you can successfully cultivate taro plants and enjoy the many benefits they offer.

Happy Gardening!

Winter Plant Care and Protection: Safeguarding Your Garden Against Frost and Cold Weather!

Introduction

As winter descends, ensuring the health and vitality of your garden demands strategic plant care and protective measures. The plummeting temperatures and frosty conditions pose threats like frost damage, frozen roots, and winter scald, leaving plants vulnerable. Understanding the unique needs of different plants and employing various protective methods are crucial to safeguarding your garden’s greenery during the cold season.

Diverse Cold Tolerance in Plants

Not all plants weather winter in the same way. Understanding the varying levels of cold tolerance is essential. Some resilient plants, such as carrots, kale, broccoli, spinach, lettuce, chard, cilantro, cress, leeks, onions, and radicchio, thrive in colder temperatures. They require specific methods of protection to endure the winter months and continue flourishing once the cold subsides.

Methods of Winter Plant Protection

A range of protective measures can shield your plants from the harsh winter elements. Mulching stands out as a vital technique, effectively insulating the soil and roots against extreme cold. Covering plants acts as a barrier, trapping essential heat and moisture around them. Wrapping vulnerable stems and foliage shields them from biting cold winds. Moving delicate plants to sheltered or warmer locations can be a simple yet effective method. Adequate watering prevents dehydration and elevates soil temperature, contributing to the plants’ resilience.

Materials for Winter Plant Protection

Selecting the right materials is crucial in safeguarding your plants without causing harm. Leaves, straw, wood chips, burlap, frost cloth, plastic, bubble wrap, cardboard, and newspaper are commonly used protective coverings. Applying these materials with care is essential to avoid suffocating or overheating the plants. It’s crucial to remove them when the weather improves to prevent any adverse effects on plant health.


Similar Posts


Essential Winterizing Practices for Your Garden

Preparing your garden for winter involves a series of vital practices to ensure its well-being. Pruning, a fundamental step, involves removing dead or diseased branches to maintain plant health. Fertilizing replenishes vital nutrients, fortifying plants against the rigors of the cold season. Weeding helps minimize competition for resources, allowing plants to thrive. Cleaning the garden beds and surrounding areas prevents pests and diseases from proliferating. Harvesting remaining produce not only ensures freshness but also prevents rotting, fostering a healthy environment.

Vigilance in Monitoring and Early Intervention

Amidst the cold and frost, it’s crucial to maintain a proactive stance in observing your garden. Regularly monitor the conditions and the health of your plants. Keep an eye out for signs of stress or damage caused by the winter elements. Look for wilting, discoloration, or browning of foliage, which can signal potential issues. Early detection of problems enables swift action, preventing further damage and ensuring a better chance of plant recovery.

Building a Winter Gardening Community: Sharing Knowledge and Experiences

Additionally, fostering a sense of community and knowledge-sharing among fellow gardeners can be invaluable. Engage with local gardening groups or online forums where experiences and insights are exchanged. Learning from others’ experiences, especially those gardening in similar climates, can provide valuable tips and guidance for winter plant care and protection. Sharing knowledge fosters a sense of solidarity and can offer unique perspectives on dealing with winter challenges in gardening.

Conclusion

Maintaining a thriving garden through winter entails diligent care and vigilance. Employing suitable protective methods and understanding the individual needs of your plants are pivotal in ensuring their survival and prosperity through the cold months. As the temperatures drop, investing time and effort in winter plant care and protection ensures a robust and vibrant garden when the frost fades away.

Winter might be a dormant period for many plants, but it’s an active time for gardeners. By staying attuned to your garden’s needs and employing effective protective measures, you’re not just preserving your garden’s health; you’re nurturing a resilient and thriving ecosystem that will reward your efforts when the warmer seasons return.

Happy Gardening!

Rain Lily: Nature’s Delicate Beauties Flourishing in Rainfall Splendor!

Introduction

Rain lilies, botanical wonders celebrated for their ephemeral beauty, emerge as nature’s delightful response to rainfall. These dainty flowers, scientifically known as Zephyranthes, captivate with their ethereal charm, gracing gardens with a burst of color after a refreshing downpour. Let’s delve into the enchanting world of rain lilies and explore their unique characteristics, cultivation tips, and the magic they bring to landscapes.

Rain Lily Origins and Characteristics:

Originating from the Amaryllidaceae family, rain lilies earned their name from their propensity to bloom shortly after rainfall. These petite flowers, typically 2 to 3 inches wide, display an array of hues, including white, pink, yellow, and lavender. Their delicate, star-shaped petals gracefully unfurl atop slender stems, creating a mesmerizing visual spectacle in gardens.

Cultivation and Care:

Thriving in well-draining soil and basking in full sun or partial shade, rain lilies are versatile and low-maintenance additions to gardens. Planting them in clusters or groups enhances their visual impact, and they effortlessly complement borders, rock gardens, and container plantings. They are ideal for regions with warm climates, displaying their floral splendor in rainy season.


Similar Posts


Rain Lily Varieties and Adaptability:

Zephyranthes encompasses numerous species and hybrids, offering a diverse palette of colors and sizes. From the vibrant Zephyranthes grandiflora to the delicate Zephyranthes candida, these flowers adapt to various climates, including tropical and subtropical regions. Their adaptability to diverse environments contributes to their popularity among gardeners worldwide.

Symbolism and Cultural Significance:

Beyond their ornamental value, rain lilies carry symbolic significance in various cultures. Renowned for their fleeting beauty, they symbolize rejuvenation, renewal, and the ephemeral nature of life. In some cultures, these blossoms represent purity and the transient beauty found in life’s fleeting moments, evoking a sense of appreciation for the present.

Conclusion:

Rain lilies, with their ephemeral charm and vibrant hues, stand as nature’s poetic response to rainfall, adding an enchanting touch to gardens worldwide. Their effortless beauty, adaptability, and symbolic significance make them not just botanical marvels but also reminders of life’s fleeting yet beautiful moments.

Whether adorning landscapes with their subtle elegance or symbolizing the transient nature of existence, rain lilies enchant gardeners and nature enthusiasts alike. Embrace the fleeting beauty of rain lilies, and let them grace your garden with their ephemeral yet captivating presence.

In a world shaped by impermanence, rain lilies stand as a testament to nature’s transient splendor, inviting us to revel in life’s fleeting moments and find beauty in every rainfall.

Their brief but breathtaking appearance serves as a reminder to cherish life’s transient joys and appreciate the ever-changing canvas of nature’s artistry. Discover the delicate allure of rain lilies and embrace their ephemeral beauty in your garden sanctuary.

Happy Gardening!