12 Vegetables to Grow During the Rainy Season!

Introduction

The rainy season brings life to gardens, making it an ideal time to cultivate a variety of vegetables. With the right selection, you can take full advantage of the consistent moisture and mild temperatures. Here’s a guide to 12 vegetables that thrive in rainy conditions, helping you make the most of your rainy season garden.

1. Spinach (Spinacia oleracea)

Spinach is a leafy green that thrives in cooler, moist conditions. The consistent rainfall of the rainy season provides the perfect environment for spinach to grow lush and tender. Spinach can be harvested multiple times, making it a versatile choice for a continuous harvest throughout the season. Make sure the soil is well-drained to prevent waterlogging and root rot.

2. Kale (Brassica oleracea var. sabellica)

Kale is another leafy green that performs well in the rainy season. It is rich in vitamins and can be used in a variety of dishes. Kale requires moderate watering, which is naturally provided by the rain, and the cooler temperatures help reduce pest infestations. Plant kale in well-drained soil with good organic matter to enhance growth.

3. Okra (Abelmoschus esculentus)

Okra, also known as ladyfinger, is a hardy vegetable that flourishes in warm, wet climates. It grows quickly and can be harvested multiple times during the rainy season. Okra prefers well-drained soil and benefits from the humid environment that rain provides. Regular harvesting promotes further growth, so keep picking the pods when they are young and tender.

4. Eggplant (Solanum melongena)

Eggplant, or brinjal, is well-suited for the rainy season. This vegetable thrives in warm temperatures and benefits from the increased moisture levels in the soil. Eggplants should be planted in well-drained soil to avoid waterlogging. The rain helps in keeping the soil consistently moist, which is crucial for the development of healthy fruit.

5. Cucumber (Cucumis sativus)

Cucumbers are fast-growing vines that do exceptionally well during the rainy season. The frequent rain helps keep the soil consistently moist, which cucumbers need to grow crisp and flavorful fruits. Ensure the vines have plenty of space to spread out and consider using a trellis to support their growth, preventing the fruits from rotting on wet ground.

6. Bitter Gourd (Momordica charantia)

Bitter gourd, also known as bitter melon, is another vine vegetable that loves the rainy season. The warm, moist conditions promote vigorous growth and fruit production. Plant bitter gourd in well-drained soil and provide a trellis or support structure for the vines. Regular pruning and harvesting help to maximize yield.


Similar Posts:


7. Beans (Phaseolus vulgaris)

Beans, particularly varieties like green beans and bush beans, are excellent choices for the rainy season. They are easy to grow and have a quick turnaround time from planting to harvest. Beans fix nitrogen in the soil, which helps improve soil fertility for subsequent crops. Ensure they are planted in soil that drains well to prevent root rot.

8. Zucchini (Cucurbita pepo)

Zucchini is a summer squash that thrives in warm, wet conditions. The plant produces abundantly in the rainy season and benefits from the consistent moisture. Zucchini plants are prolific, and regular harvesting encourages more fruit to set. Plant zucchini in rich, well-drained soil and ensure adequate spacing to prevent fungal diseases.

9. Radish (Raphanus sativus)

Radishes are fast-growing root vegetables that are perfect for the rainy season. They mature quickly, often within 3-4 weeks, making them an ideal crop for continuous planting. Radishes prefer cooler temperatures and moist soil, both of which are provided by the rainy season. Make sure the soil is loose and well-drained to allow the roots to develop properly.

10. Lettuce (Lactuca sativa)

Lettuce is a cool-season crop that does well in the mild, wet conditions of the rainy season. There are many varieties of lettuce, from loose-leaf to head lettuce, all of which can be harvested in succession. Lettuce prefers well-drained, fertile soil and needs consistent moisture to develop crisp leaves. Too much water, however, can lead to rot, so ensure adequate drainage.

11. Turnip (Brassica rapa subsp. rapa)

Turnips are root vegetables that thrive in the cooler temperatures and moist soil conditions of the rainy season. Both the roots and leaves are edible, offering a versatile harvest. Turnips require well-drained soil and consistent moisture to develop sweet, tender roots. Avoid waterlogged conditions by planting in raised beds or well-drained soil.

12. Carrots (Daucus carota subsp. sativus)

Carrots are a popular root vegetable that grows well in the rainy season due to the cool, moist conditions. Carrots prefer loose, sandy soil that is well-drained to allow the roots to expand freely. Regular watering, naturally provided by rain, helps in developing sweet, crisp carrots. Thin the seedlings to prevent overcrowding and ensure proper root development.

Tips for Growing Vegetables in the Rainy Season

To ensure a successful harvest during the rainy season, consider these tips:

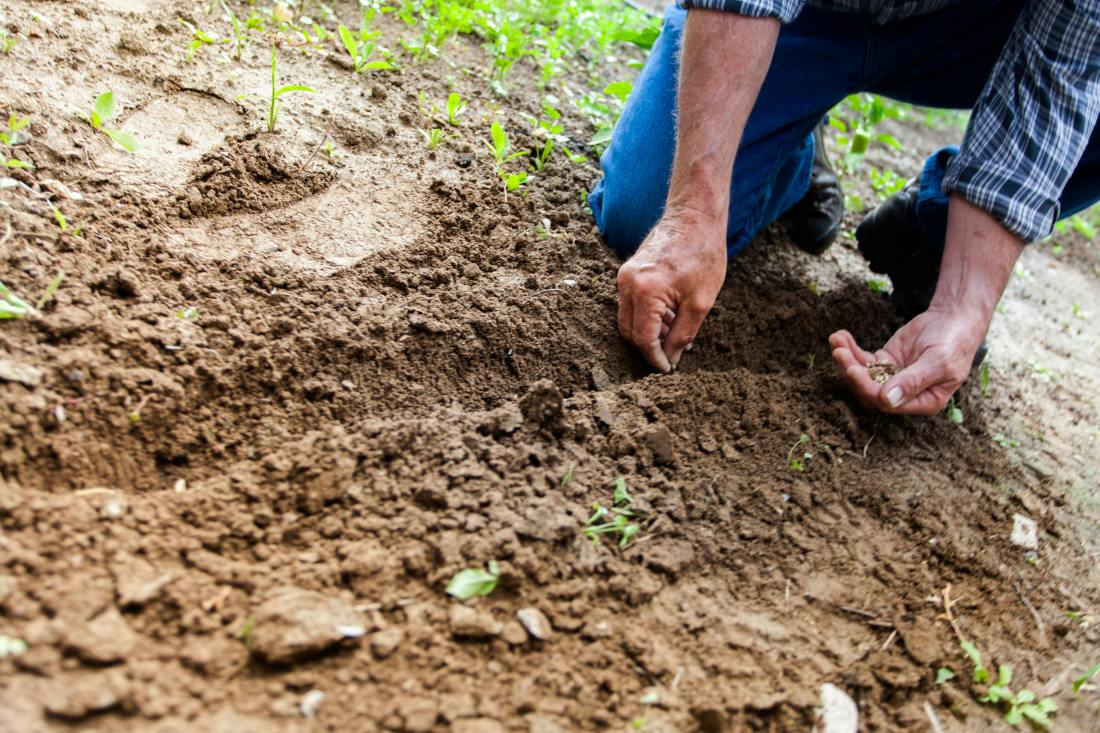
Soil Preparation: Make sure your soil has good drainage to avoid waterlogging.. Raised beds or adding organic matter can help improve drainage and soil structure.

Pest Management: Increased humidity can lead to a rise in pests. Regularly inspect plants for signs of pests and use organic pesticides when necessary.

Plant Spacing: Adequate spacing between plants ensures good air circulation, reducing the risk of fungal infections and other diseases.

Support Structures: Use trellises or supports for vine vegetables to keep them off the wet ground and prevent rotting.

Conclusion

By selecting the right vegetables and following proper gardening practices, you can enjoy a bountiful harvest throughout the rainy season. These vegetables not only thrive in wet conditions but also provide a variety of flavors and nutrients to your diet.

Happy gardening!

Unveiling the Secrets of Successful Chilli Plant Cultivation: A Comprehensive Guide!

Introduction:

Chilli plants, with their vibrant colors and fiery flavors, are a staple in many gardens and kitchens around the world. Whether you’re a seasoned gardener or a novice enthusiast, growing chillies can be a rewarding and enjoyable experience. From selecting the right varieties to providing optimal growing conditions, there are several key factors to consider when cultivating these spicy delights. In this comprehensive guide, we’ll delve into everything you need to know to successfully grow and care for chilli plants in your garden.

Choosing the Right Chilli Varieties

Before diving into chilli cultivation, it’s essential to choose the right varieties suited to your preferences and growing conditions. With countless cultivars available, ranging from mild to super-hot, there’s a chilli variety to suit every taste and skill level. Consider factors such as heat level, size, color, and growth habit when selecting chilli seeds or seedlings for your garden.

Providing Optimal Growing Conditions

Chilli plants thrive in warm, sunny environments with well-draining soil and ample airflow. Here are some tips for providing optimal growing conditions for your chillies:

Sunlight: Ensure your chilli plants receive at least 6-8 hours of direct sunlight each day to promote robust growth and fruit production. Position them in a sunny spot in your garden or use grow lights for indoor cultivation.

Soil: Plant chillies in well-draining soil with a slightly acidic to neutral pH (pH 6.0-7.0). Incorporate organic matter such as compost or aged manure into the soil to improve fertility and moisture retention.

Watering: Chili plants require more water during hot and dry periods to prevent flower drop and promote chilli production. Water chili plants deeply and evenly, allowing the soil to dry out slightly between waterings to prevent root rot.

Temperature: Chilli plants thrive in warm temperatures between 70°F to 85°F (21°C to 29°C) during the day and above 50°F (10°C) at night. Protect them from frost and cold temperatures, as chillies are sensitive to cold damage.

Planting and Transplanting

When planting chilli seeds or seedlings, follow these guidelines for successful establishment:

Seed Starting: Start chilli seeds indoors 6-8 weeks before the last frost date in your area. Sow seeds in seed trays or small pots filled with seed-starting mix, keeping them warm and moist until germination occurs.

Transplanting: Transplant chilli seedlings into larger containers or into the garden once they have developed 3-4 true leaves and the threat of frost has passed. Space plants 18-24 inches apart in rows or clusters to allow for adequate air circulation and sunlight penetration.


Similar Posts:


Fertilizing and Feeding

Chilli plants are heavy feeders and benefit from regular fertilization throughout the growing season. Here are some tips for feeding your chilli plants:

Organic Fertilizers: Use organic fertilizers such as compost, fish emulsion, or seaweed extract to provide a steady supply of nutrients to your chilli plants. Apply fertilizers according to package instructions, taking care not to over-fertilize, which can lead to salt buildup and nutrient imbalances.

Top-Dressing: Apply a layer of compost or well-aged manure around the base of chilli plants every 4-6 weeks to replenish soil nutrients and improve soil structure.

Foliar Feeding: Spray chilli plants with a dilute solution of liquid seaweed or fish emulsion every 2-4 weeks to provide a quick boost of nutrients and promote healthy growth.

Pest and Disease Management

Chilli plants are susceptible to a variety of pests and diseases, including aphids, thrips, whiteflies, and fungal infections. Here are some tips for managing common chilli plant pests and diseases:

Companion Planting: Plant insect-repellent herbs such as basil, mint, and marigolds near chilli plants to deter pests and attract beneficial insects that prey on garden pests.

Natural Predators: Introduce beneficial insects such as ladybugs, lacewings, and predatory mites to your garden to help control pest populations organically.

Cultural Practices: Practice good garden hygiene by removing weeds, fallen leaves, and debris that can harbor pests and diseases. Avoid overhead watering to minimize fungal infections, and prune overcrowded foliage to improve air circulation around plants.

Harvesting and Storage

Harvest chillies when they reach their mature size and color, typically 60-90 days after transplanting. Use clean, sharp scissors or pruning shears to snip chillies from the plant, taking care not to damage the stems or foliage. Store harvested chillies in a cool, dry place away from direct sunlight, or preserve them by drying, freezing, or pickling for long-term storage.

Conclusion:

With the right knowledge and care, growing chilli plants can be a rewarding and enjoyable experience for gardeners of all skill levels. By selecting the right varieties, providing optimal growing conditions, and implementing effective pest and disease management strategies, you can enjoy a bountiful harvest of spicy peppers to enhance your culinary creations. Follow the tips outlined in this guide, and embark on your journey to becoming a successful chilli gardener!

Happy Gardening!

Unveiling the Splendor: A Guide to Growing Summer Flower Bulbs!

Introduction:

Summer is a time of vibrant colors and blooming beauty, and what better way to adorn your garden than with a dazzling array of summer flower bulbs? From the elegant lilies to the cheerful dahlias, there’s a summer bulb for every garden style and preference. In this comprehensive guide, we’ll explore the fascinating world of summer flower bulbs and discover how to grow and care for these enchanting blooms in your garden.

Understanding Summer Flower Bulbs

Summer flower bulbs are underground storage structures that contain the embryonic plants and nutrients needed for growth. Unlike seeds, bulbs produce new shoots and roots from within themselves, giving them a head start on the growing season. Many popular summer flowers, such as Asiatic lilies, calla lilies, and dahlias, grow from bulbs and tubers.

Choosing the Right Bulbs

When selecting summer flower bulbs for your garden, consider factors such as bloom time, color, size, and growing conditions. Some popular types of summer flower bulbs to consider include:

Lilies: Known for their elegant, trumpet-shaped flowers and intoxicating fragrance, lilies are a classic addition to any summer garden. Choose from a variety of colors and sizes, including Asiatic, Oriental, and hybrid lilies.

Dahlias: With their showy, dinner-plate-sized blooms and vibrant colors, dahlias add drama and flair to summer gardens. From pompon to cactus varieties, there’s a dahlia to suit every taste and garden style.

Calla Lilies: Elegant and graceful, calla lilies are prized for their sculptural blooms and glossy, arrow-shaped foliage. Available in a range of colors, including white, pink, yellow, and purple, calla lilies add a touch of sophistication to summer gardens. Plant them in borders or containers for a stunning focal point that will dazzle throughout the season.

Cannas: Loved for their tropical foliage and bold, exotic flowers, cannas are a popular choice for summer gardens. Plant them in containers or along borders for a striking burst of color and texture.


Similar Posts:


Planting Summer Flower Bulbs

Plant summer flower bulbs in spring after the danger of frost has passed and the soil has warmed up. Follow these steps for successful bulb planting:

Choose a Location: Select a sunny spot with well-draining soil for planting summer flower bulbs. Avoid regions susceptible to waterlogging or inadequate drainage.

Prepare the Soil: Loosen the soil to a depth of 8-10 inches and incorporate organic matter such as compost or aged manure to improve soil structure and fertility. Add cocopeat to retain moisture in the soil.

Planting Depth: Follow the planting depth recommendations for each type of bulb, as planting depths can vary depending on the species. It is generally recommended to plant bulbs at a depth that is three times their diameter.

Spacing: Space bulbs according to the recommended spacing guidelines for each species, ensuring adequate room for growth and air circulation.

Watering: Water newly planted bulbs thoroughly to settle the soil and provide moisture for root establishment. Continue watering throughout the growing season for optimal growth and good blooms.

Caring for Summer Flower Bulbs

Once planted, summer flower bulbs require minimal maintenance to thrive. Here are some tips for caring for your summer bulb garden:

Mulching: Apply a layer of organic mulch such as shredded bark or straw around newly planted bulbs to conserve moisture, suppress weeds, and regulate soil temperature.

Fertilizing: Feed summer flower bulbs with a balanced fertilizer or bulb-specific fertilizer in spring as new growth emerges. Repeat applications every 4-6 weeks during the growing season to promote healthy foliage and abundant blooms.

Deadheading: Regularly removing spent flowers promotes continuous blooming and prevents seed pod formation. Deadheading also helps redirect energy back into bulb storage for the following year’s growth.

Staking: Stake tall or top-heavy varieties such as gladioli and dahlias to prevent them from flopping over in strong winds or heavy rain.

Conclusion:

With their stunning colors, diverse forms, and delightful fragrances, summer flower bulbs are a must-have addition to any garden. By selecting the right bulbs, providing optimal growing conditions, and practicing proper care and maintenance, you can enjoy a spectacular display of blooms all summer long. Follow the tips outlined in this guide, and let your garden come alive with the beauty of summer flower bulbs!

Happy Gardening!

Growing Bleeding Heart Plant: A Guide to Heartwarming Beauty!

Introduction:

The Bleeding Heart plant, known for its heart-shaped flowers that dangle gracefully from arching stems, is a romantic and nostalgic addition to any garden. This enchanting perennial, scientifically known as Dicentra spectabilis, captures the hearts of gardeners with its unique blooms and fern-like foliage. If you’re looking to add a touch of whimsy and elegance to your garden, read on to discover our comprehensive guide on growing and caring for the Bleeding Heart plant.

1. Understanding the Bleeding Heart Plant

Botanical Background

The Bleeding Heart plant is native to Siberia, Northern China, Korea, and Japan. It belongs to the Fumariaceae family and is renowned for its distinctive heart-shaped flowers, which come in shades of pink, red, and white. The flowers typically appear in spring, adding a burst of color to the garden landscape.

Ideal Growing Conditions

Bleeding Hearts thrive in cool, moist conditions and prefer partial shade to full shade. They are typically grown as perennials in USDA hardiness zones 3-9, depending on the variety. While they can tolerate some sunlight, too much direct sun can scorch their delicate foliage, making them more suitable for shaded areas or dappled sunlight.

2. Planting the Bleeding Heart Plant

Soil Requirements

Well-draining soil rich in organic matter is essential for the Bleeding Heart’s health. An ideal soil pH level ranges from 6.0 to 7.0. Incorporating compost or well-rotted manure into the planting area can help improve soil structure and fertility.

Planting Depth and Spacing

Plant Bleeding Hearts at the same depth as they were in their nursery pots, typically around 1-2 inches deep. Space them approximately 18-24 inches apart to allow room for mature growth and optimal air circulation.


Similar Posts:


3. Watering and Feeding

Watering

Consistent moisture is key to the Bleeding Heart’s success. Ensure regular watering, particularly during periods of drought, to maintain even soil moisture without causing waterlogging. Applying mulch around the plant’s base aids in preserving soil moisture and controlling weed growth.

Fertilization

In the early spring, apply a balanced fertilizer following the manufacturer’s guidelines. Avoid over-fertilizing, as excessive nutrients can lead to lush foliage at the expense of flower production.

4. Maintenance and Care

Pruning and Deadheading

Deadheading spent flowers promotes ongoing blooms and helps keep a neat appearance. After the plant has finished blooming for the season, you can cut it back to ground level to promote fresh growth and rejuvenate the plant.

Winter Care

Apply mulch around the plant’s base in late fall to insulate the roots against freezing temperatures. In colder climates, additional winter protection such as covering with burlap or a layer of straw may be necessary.

5. Pests and Diseases

Common Pests

Aphids, slugs, and snails can occasionally be a problem for Bleeding Heart plants. Monitor your plants regularly and treat any infestations promptly using insecticidal soap or other organic pest control methods.

Disease Prevention

Powdery mildew and root rot are potential concerns for Bleeding Hearts. Ensuring proper spacing, facilitating adequate air flow, and refraining from overhead watering are effective strategies to prevent these problems. If signs of disease appear, treat the plant with fungicides or other appropriate treatments as recommended.

Conclusion:

The Bleeding Heart plant, with its heartwarming beauty and easy-care nature, is a delightful addition to any garden. By providing the right growing conditions, regular watering, and minimal maintenance, you can enjoy the charm of these romantic blooms year after year. Whether planted in borders, woodland gardens, or containers, the Bleeding Heart’s unique flowers and elegant foliage are sure to captivate and enchant all who behold them.

Happy Gardening!

The Ultimate Guide to Gardening: Do’s and Don’ts for a Flourishing Garden!

Introduction

Gardening is a delightful hobby that allows you to connect with nature, beautify your surroundings, and even produce your own fruits and vegetables. However, like any other endeavor, gardening requires knowledge and care to be successful. In this article, we’ll go over the key dos and don’ts in this in-depth guide to assist you in creating a successful garden.

The Do’s of Gardening

1. Do Plan Before Planting

Do: Research the plants suitable for your climate, soil type, and sunlight conditions. Plan the layout of your garden to ensure adequate spacing between plants and easy access for maintenance.

2. Do Prepare the Soil

Do: Invest in good quality soil or amend your existing soil with compost and organic matter to improve its fertility and structure. Healthy soil is the first step and the basis of a successful garden.

3. Do Water Wisely

Do: Water your plants deeply but infrequently to encourage deep root growth. Use a soaker hose or drip irrigation system to deliver water directly to the root zone and minimize water waste.

4. Do Mulch

Do: Apply a layer of organic mulch like straw, wood chips, or compost to help retain moisture, suppress weeds, and regulate soil temperature. Mulching is an excellent way to conserve water and improve soil health.

5. Do Regular Maintenance

Do: Regularly check for weeds, pests, and diseases and take prompt action to address any issues. Prune dead or damaged branches, and fertilize your plants as needed to promote healthy growth.

6. Do Rotate Crops

Do: Practice crop rotation to prevent soil depletion and reduce the risk of pests and diseases. Rotate plants from different families to maintain soil fertility and overall garden health.

7. Do Compost

Do: Start a compost pile or bin to recycle kitchen scraps, yard waste, and other organic materials into nutrient-rich compost for your garden. Composting is an eco-friendly way to improve soil fertility and reduce waste.


Similar Posts:


The Don’ts of Gardening

1. Don’t Overwater

Don’t: Avoid overwatering your plants as it can lead to root rot and other moisture-related problems. To determine when to water, use a moisture meter or feel the soil with your finger.

2. Don’t Plant Invasive Species

Don’t: Avoid planting invasive species that can outcompete native plants and harm local ecosystems. Research the plants you choose to ensure they are not considered invasive in your area.

3. Don’t Use Chemical Pesticides

Don’t: Resist the temptation to use chemical pesticides and herbicides as they can harm beneficial insects, pollinators, and even your plants. Whenever possible choose natural and organic pest control techniques.

4. Don’t Neglect Pest Control

Don’t: Ignoring pest and disease issues can quickly escalate and cause widespread damage to your garden. Keep a close eye on your plants and take preventative action to keep pests and diseases under control.

5. Don’t Plant Too Deep

Don’t: Avoid planting your seeds or seedlings too deep as it can hinder germination and root development. Follow the planting instructions provided for each plant to ensure proper depth.

6. Don’t Overfertilize

Don’t: Overfertilizing can lead to nutrient imbalances, burn your plants’ roots, and harm beneficial soil organisms. Use fertilizers sparingly and follow the manufacturer’s instructions for application rates.

7. Don’t Ignore Sunlight Requirements

Don’t: Ignoring the sunlight requirements of your plants can result in poor growth and reduced yields. Plant sun-loving plants in sunny spots and shade-loving plants in shaded areas to ensure they thrive.

Conclusion

Gardening is a fulfilling and rewarding activity that offers numerous benefits for your physical and mental well-being. By following these do’s and don’ts, you can create a flourishing garden that brings joy and beauty to your outdoor space while respecting nature and the environment.

Remember, gardening is a learning process, and it’s okay to make mistakes along the way. The key is to observe, adapt, and enjoy the journey as you nurture your garden to its fullest potential.

Happy Gardening!

Essential Safety Measures for Gardening: Protecting Yourself While Cultivating Your Garden Oasis!

Introduction:

Gardening is a rewarding and enjoyable hobby that allows us to connect with nature and create beautiful outdoor spaces. However, it’s essential to prioritize safety while tending to our gardens to prevent accidents and injuries. In this guide, we’ll explore important safety measures and precautions that every gardener should take to ensure a safe and enjoyable gardening experience.

Dress Appropriately:

Before you start gardening, it’s crucial to wear appropriate attire to protect yourself from potential hazards. This includes wearing sturdy, closed-toe shoes to prevent injuries from sharp tools or falling objects. Additionally, wearing long pants and sleeves can protect your skin from scratches, bites, and exposure to harmful plants or chemicals.

Use Protective Gear:

When handling gardening tools and equipment, wearing appropriate protective gear can minimize the risk of injuries. Always wear gloves to protect your hands from blisters, cuts, and thorns while pruning, weeding, or handling soil. If you’re working with power tools or machinery, such as lawn mowers or hedge trimmers, wear safety goggles and ear protection to prevent eye and ear injuries.

Handle Chemicals Safely:

Many gardeners use fertilizers, pesticides, and herbicides to maintain their gardens, but these chemicals can pose health risks if not handled properly. Always read and follow the instructions on chemical labels carefully, and wear protective clothing, gloves, and a mask when applying chemicals. Store chemicals in a secure location out of reach of children and pets, and never mix or transfer chemicals in food containers.

Lift Heavy Objects Safely:

Gardening often involves lifting and carrying heavy objects, such as bags of soil, pots, or gardening equipment. To prevent back strain and injuries, use proper lifting techniques. Bend your knees, keep your back straight, and lift with your legs rather than your back. If an object is too heavy to lift safely, ask for assistance or use a wheelbarrow or gardening cart to transport it.


Similar Posts:


Be Mindful of Sun Exposure:

Spending time outdoors in the garden exposes you to sunlight, which can lead to sunburn and skin damage if proper precautions are not taken. Wear sunscreen with a high SPF rating, even on cloudy days, and reapply it every few hours, especially if you’re sweating or swimming. Additionally, wear a wide-brimmed hat and lightweight, breathable clothing to protect your skin from harmful UV rays.

Stay Hydrated:

Gardening can be physically demanding, especially on hot and humid days, so it’s essential to stay hydrated to prevent dehydration and heat-related illnesses. Drink plenty of water before, during, and after gardening, and take frequent breaks in the shade to rest and cool off. Avoid working in the garden during the hottest part of the day, and schedule tasks for early morning or late afternoon when temperatures are cooler.

Watch Out for Wildlife:

While gardening, you may encounter various wildlife, including insects, spiders, snakes, and other creatures. Be cautious when reaching into dark or hidden areas, such as under bushes or in dense vegetation, where animals may be hiding. Wear gloves and protective clothing to minimize the risk of bites or stings and familiarize yourself with common pests and how to safely remove them from your garden.

Maintain Garden Tools and Equipment:

Regularly inspect and maintain your gardening tools and equipment to ensure they are in good working condition and safe to use. Sharpen dull blades on pruners, shears, and other cutting tools to prevent accidents and make clean, precise cuts. Replace worn or damaged tools and repair any defects or malfunctions promptly to prevent injuries during use.

Conclusion:

By following these safety measures and precautions, you can minimize the risk of accidents and injuries while enjoying your gardening hobby. Remember to prioritize safety at all times and be mindful of potential hazards in your garden environment. With proper precautions and responsible gardening practices, you can create a safe and enjoyable outdoor space to relax, unwind, and connect with nature.

Happy Gardening!

Growing and Maintaining Gerbera Plants: A Complete Guide to Vibrant Blooms!

Introduction:

Gerbera plants, with their vibrant and colorful blooms, are a delightful addition to any garden or indoor space. Known for their daisy-like flowers and long-lasting blossoms, gerberas are relatively easy to grow with proper care and maintenance. In this comprehensive guide, we’ll explore everything you need to know about cultivating and nurturing gerbera plants for continuous and vibrant flowering.

Understanding Gerbera Plants:

Gerbera (Gerbera jamesonii) is a genus of ornamental plants native to South Africa, belonging to the Asteraceae family. These perennial flowering plants are cherished for their large, showy flowers, which come in a variety of colors, including red, yellow, orange, pink, and white. Gerberas thrive in moderate climates and are commonly grown as outdoor bedding plants, container plants, or cut flowers for floral arrangements.

Growing Conditions:

To ensure optimal growth and blooming, it’s essential to provide gerbera plants with the right growing conditions:

Sunlight: Gerberas prefer bright, indirect sunlight or partial shade. In hotter climates, they benefit from some protection from the intense afternoon sun to prevent scorching of the leaves and flowers.

Temperature: Gerberas thrive in moderate temperatures ranging from 65°F to 75°F (18°C to 24°C). Protect them from frost and extreme cold, as prolonged exposure can damage the foliage and flowers.

Soil: Well-draining, fertile soil with a slightly acidic to neutral pH (around 6.0 to 6.5) is ideal for gerbera plants. Add organic matter to your soil, such as compost or peat moss, to help with fertility and soil structure.

Watering: Make sure the soil is constantly damp but not soggy. Water gerberas thoroughly when the top inch of soil feels dry to the touch, and avoid overhead watering to prevent fungal diseases.

Planting and Propagation:

Gerberas can be propagated from seeds, division, or tissue culture. Here’s how to plant and propagate gerbera plants effectively:

Seed Propagation: Sow gerbera seeds in seed-starting trays filled with a well-draining potting mix. Keep the seeds moist and lightly cover with soil until germination takes place. Transplant the seedlings into individual pots once they develop true leaves.

Division: Mature gerbera plants can be divided during the dormant season or early spring. Carefully separate the clumps of rhizomes, ensuring each division has healthy roots and foliage. Plant the divisions in separate containers or directly in the garden bed.


Similar Posts:


Care and Maintenance:

Proper care and maintenance are essential for promoting healthy growth and continuous blooming of gerbera plants. Follow these tips to ensure your gerberas thrive:

Deadheading: Remove spent flowers regularly to encourage the production of new blooms and prevent the plant from diverting energy into seed production.

Fertilization: Feed gerbera plants with a balanced, water-soluble fertilizer every two to four weeks during the growing season. High-nitrogen fertilizers should be avoided as they may encourage the growth of foliage at the expense of flowers.

Pest and Disease Control: Monitor gerbera plants for common pests such as aphids, spider mites, and whiteflies. Use neem oil or insecticidal soap to quickly treat infestations. Furthermore, keep fungal diseases at bay by avoiding overhead watering and maintaining adequate air circulation.

Support: Tall varieties of gerbera plants may require staking or support to prevent the flower stems from bending or breaking. Use bamboo stakes or plant supports to provide structural support as needed.

Pruning and Deadheading:

Regular pruning and deadheading are essential for maintaining the health and appearance of gerbera plants. Follow these guidelines for pruning and deadheading gerberas:

Pruning: Remove any dead, damaged, or yellowing leaves and stems as needed throughout the growing season. To make precise cuts and stop spreading of diseases, use sharp, clean pruning shears.

Deadheading: Pinch or cut off spent flowers as soon as they fade to promote continuous blooming. Trim the flower stems back to the base of the plant or to a healthy set of leaves to encourage new flower buds to develop.

Conclusion:

Growing and maintaining gerbera plants can be a rewarding experience for gardeners of all skill levels. By providing the right growing conditions, proper care, and regular maintenance, you can enjoy a profusion of vibrant blooms throughout the growing season. Whether grown in garden beds, containers, or as cut flowers, gerberas add a splash of color and beauty to any landscape or indoor space. Incorporate these tips and techniques into your gardening routine to cultivate healthy, thriving gerbera plants and enjoy their stunning flowers year after year.

Happy Gardening!

Mastering Plant Care in the Summer Heat: Tips for Thriving Gardens!

Introduction:

As the summer sun beats down, maintaining healthy and vibrant plants becomes essential for gardeners. The scorching temperatures and intense sunlight can pose challenges to plant growth, making it crucial to implement proper care strategies. In this comprehensive guide, we’ll explore essential tips and techniques for caring for plants during the summer season, ensuring they thrive despite the heat.

Understanding Summer Plant Care Needs:

Watering:

  • During the summer months, plants require more frequent watering to combat dehydration caused by the heat.
  • Water deeply and thoroughly, ensuring the soil is adequately moistened but not waterlogged.
  • Water early in the morning or late in the evening to minimize evaporation and ensure optimal absorption by the plants’ roots.

Mulching:

  • Apply a layer of organic mulch, such as shredded bark or straw, around the base of plants to help retain soil moisture and regulate temperature.
  • Mulching also suppresses weed growth, which can compete with plants for water and nutrients during the summer.

Sun Protection:

  • Provide shade for delicate plants or those sensitive to intense sunlight by using shade cloth or strategically placing potted plants under awnings or trees.
  • Consider using reflective mulch or light-colored containers to reduce soil temperature and minimize heat stress on plant roots.

Pruning and Deadheading:

  • Regularly prune dead or damaged foliage to encourage healthy growth and improve air circulation around plants.
  • Deadhead spent flowers to promote continuous blooming and prevent plants from expending energy on seed production.

Similar Posts:


Fertilizing:

  • Feed plants with a balanced fertilizer formulated for summer use to replenish nutrients lost due to increased watering and rapid growth.
  • Go for liquid fertilizers as they provide nourishment to plants and also help in reducing the temperature of the soil.
  • Avoid over-fertilizing, as this can lead to nutrient imbalances and burn roots in hot weather.

Pest and Disease Management:

  • Monitor plants closely for signs of pest infestations and diseases, which can proliferate in warm, humid conditions.
  • Use natural remedies or organic insecticides to control pests and prevent damage to plants without harming beneficial insects.

Proper Plant Selection:

  • Choose heat-tolerant plant varieties that are well-suited to your region’s climate and growing conditions.
  • Opt for drought-resistant plants that require less water and are better equipped to withstand prolonged periods of heat and dryness.

Regular Maintenance:

  • Stay vigilant with regular maintenance tasks such as weeding, pruning, and grooming to keep plants healthy and thriving.
  • Monitor soil moisture levels and adjust watering frequency as needed based on weather conditions and plant requirements.

Conclusion:

Plants can undoubtedly thrive in the sizzling heat of summer with proper care and attention. Don’t doubt their resilience! If you’re committed to seeing your plants succeed, you must be vigilant in providing them with what they need to flourish, even in the hottest of temperatures. By implementing these essential tips for watering, mulching, sun protection, pruning, fertilizing, pest management, plant selection, and regular maintenance, gardeners can ensure their plants remain healthy, vibrant, and resilient throughout the summer season. With a little extra effort and care, your garden can continue to flourish and bring joy throughout the hottest months of the year.

Happy Gardening!

Maintaining a Clean Home Oasis: Tips for Growing Indoor Plants Dirt-Free!

Introduction:

Bringing the beauty of nature indoors with houseplants adds a touch of greenery and tranquility to any living space. However, keeping your home clean while nurturing indoor plants can sometimes pose a challenge. With the right strategies, it’s possible to enjoy the benefits of indoor gardening without sacrificing cleanliness. In this article, we’ll explore practical tips for maintaining a dirt-free home while growing indoor plants.

Choose Clean Indoor Plants:

When selecting indoor plants for your home, opt for varieties that are less likely to shed soil or create messes. Look for plants with compact root systems or those that come in clean, soil-free growing mediums like hydroponic setups or air plants. Succulents, snake plants, pothos, and peace lilies are excellent choices known for their low-maintenance nature and minimal mess.

Use Containment Solutions:

To prevent soil spills and water leakage, consider using containment solutions such as decorative pots with built-in saucers or trays. These containers not only catch excess water but also help contain any soil that may escape during watering or transplanting. Additionally, placing plants on trays or trays lined with decorative rocks can further minimize messes and make cleanup easier.

Implement Drip Trays and Watering Techniques:

Drip trays placed underneath pots are essential for catching water runoff during watering sessions. Opt for trays that match the size and aesthetic of your plant containers to maintain a cohesive look. When watering your plants, do so carefully and avoid over-watering to minimize the risk of spills and soil displacement. Using a watering can with a narrow spout or a watering globe can help control water distribution and reduce splashing.

Practice Regular Maintenance:

Routine maintenance tasks such as dusting, pruning, and repotting can help keep indoor plants healthy and minimize messes. Dusting plant leaves with a soft cloth or gentle spray of water removes accumulated dirt and enhances photosynthesis. Pruning dead or yellowing leaves not only improves plant appearance but also prevents soil contamination. Additionally, repotting plants as needed allows for root inspection and prevents overcrowding, which can lead to soil spillage.


Similar Posts


Employ Protective Coverings:

For extra protection against soil spills and water damage, consider using protective coverings such as plastic or silicone mats placed underneath plant containers. These mats provide an additional barrier between the plant and the surface below, preventing water stains and soil residue. Alternatively, decorative waterproof trays or trays lined with waterproof liners can serve as stylish and functional solutions for containing messes.

Opt for Soilless Growing Mediums:

Soilless growing mediums such as coco coir, perlite, or peat moss offer an alternative to traditional potting soil and can help minimize dirt-related messes. These lightweight and sterile mediums provide excellent aeration and drainage for plant roots while reducing the risk of soil-borne pests and diseases. Hydroponic systems, aeroponic towers, and moss poles are innovative soil-free growing methods that eliminate the need for messy soil altogether.

Establish Cleaning Routines:

Regular cleaning routines are essential for maintaining a dirt-free home environment while growing indoor plants. Vacuuming or sweeping floors, wiping down surfaces, and dusting furniture help remove accumulated dirt and debris. Pay special attention to areas around plant containers and windowsills, where soil and dust tend to accumulate. Consider using a handheld vacuum or dusting brush to clean hard-to-reach spaces and tight corners.

Conclusion:

With proper planning and maintenance, it’s possible to enjoy the beauty of indoor plants without compromising cleanliness in your home. By selecting clean plant varieties, using containment solutions, practicing regular maintenance, and implementing protective measures, you can create a dirt-free oasis that enhances both your living space and your well-being. With these tips in mind, you can cultivate a harmonious balance between nature and cleanliness indoors.

Happy Gardening!

Flourishing Beauty: A Guide to Growing and Caring for Azalea Plants!

Introduction

Azaleas, with their vibrant blooms and lush foliage, are beloved ornamental shrubs that can add a touch of elegance to any garden landscape. Known for their stunning flowers and relatively low maintenance, azaleas are a popular choice among gardeners looking to enhance their outdoor spaces. In this comprehensive guide, we’ll explore everything you need to know about growing and caring for azalea plants, from selecting the right variety to providing the optimal conditions for their flourishing growth.

Understanding Azalea Plants

Azaleas belong to the genus Rhododendron and are part of the Ericaceae family. These deciduous or evergreen shrubs are native to Asia, Europe, and North America, with hundreds of species and cultivars available to choose from. Azaleas are prized for their showy, funnel-shaped flowers that bloom in a wide range of colors, including shades of pink, purple, red, white, and orange. Depending on the variety, azaleas can bloom in early spring, late spring, or even summer, providing a spectacular display of color in the garden.

Selecting the Right Variety

When choosing azaleas for your garden, it’s essential to select the right variety based on your climate, soil type, and desired bloom time. Some popular types of azaleas include:

Southern Indica Azaleas: These evergreen azaleas are well-suited to warm climates and bloom profusely in the spring.

Encore Azaleas: Known for their ability to bloom multiple times throughout the year, Encore azaleas offer an extended flowering season.

Native Azaleas: Indigenous to North America, native azaleas are prized for their fragrant flowers and vibrant fall foliage.

Hybrid Azaleas: Hybrid varieties combine the best traits of different azalea species, offering a wide range of colors, sizes, and bloom times.

Before purchasing azaleas, research the specific requirements of each variety to ensure they are suitable for your garden conditions.


Similar Posts


Planting Azaleas

Azaleas thrive in well-drained, acidic soil with a pH between 4.5 and 6.0. Choose a planting location with partial shade or filtered sunlight, as azaleas prefer dappled sunlight rather than full sun exposure. When planting azaleas, follow these steps for success:

Prepare the Soil: Amend the soil with organic matter such as compost or peat moss to improve drainage and acidity.

Dig the Hole: Dig a hole twice as wide as the azalea’s root ball and slightly shallower than its depth.

Plant the Azalea: Gently remove the azalea from its container and place it in the center of the hole. After planting, add soil to fill the hole and make sure to water it sufficiently to help the roots settle in.

Mulch and Water: Apply a layer of mulch around the base of the plant to retain moisture and suppress weeds. Water the newly planted azalea regularly to keep the soil consistently moist but not waterlogged.

Caring for Azaleas

Once established, azaleas require minimal maintenance to thrive. Here are some essential care tips to ensure your azaleas remain healthy and vibrant:

Watering: Azaleas have shallow roots and are sensitive to drought, so it’s crucial to water them regularly, especially during dry periods. It’s recommended to avoid overhead watering since it can cause the foliage to become wet, which increases the risk of fungal diseases.

Fertilizing: Feed azaleas with a balanced, slow-release fertilizer formulated for acid-loving plants in early spring, just before new growth begins. Avoid using high-nitrogen fertilizers as they promote excessive foliage growth, which can negatively impact flower growth..

Pruning: Prune azaleas after they finish blooming to shape the shrub and remove dead or diseased branches. Avoid heavy pruning, as it can reduce the following year’s flower production.

Disease and Pest Control: Keep an eye out for common azalea pests and diseases, such as lace bugs, spider mites, powdery mildew, and root rot. Treat any issues promptly with organic or chemical control methods as needed.

Overwintering Azaleas

In colder climates, protecting azaleas from winter weather is essential to ensure their survival. Here are some tips for overwintering azaleas:

Mulch: Apply a thick layer of mulch around the base of the plant to insulate the roots and retain soil moisture.

Wind Protection: Shield azaleas from harsh winds by planting them in a sheltered location or using windbreaks such as fences or evergreen shrubs.

Anti-Desiccant Spray: Apply an anti-desiccant spray to azalea foliage in late fall to reduce moisture loss through transpiration.

Wrapping: For added protection, consider wrapping azaleas with burlap or frost cloth during periods of extreme cold.

Conclusion

With their stunning blooms and relatively low maintenance requirements, azaleas are a fantastic addition to any garden landscape. By selecting the right variety, providing the optimal growing conditions, and following proper care techniques, you can enjoy the beauty of azaleas in your garden for years to come.

Happy Gardening!