The Art of Soil Enrichment: Building and Maintaining Nutrient-Rich Soil

Introduction

Hello, fellow gardeners and nature enthusiasts! Welcome to a journey that will uncover the secrets of creating and sustaining nutrient-rich soil – the foundation of a thriving garden. In this article, we’ll delve into the fascinating world of soil enrichment, exploring techniques and practices that will transform your garden into a haven of lush, vibrant plant life. Whether you’re a seasoned gardener or just starting out, understanding the art of soil enrichment can make a world of difference in your gardening success.

1. The Essence of Nutrient-Rich Soil

Picture this: a garden where plants grow vigorously, blossoming with vivid colors and yielding bountiful harvests. The magic behind this enchanting scenario lies in the soil. Nutrient-rich soil provides plants with the essential elements they need to flourish – think of it as a balanced meal for your plants. These nutrients include nitrogen, phosphorus, potassium, and a variety of micronutrients that facilitate growth, flowering, and fruiting.

2. Building Nutrient-Rich Soil

Composting: One of the fundamental ways to enrich soil is through composting. Gather kitchen scraps, yard waste, and even paper products to create a compost pile. Over time, these materials decompose into nutrient-rich organic matter, infusing your soil with vitality.

Cover Cropping: Another technique involves planting cover crops like clover or legumes during the off-season. These crops not only prevent soil erosion but also fix nitrogen in the soil, enhancing its fertility.

3. The Role of Mulching

Mulching isn’t just about aesthetics – it plays a pivotal role in soil enrichment. Mulch acts as a protective barrier, regulating soil temperature, retaining moisture, and preventing weed growth. Organic mulches, such as straw, coconut chips or wood chips, gradually break down, adding valuable nutrients to the soil in the process.

4. Incorporating Organic Matter

Introducing organic matter into your soil is like treating it to a nourishing spa day. Compost, well-rotted manure, and leaf litter enhance soil structure, allowing for improved water retention and aeration. This invites beneficial microorganisms that aid in nutrient breakdown and absorption by plants.

5. Smart Fertilization

While organic methods are excellent for long-term soil health, there’s a place for balanced fertilization. Choose fertilizers with the right N-P-K ratio (nitrogen, phosphorus, potassium) for your plants’ needs. Slow-release fertilizers provide a steady supply of nutrients, preventing overfeeding and runoff. You can also use Amrit Jal for soil enrichment.

Preparation Of NPK

You can prepare your own NPK fertilizer from kitchen waste. For this, you require 3 ingredients:

  1. Tea leaves (properly washed and dried): For making nitrogen-based fertilizer (for foliage)
  2. Mustard cake: For making phosphorus-based fertilizer (for root growth)
  3. Onion peel/Banana peel(dried): For making potassium-based fertilizer (for blooms)

In a grinder or a mixer, grind each ingredient individually. Mix each of these in an equal ratio. After mixing the three fertilizers, our homemade NPK fertilizer is ready for use. We can now either keep it for the future or use it immediately for our plants.

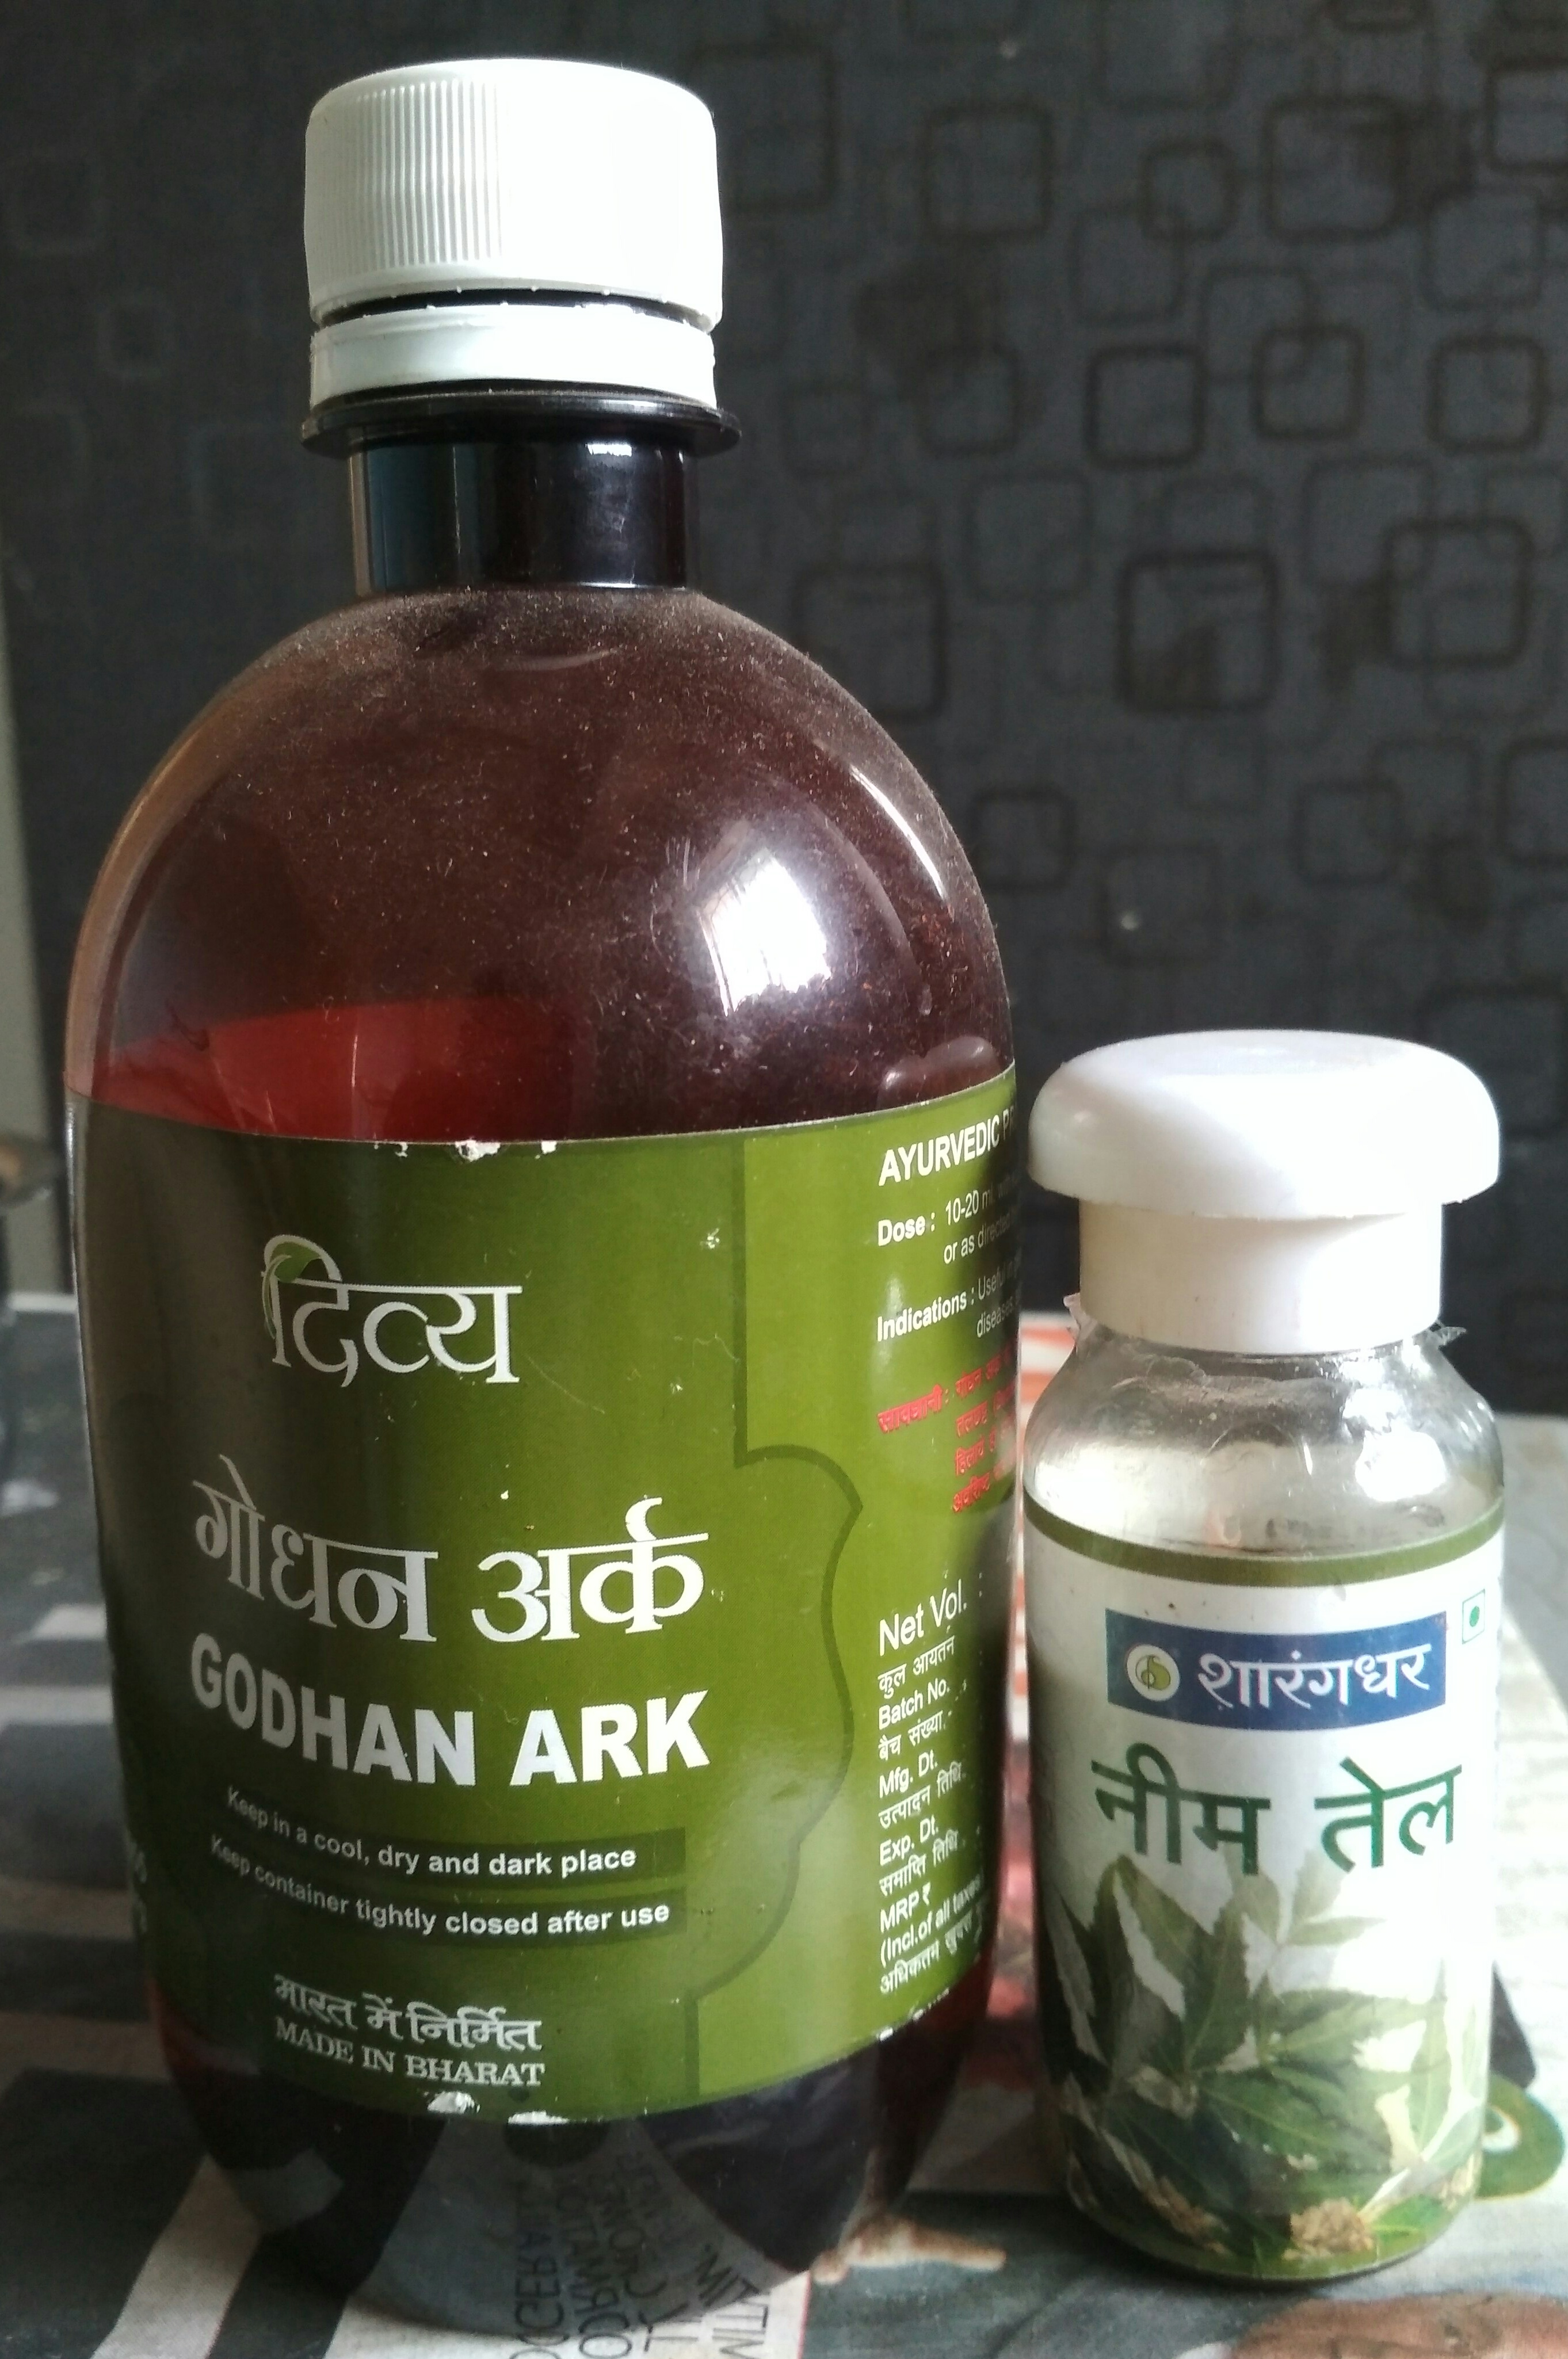
Preparation of Amrit Jal

Mix cow dung, cow urine, and jaggery in one drum for 3 days and stir 2 to 3 times a day, both clock and anti-clockwise. On the 4th day mix with 50 to 60 liters of water and you will have Amrit Jal ready for use.


Similar Posts


6. Conserving Soil Health

Maintaining nutrient-rich soil is an ongoing process. Rotate your crops to prevent nutrient depletion in specific areas. Avoid excessive tilling, which can disrupt the soil structure and microorganism balance. Instead, practice minimal tillage or no-till gardening to protect the delicate ecosystem underground.
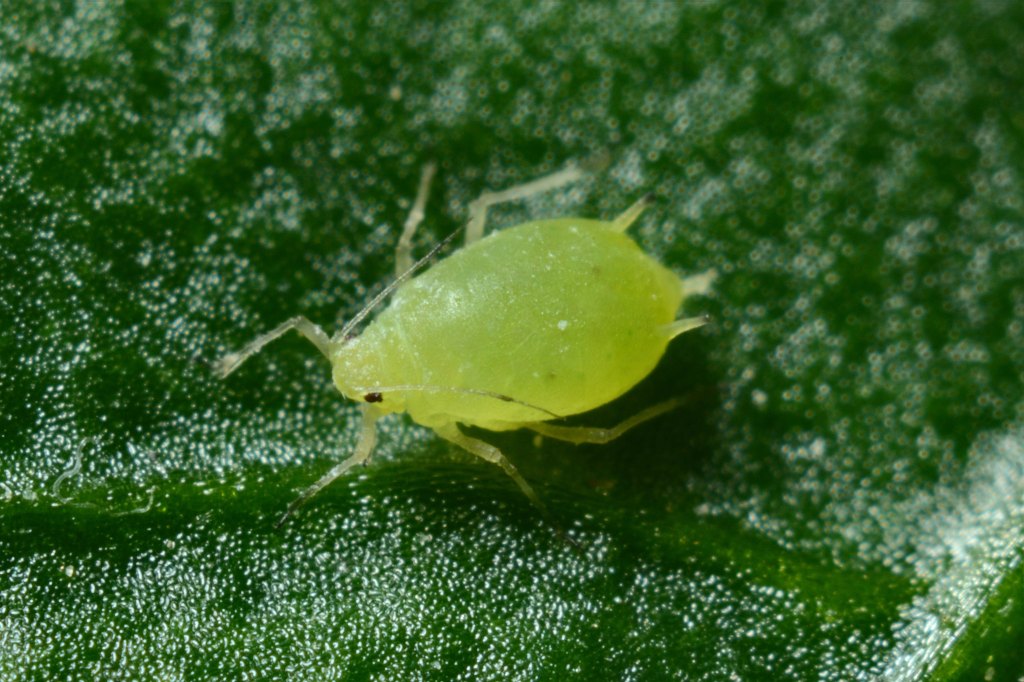
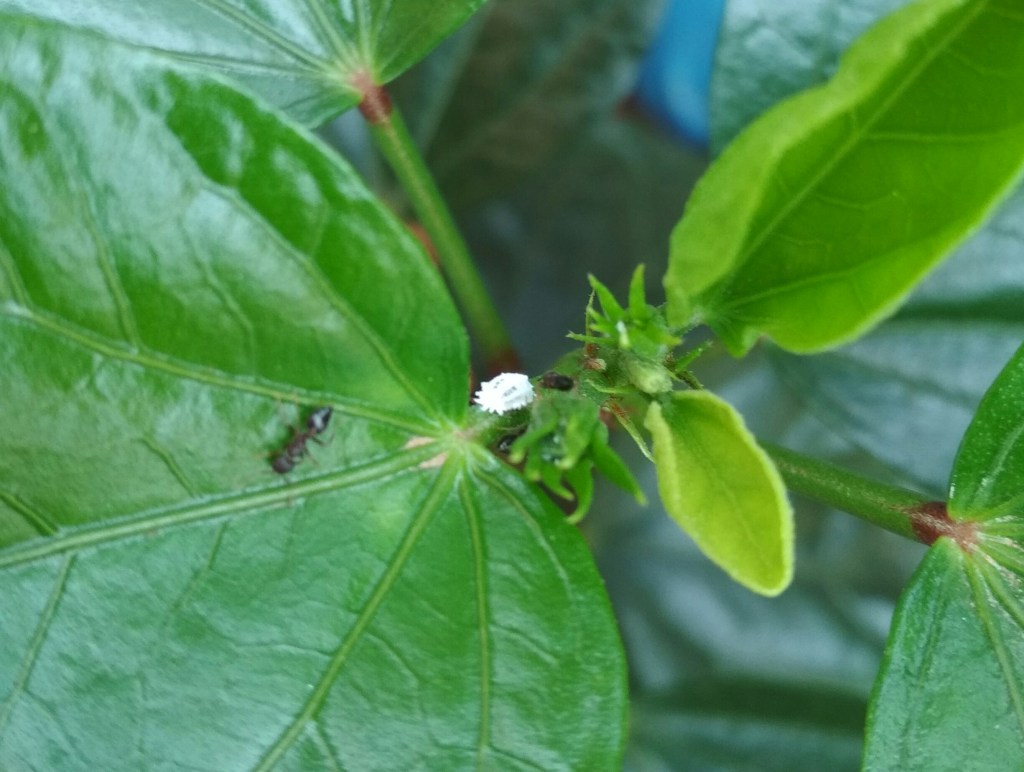
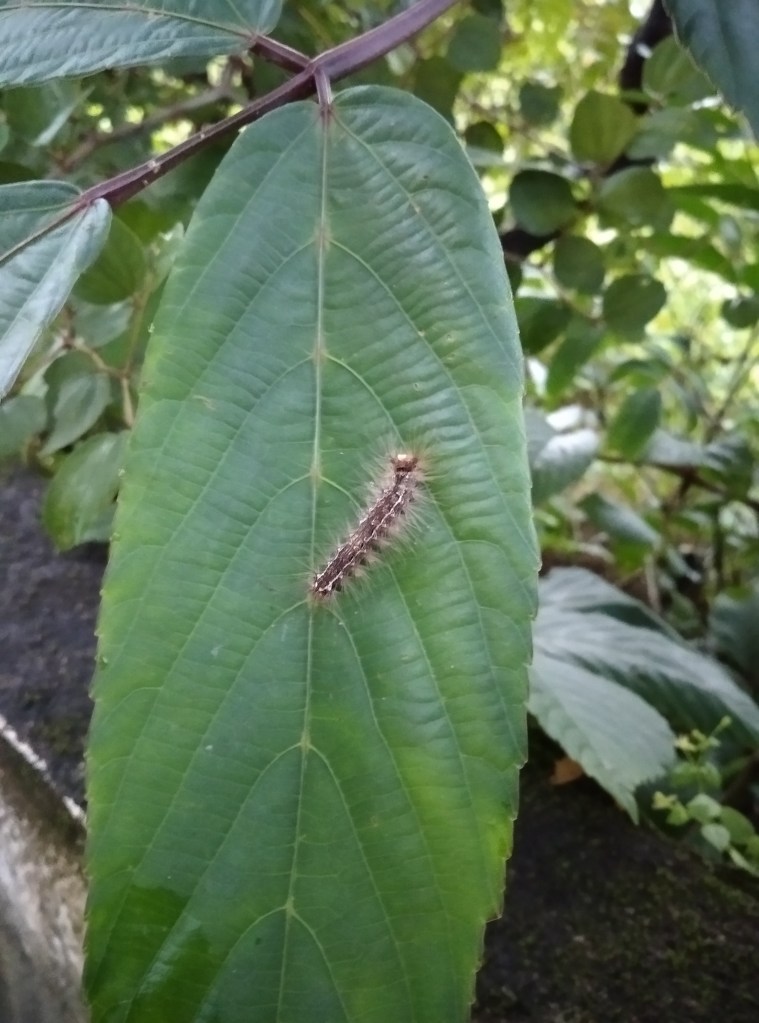
7. Pest control

When it comes to gardening, dealing with pests in the soil is like navigating a tiny underground battlefield! Soil-borne pests, such as root-feeding nematodes, larvae, and harmful microorganisms, can undermine the vitality of garden plants, leading to stunted growth and reduced yields. Natural remedies like beneficial nematodes, compost, and soil amendments play key roles in soil pest control. Crop rotation and interplanting can also disrupt pest life cycles and deter infestations. Additionally, using mulch or protective covers can create physical barriers that keep soil pests at bay.

Conclusion

In the grand tapestry of gardening, nutrient-rich soil forms the very fabric that supports and nourishes plant life. By embracing the art of soil enrichment, you’re not just cultivating a garden – you’re creating a thriving ecosystem where plants, microorganisms, and nutrients harmoniously coexist. So, whether you’re tending to a small backyard plot or a sprawling farm, remember that beneath it all, in the heart of the earth, lies the secret to a flourishing garden – the art of soil enrichment.

Happy Gardening!

Exploring Vertical Gardening: Growing Up for More Space and Beauty

Hey there, green thumbs and plant enthusiasts! If you’re looking to maximize your gardening space without compromising on beauty, it’s time to set your sights skyward with vertical gardening. This innovative technique has been taking root all across the world, offering a fantastic solution for urban dwellers and anyone seeking to transform walls, balconies, and even tiny corners into lush and vibrant green spaces. Let’s delve into the world of vertical gardening and discover how to create your own captivating vertical oasis.

Why Go Vertical?

In a country as diverse as India, where space is often at a premium, vertical gardening is a game-changer. It allows you to utilize both indoor and outdoor vertical surfaces, turning them into living, breathing pieces of art. From apartments to bungalows, vertical gardens offer a creative way to add personality and greenery to your surroundings.

Choosing the Right Plants

Before you dive into vertical gardening, consider the types of plants that thrive in your local climate. As a gardener, you’re spoiled for choice – from vibrant flowers like bougainvillea and morning glories to culinary herbs like basil and mint. Opt for plants with lightweight growth habits that won’t weigh down the structure and enjoy the freedom of experimenting with a variety of species.

Creating the Framework

A successful vertical garden begins with a sturdy framework. You can choose from various options like trellises, grids, hanging planters, and even repurposed materials like pallets. Make sure your chosen framework can support the weight of the plants and the soil they’ll be growing in. As you set up your framework, ensure that it’s securely attached to the wall or surface for stability.

Choosing the Right Soil and Planters

Using the right soil and planters is crucial for your vertical garden’s success. Opt for lightweight potting mixtures that provide proper drainage and aeration. Additionally, consider using planters with built-in reservoirs to ensure consistent moisture levels, especially in India’s varying weather conditions.


Similar Posts


Planting Techniques

Planting in vertical gardens requires a bit of finesse. For potted plants, make sure to pack the soil firmly to prevent it from settling and leaving gaps. Plant smaller plants near the top and larger ones toward the bottom to create a balanced and visually appealing composition. Regularly water your garden, keeping in mind that vertical gardens may dry out more quickly than traditional beds.

Vertical Gardens Indoors

Vertical gardening isn’t limited to outdoor spaces – it can also breathe life into your indoor environment. Choose indoor-friendly plants like pothos, spider plants, and air plants. Hanging planters or wall-mounted pockets can add a touch of nature to your living room, kitchen, or even your office space.

Maintenance and Care

Vertical gardens require consistent care to thrive. Regularly check for signs of pests, disease, and nutrient deficiencies. Prune plants as needed to maintain their shape and encourage healthy growth. Keep in mind that plants may need more frequent watering in warmer months, so be attentive to their moisture needs.

Benefits Beyond Beauty

Vertical gardening isn’t just about aesthetics – it offers various other benefits. It can improve air quality, insulate buildings, and even provide food in the form of fresh herbs and vegetables. Plus, nurturing your vertical garden can be a therapeutic and rewarding experience.

Conclusion

Vertical gardening is a fantastic way to add greenery and charm to your living spaces, whether you’re in a bustling city or a cozy town in India. With careful planning, the right plant choices, and a touch of creativity, you can transform any vertical surface into a captivating garden that’s a testament to the power of nature’s beauty. So, reach for the sky and embark on your vertical gardening journey today – your walls are waiting to be adorned with the splendor of lush foliage!

Happy Gardening!

A Comprehensive Guide to Growing Plants with Cuttings: Tips for Success!!

Introduction

Growing plants from cuttings is a rewarding and cost-effective way to expand your garden and enjoy a bountiful harvest. This propagation method allows you to reproduce your favorite plants, maintain their characteristics, and save money on purchasing new plants. In this guide, we’ll delve into the world of plant propagation through cuttings and provide you with valuable insights and tips for a successful journey.

Understanding Plant Cuttings

Plant cuttings are small sections of a parent plant that are removed and cultivated to develop into new, independent plants. This method is widely used for a variety of plants, including flowers, herbs, shrubs, and even some trees. There are different types of cuttings, each with its own benefits:

  1. Softwood Cuttings:

Taken from the new, flexible growth at the tips of branches. These cuttings root quickly and are commonly used for plants like herbs and ornamental plants.

  1. Hardwood Cuttings:

Collected from mature, woody stems during the dormant season. These cuttings take longer to root but are often used for deciduous shrubs and trees.

  1. Semi-Hardwood Cuttings:

 Collected from partially mature stems. This type of cutting strikes a balance between softwood and hardwood cuttings and is suitable for a variety of plants.

  1. Leaf Cuttings:

 In this method, individual leaves or leaf sections are used to propagate new plants. It is commonly used for succulents and some tropical plants.

  1. Root Cuttings:

Sections of roots are used to create new plants. This method is commonly used for perennial plants.

Step-by-Step Propagation Process

  1. Preparation:

Select healthy parent plants that are free from pests and diseases. Prepare clean, sharp tools for taking cuttings.

  1. Selection of Cuttings:

Choose young, healthy shoots that are free from flower buds. Cut just below a node, which is the point where leaves emerge from the stem.

  1. Preparation of Cuttings:

 Trim the cutting, removing any excess leaves or flowers. Dip the cut end into rooting hormone to promote root growth.

  1. Planting Medium:

Choose a well-draining planting medium such as a mix of peat, perlite, and vermiculite. Insert the cuttings into the medium, ensuring that at least one node is below the surface.

  1. Rooting Environment:

Place the cuttings in a warm, humid environment with indirect light. You can cover them with a plastic dome or place them in a clear plastic bag to create a mini greenhouse.

  1. Watering:

Keep the medium consistently moist but not waterlogged. Mist the cuttings regularly to maintain humidity.

  1. Root Development:

After a few weeks to months, you’ll notice roots developing. Gently tug on the cuttings to check for resistance, indicating root growth.

  1. Transplanting:

Once roots are well-developed, transplant the cuttings into individual pots filled with a suitable potting mix.


Similar Posts


Tips for Success

  • Timing:

Take cuttings during the plant’s active growth period for the best chance of success.

  • Equipment:

Use clean, sharp tools to avoid damaging the plant tissue.

  • Rooting Hormone:

While not always necessary, rooting hormone can significantly increase your success rate.

  • Humidity:

Maintain high humidity around the cuttings to prevent moisture loss.

  • Light:

Provide indirect light to promote root growth while preventing excessive transpiration.

  • Patience:

 Rooting and growth can take time, so be patient and monitor your cuttings regularly.

Season

The best season for growing plants from cuttings can vary depending on the type of plant you’re propagating. However, in general, the monsoon and early spring seasons tend to be the most favorable for propagating plants from cuttings.

However, it’s important to note that the best season for propagating plants can also depend on the specific plant species. Some plants may have different preferences or may be more forgiving in terms of when they can be propagated. Always research the specific needs of the plant you’re trying to propagate to ensure the best chance of success.

Conclusion

Growing plants from cuttings is a fulfilling way to expand your garden and enjoy the beauty of nature. By understanding the different types of cuttings, following the step-by-step process, and implementing the tips provided, you’ll increase your chances of successfully propagating a wide range of plants. Embrace this technique and watch your garden flourish with new life and vibrancy.

Happy Gardening

The Art and Science of Grafting: A Comprehensive Guide!

Introduction:

Grafting, a time-honored horticultural technique, is the secret behind creating magnificent plant hybrids and ensuring the propagation of desired traits. Whether you’re an aspiring gardener or an experienced horticulturist, understanding the art and science of grafting can open up a world of possibilities for enhancing plant growth, yield, and resilience. In this article, we’ll delve into the fundamentals of grafting, its benefits, various grafting methods, and essential tips for successful grafting.

The Fundamentals of Grafting:

 Grafting is the process of joining a scion (desired plant part) with a rootstock (established root system), resulting in the fusion of the two to create a single plant. This technique is widely used to combine desirable traits from different plants, such as disease resistance, fruit quality, or growth habits, to produce a stronger, more adaptable hybrid.

Benefits of Grafting:

1. Enhanced Plant Performance:

Grafted plants often exhibit improved growth rates, increased yield, and overall better health due to the combination of strong root systems and desired scion traits.

2. Disease Resistance:

    By grafting onto rootstocks that are naturally resistant to certain diseases, you can protect scion plants from infections that would otherwise hinder their growth.

    3. Environmental Adaptability:

     Grafted plants can thrive in diverse soil conditions and climates, thanks to the rootstock’s ability to anchor the plant and provide vital nutrients and water.

    4. Reduced Time to Maturity:

    Grafting can accelerate the time it takes for a plant to reach maturity, leading to earlier harvests and quicker results.

    Common Grafting Methods:

    1. Whip-and-Tongue Grafting:

    This method involves making diagonal cuts on both the scion and rootstock, creating matching “tongues.” The two pieces are then joined together and secured with tape or twine.

    2. Cleft Grafting:

      Suitable for larger rootstocks, this technique entails splitting the rootstock down the middle and inserting the scion into the cleft. The setup is then bound tightly until the graft heals.

      3. Budding:

      Unlike other methods, budding involves placing a single bud (with little or no wood) from the scion onto the rootstock. This is particularly useful for species that are harder to graft.

      4. Side-veneer Grafting:

      This method is ideal for plants with varying stem diameters. A vertical cut is made in the rootstock, and a matching slice of the scion is inserted.


      Similar Posts


      Tips for Successful Grafting:

      • Choose Compatible Partners:

      Ensure that the scion and rootstock are closely related and compatible in terms of size, growth rate, and physiological requirements.

      • Proper Timing:

      Graft during the plant’s active growing season for optimal success. Timing may vary depending on the plant species and grafting method.

      • Sterilize Tools:

      Use clean, sharp tools to prevent introducing infections to the graft site. Sterilize tools between cuts to reduce the risk of disease transmission.

      • Secure Graft Properly:

      Use appropriate materials like grafting tape or rubber bands to firmly hold the graft in place while allowing for proper healing.

      • Provide Adequate Care:

      Protect grafted plants from stressors such as extreme temperatures or excessive sunlight during the healing process. Regularly monitor their progress and make adjustments if necessary.

      Conclusion:

      Grafting is both an art and a science that allows horticulturists to achieve remarkable results in plant cultivation. By understanding the basics of grafting, its advantages, and the different grafting techniques, you can unlock the potential for creating healthier, more resilient, and highly productive plants. Whether you’re looking to experiment with unique hybrids or improve the performance of your existing garden, grafting is a valuable technique to master.

      Happy Gardening!

      Crafting Bonsai Masterpieces: A Step-by-Step Guide to Making Breathtaking Bonsai Trees!

      Introduction:

      Bonsai, an ancient art form from Japan, is a fascinating way to cultivate miniature trees that has been captivating gardening enthusiasts for centuries. The term “bonsai” comes from the combination of two Japanese words, “Bon” (meaning shallow pan) and “Sai” (meaning plant). By growing trees in shallow containers, their growth is controlled or stunted without starving the plant. A delicate balance between nature and human intervention creates awe-inspiring masterpieces that exude elegance and tranquility. If you’re interested in exploring the world of bonsai, this comprehensive guide will take you through every step of the process, from selecting the right tree to nurturing its growth and shaping it into a living work of art.

      1. Start by learning about bonsai.

      Research different tree species suitable for bonsai, their care requirements, and the techniques involved in shaping and maintaining them. There are many books, online resources, and local bonsai clubs that can provide valuable information and guidance.

      2. Gather Materials:

      Collect the necessary materials, including a suitable bonsai pot, bonsai soil mix (usually a mixture of Akadama, pumice, and lava rock), bonsai wire for shaping, pruning tools (sharp scissors, concave cutters, branch cutters), and potentially root rake and tweezers.

      3. Choosing the Perfect Bonsai Tree:

      Selecting the right tree is the key to successful bonsai making. The most crucial factor to consider when choosing a plant for bonsai is its hardiness. It should be able to withstand the challenges of shallow container growing, harsh training, and root and branch cutting without losing its vitality. A good bonsai specimen should have a natural-looking trunk that complements the container it is grown in. The branches should also have an artistic rhythm that enhances its aesthetic value. Trees with sturdy, thick trunks at ground level are particularly pleasing. Plants that display seasonal changes in growth pattern and flowering are highly prized in bonsai culture.

      For instance, trees that produce fruit in one season or alter the color of their leaves in another season all contribute color to the collection.

      Some examples include Ficus religiosa, Bombax malabaricum, Callistemon lanceolatus, Kigellia pinnata, Milletia ovalifolia, Punica granatum, Jacaranda mimodsifolia, and F. benghalensis.

      4. Starting with Seedlings or Nursery Plants:

      For beginners, starting with pre-grown seedlings or nursery plants is recommended. These plants have already undergone some initial growth, making them easier to manage and shape. As you gain experience, you can experiment with growing bonsai from seeds or cuttings.

      5. Soil and Pot Selection:

      Choosing the right soil mixture is crucial for the health and development of your bonsai. A well-draining soil mix with good water retention capabilities is essential. Additionally, select a pot that complements the size and style of your tree. Bonsai pots are often shallow and have drainage holes to prevent overwatering.

      6. Pruning and Shaping:

      Pruning is one of the most important techniques in bonsai making. Regularly trim the branches and roots to maintain the desired shape and size. Use bonsai-specific tools like concave cutters and branch cutters for precise cuts. Shaping wires can be gently wrapped around branches to guide their growth and create the desired aesthetics.


      Similar Posts


      7. Wiring and Styling:

      Wiring is a skill that requires practice and finesse. Use aluminum or copper wires to gently bend and position branches. Be cautious not to leave wires on for too long, as they can cut into the bark. As you wire and style your bonsai, strive for natural, balanced proportions that mimic the appearance of mature trees.

      8. Watering and Fertilizing:

      Proper watering and fertilization are essential for the health of your bonsai. Water your tree when the top layer of soil becomes slightly dry. Fertilize during the growing season to provide the necessary nutrients for growth. Use a balanced liquid fertilizer or specialized bonsai fertilizer according to the manufacturer’s instructions.

      9. Repotting:

      Bonsai trees require periodic repotting to refresh the soil, trim roots, and encourage new growth. Repot every 1 to 3 years, typically during the spring. Gently remove the tree from its pot, trim the roots, and replant it in fresh soil. Repotting allows your bonsai to thrive and prevents it from becoming root-bound.

      10. Patience and Dedication:

      Bonsai making is an art that requires patience and dedication. Trees evolve slowly, and achieving the desired results may take years. Regularly observe your bonsai’s growth and make adjustments as necessary. Over time, you’ll develop a deeper understanding of your tree’s unique characteristics and needs.

      11. Learn and Adapt:

      Bonsai making is an ongoing learning process. Pay attention to how your tree responds to different techniques, environments, and care routines. Adapt your approach based on the tree’s needs and your observations.

      12. Join Bonsai Communities:

      Engage with local bonsai clubs or online communities. Connecting with fellow enthusiasts can provide you with valuable advice, tips, and a supportive network to share your progress and learn from others’ experiences.

      Conclusion:

      Crafting a bonsai is a rewarding journey that combines horticulture, artistry, and mindfulness. Through careful cultivation, shaping, and nurturing, you can transform an ordinary tree into a breathtaking work of art that captures the essence of nature’s beauty. As you embark on your bonsai-making adventure, remember that every cut, wire, and bend contributes to the creation of a living masterpiece that will inspire awe for generations to come.

      Happy Gardening!

      The Ultimate List Of 15 Drought-Tolerant Plants Perfect for Your Low-Maintenance Garden!

      Are you tired of constantly watering your garden and watching your plants wilt under the scorching sun? Well, we’ve got some good news for you! Creating a vibrant and lush garden doesn’t have to be a water-intensive chore. By choosing drought-tolerant plants, you can have a stunning garden that thrives even in the hottest and driest conditions. Let’s explore some fantastic options that will transform your outdoor space into a low-maintenance heaven.

      1. Bougainvillea: Burst of Color Bougainvillea, with its vibrant hues, is a showstopper in any garden. These hardy plants are well-suited for India’s arid climate. Once they are established, they need very little watering. Their paper-like bracts come in various shades, bringing an explosion of color to your garden without demanding constant attention.
      2. Succulents: Beauty in Diversity Succulents are all the rage in gardening and for a good reason. With an array of shapes and sizes, these water-storing plants thrive in summer dry spells. From the iconic aloe vera to the charming echeverias, succulents add texture and intrigue to your garden while needing only occasional watering.
      3. Zinnias: Sun-Kissed Delight Zinnias are a go-to choose for those seeking a burst of color without the fuss. These cheerful flowers come in various warm shades and can handle India’s heat with grace. Zinnias are not picky about soil types and can bloom all season long, making them a perfect low-maintenance addition to your garden.
      4. Curry Leaf Plant: Fragrant and Useful The curry leaf plant not only brings an aromatic touch to your garden but also holds culinary significance. These hardy plants thrive in hot climate and require infrequent watering once established. With proper care, they can flourish for years, providing you with a steady supply of fresh curry leaves.
      5. Portulaca: Beauty in Simplicity If you’re looking for a plant that can withstand neglect and still thrive, portulaca is your answer. These colorful little blooms are drought-resistant and can tolerate poor soil conditions. Their low-growing nature makes them perfect for ground cover, adding a carpet of vibrant hues to your garden.
      6. Agave: Majestic Elegance For a touch of desert beauty, consider planting agaves. These architectural wonders require very little water and can add a dramatic focal point to your garden. Their unique shapes and sizes create an eye-catching display that’s sure to impress.
      7. Cacti: Endearing and Resilient No list of drought-tolerant plants would be complete without cacti. These iconic plants are built to withstand the toughest conditions. From prickly pears to barrel cacti, they come in various forms and sizes, adding a touch of the wild to your garden.
      8. Aloe Vera: Nature’s Healer Aloe vera is not just a skincare gem; it’s a low-maintenance superstar. Its fleshy leaves store water, keeping it fresh even during India’s hottest days.
      9. Vinca: Effortless Enchantment Vinca’s charming blooms thrive in the face of water scarcity. Their adaptability and resilience ensure a colorful garden all season long.
      10. Snake Plant: Stylish and Sturdy Bring some contemporary flair with snake plants. Their striking vertical leaves and minimal water needs make them ideal for modern Indian gardens.
      11. Sedum: Beauty in Simplicity Sedums come in various shades and shapes, adding elegance to your garden. These low-maintenance succulents can handle dry spells with ease.
      12. Gazania: Sunshine on Display Gazanias open their vibrant petals to the sun, thriving in its warmth. These dazzling blooms require minimal care, giving you maximum beauty.
      13. Oleander: Graceful and Stalwart Oleander’s beauty is matched by its ability to withstand dry conditions. This evergreen shrub adds a touch of elegance to your low-maintenance oasis.
      14. Yucca: Drama and Durability Yuccas bring a touch of drama to your garden with their sword-like leaves. Their water-storing capabilities make them a perfect fit for Indian summers.
      15. Dusty Miller: Silver Elegance Dusty Miller’s silver foliage is a standout in any garden. Its tolerance to dry conditions adds a touch of sophistication to your low-maintenance haven.

      Incorporating drought-tolerant plants into your garden not only saves water but also reduces the need for constant maintenance. With the right choices, you can enjoy a lush and vibrant outdoor space that flourishes even in the driest spells. So, go ahead and transform your garden into a low-maintenance oasis of beauty and resilience.

      Happy Gardening!

      A Year-Round Guide to Seasonal Gardening: Planting and Caring for Each Season!!

      Introduction:

      Gardening isn’t just a spring and summer affair; it’s a year-round journey filled with possibilities and rewards. Whether you’re a seasoned gardener or a newbie with a green thumb yearning to flourish, this comprehensive guide will walk you through the ins and outs of seasonal gardening. From the vibrant blooms of spring to the cozy joys of winter, each season presents unique opportunities to nurture your garden and watch it thrive.

      Winter Season:

      Indian winters can be mild to cold, depending on the region. It’s a period of rest and renewal. The development rate of plants substantially slows down, and many go dormant throughout the winter, so they require extra care. Here are some tips to help you care for your plants during the winter:

      • Protect from Cold:

      Cover tender plants with frost cloth or burlap during frosty nights to shield them from the cold.

      • Watering:

      While plants require less water in winter, don’t let them dry out completely. Water deeply but less frequently to avoid waterlogged roots.

      • Sunlight:

      Ensure that plants receive sufficient sunlight, as winter days can be shorter. Trim overgrown branches that might be blocking sunlight.

      • Pruning:

      Prune your plants to remove dead or diseased branches. This encourages new growth in the spring.

      • Use Windbreaks:

       For areas that experience cold winds, create windbreaks using cloth or screens to protect plants from windburn.

      • Reduce Fertilization:

      Plants are usually in a state of dormancy during winter, so avoid heavy fertilization. Make only occasional use of a balanced, slow-release fertilizer.

      • Indoor Plants:

      If you have potted plants, consider bringing sensitive ones indoors to protect them from the cold.

      • Plant Cover Crops:

      If you have a vegetable garden, consider planting cover crops like mustard or clover to protect and enrich the soil during winter.


      Similar Posts


      Rainy Season:

      Taking care of your plants during the rainy season is all about finding that balance. While the extra water from the rain is great, it is crucial to take care of plants during the rainy season to ensure their healthy development, avoid water-related problems, and maintain ideal moisture levels. Here are some tips to help you care for your plants during the rainy season:

      • Ensure Proper Drainage:

      To prevent waterlogging, make sure your pots and garden beds have proper drainage. Elevate pots on bricks or blocks to allow excess water to drain away.

      • Control Fungal Diseases:

      Rainy seasons can lead to fungal growth. Apply preventive fungicides to your plants and avoid overwatering. Water indoor plants in the morning so that leaves have time to dry before evening.

      • Prune and Trim:

      Remove any dead or diseased branches or leaves to discourage the growth of fungi and pests. Proper air circulation is important.

      • Pest Control:

      Rain can bring out pests. Regularly inspect your plants for signs of infestations and treat them promptly with natural remedies or appropriate pesticides.

      • Avoid Overwatering:

      While plants (indoor plants) need water, be cautious not to overwater them. Check the soil moisture before watering to prevent root rot.

      • Use Mulch:

      Apply a layer of organic mulch around plants to prevent soil erosion, reduce splashing, and regulate soil temperature and moisture.

      Summer Season

      Caring for plants during the hot and often challenging summer season requires attention to watering, protection from intense sunlight, and overall plant health. Here’s a guide to help you care for your plants during the summer:

      • Watering:

      Water deeply and less frequently to encourage plants to develop strong root systems. This helps them access water from deeper into the soil. Water early in the morning or late in the evening to minimize water loss due to evaporation. Avoid wetting the foliage to prevent fungal diseases. Water at the base of the plant. Monitor your plants’ water needs closely; the heat can cause them to dry out more quickly.

      • Mulching:

      Apply a layer of organic mulch (such as straw, wood chips, or compost) around the base of your plants. This helps retain soil moisture, regulate soil temperature, and prevent weed growth.

      • Shade and Sun Protection:

      Provide shade to delicate plants during the hottest part of the day, especially in regions with scorching temperatures. Use shade cloth, row covers, or plant taller plants to create natural shade.

      • Pruning:

      Regularly prune dead or yellowing leaves to improve air circulation and prevent the growth of diseases. Trim back overgrown branches to promote better growth and shape.

      • Fertilization:

      Use a balanced, slow-release fertilizer to provide essential nutrients to your plants. Avoid excessive fertilization, as it can kill the plants especially if you are using chemical fertilizer. To prevent excess heat, fertilize the plants in the evening after watering.

      • Potted Plants:

      Potted plants can heat up quickly in the summer. Move them to a slightly shaded area to protect them from intense sunlight. Water potted plants more frequently since they tend to dry out faster than plants in the ground.

      • Heat-Tolerant Plants:

      Opt for heat-tolerant and drought-resistant plant varieties that are better suited for the Indian summer. Succulents, cacti, adenium, and native plants are good options.

      • Pest Management:

      Regularly inspect your plants for signs of pests and disease. The most frequent pests that attack plants in the summer are aphids and mealybugs. Use natural remedies or appropriate pesticides if necessary. Healthy plants are more resistant to pests and diseases, so maintaining proper care is essential.

      • Wind Protection:

      Strong winds can increase water evaporation and stress on plants. Use windbreaks or plant taller plants as barriers to reduce wind impact.

      • Watering Techniques:

      Use a soaker hose or drip irrigation system to water plants directly at the soil level. This minimizes water waste and avoids wetting foliage.

      • Consistent Care:

      Consistency is key. Regularly care for your plants and observe their condition. Adjust your care routine based on their needs.

      • Shade-loving Plants:

      If you have areas with limited sunlight, consider growing shade-loving plants to create a cooler and more comfortable environment.

      By following these tips and tailoring them to the specific needs of your plants, you can help them thrive and survive the challenges posed by the hot summer.

      Remember that the specific care required can vary depending on the types of plants you have and the microclimate of your region. Observing your plants closely and adjusting your care routine accordingly is key to successful gardening during each season.

      Conclusion:

      Embarking on a year-round journey of seasonal gardening is an enriching experience that connects you with the rhythm of nature. Each season brings its own magic, challenges, and rewards. By understanding the unique demands of each period and tailoring your efforts accordingly, you’ll cultivate a garden that’s not only a testament to your dedication but also a haven for nature’s beauty. So, roll up your sleeves, grab your gardening tools, and let the enchanting cycle of seasonal gardening begin!

      Happy Gardening!

      How to begin with Gardening: 5 easy steps for beginners!

      Everyone loves to go for a walk in a garden, but how about making your own garden and enjoy its beauty every day. This modern life has made us so busy that we have forgotten to enjoy the little things in our life. But the corona pandemic made us realize the actual meaning of life. When the lockdown was imposed everyone has stayed in their home and enjoyed their family life. Some people started with their hobbies which they have left long before because of a busy life. People who have never entered the kitchen started to cook. And some of them started with gardening.

      I have seen many posts by people on Facebook who have started gardening but are having many troubles in maintaining their plants. Many were posting their plants which are either dead or on the verge of dying. As a novice, they forgot to follow some basic rules. So here I am giving you 5 easy steps especially for the beginners who have just started or want to start Gardening.

      Step:1 Start with the basics

      Chilli saplings

      If you are a beginner, then avoid making common beginner’s mistakes. People tend to buy plants that look beautiful and different nursery sites make this task easier. If you have just started gardening, then my advice is to start from your home first. In your home, there are many vegetables or spices which can be easily grown without much effort. It saves your time as well as money. For example, chili, tomato, coriander, cumin can be easily grown and give good yield too. Apart from that, you can also grow ginger and potato by cutting their tip(ginger)/eye(potato). You can regrow mint after using the leaves and planting its stem either in soil or just putting it in water. As these are frequently used in your kitchen you can start with these instead of buying seeds and plants from nurseries or online websites which will save your money as well as time. After gaining some expertise, you can start buying plants that are easy to maintain like a spider plant, pothos, wandering jew, aparajita, etc. After that, you will be fully ready to grow any of your desired plants.

      Step 2:Know your weather

      This is a very important step that many beginners ignore. You should remember that all plants cannot be grown in all regions. Different plants have different requirements. You cannot grow cactus in heavy rainfall regions the same way as spices cannot be grown in the desert. If you are buying any plants especially online make sure the weather condition in your place is suitable for the growth of that plant. So before buying any costly plants on the net just check the description which will mention the average temperature for the growth of that plant.


      Similar Posts:


      Step 3: Always use organic fertilizer

      Fertilizer is very important for the growth and fruiting of any plant. If you browse on the net you will get 100 s of fertilizers sold by different websites. Avoid buying these as there are chances that they may kill your plants if not used in proper proportions especially if those fertilizers turn out to be chemical ones. You will also get organic fertilizers online but as a beginner, it’s better to use homemade fertilizers like kitchen wastes which include used vegetables, fish water, rice water. If cow dung(dry) is available in your area you can use that too. Always cover this waste with a layer of soil to avoid rot and smell. If you feel you can’t use these then buy only organic fertilizer from your local nurseries or online websites.

      Step 4: Remember there is a big difference between theory and practical

      On YouTube, there are many videos on growing plants. Many of them don’t show the results. I have tried many of them like growing cardamom plants from seeds or growing rose cutting using potatoes and failed miserably. Before following any YouTube video check the comment section. See what other people are saying. Even if you follow these instructions there are chances that you may not get the desired result. The reason is mentioned in step no 3. The videos which are shown are from places which have different weather conditions than yours. And many videos are just made by beginners who just want to earn money from google ads. Don’t blindly follow these videos.

      Step 5: Check the progress

      Planting is not enough. The plant should be properly taken care of. You should check the progress of your plants regularly. Check whether the plant is growing properly. If not try to find the causes. Water it properly, give fertilizers after some period, check whether the plant has any bugs or the leaves are yellow or curled or dry, and take care accordingly.

      If you follow the above steps soon you will become a successful gardener. So what you are waiting for? Start now, Happy Gardening!!!

      Hibiscus: Queen Of My Garden!

      This blog is dedicated to all hibiscus lovers. Here I am writing about a brief history of hibiscus and how I went gaga for this lovely blossom. I stay in the western coast of India. Right now, I own 36 varieties of hibiscus and searching for new varieties in the nursery and also online sites. Plz, help me in my endeavor.

      I searched many websites for different varieties of hibiscus but unable to find any useful sites. There are some sites which offer common varieties but the price ranges between Rs.250 to Rs.500. I found one useful site which offers many varieties, but the price is over my budget as they are selling it in dollars. If you want to check, then this is the link.

      Normally, I buy all of my garden plants from a nearby nursery. Each hibiscus plant costs Rs. 50 each (without pots). These plants are always in a healthy condition and have lots of buds.

      These are the photos of hibiscus which I own.

      History

      Lets know about a brief history of hibiscus. Hibiscus is a perennial plant and belongs to the family Malvaceae. It can grow up to 10meters. There are about 300 species of hibiscus. The exact origin of hibiscus is unknown but they are found throughout the tropic.

      Unknown Facts

      These lovely flowers in addition to adding beauty to your garden also have many benefits. The leaves and flowers of hibiscus plants are used in many herbal shampoos and conditioners. They also have medicinal properties and are used in many Ayurvedic medicines especially the white flowers. Even we use the leaves and flowers of white hibiscus for our hair. We boil it and then apply that lukewarm water to our scalp and leave it for 20 minutes. It reduces hair fall, makes hair smooth, and also absorbs heat and you will feel very relaxed.


      See Also:

      American and Taiwan variety hibiscus
      My water lily collection

      How I Take Care of my Hibiscus

      I have planted all my hibiscus in plastic pots as I stay in a rented apartment. While taking care of any plants you have to consider three main points

      1)Proper Watering

      2)Fertilizer

      3)Pest Control

      Watering

      depends on the season. In the rainy season, the rainwater is enough, so I don’t go for watering. In winter they require very less water i.e. once in a day. Early morning is the best time to water this plant. Since it will be very cold outside, so I prefer evening as it also suits my schedule. In summer, hibiscus require a large amount of water. I water them twice a day early in the morning and late evening.

      Fertilizer

      I always prefer organic farming as I don’t want to pollute the soil as well as the environment. I use kitchen waste like vegetables, eggshells, used tea, fish water, and coconut shells. Apart from this I also use an organic fertilizer which I buy from the nursery. They sell it for Rs. 20/kg. I use this fertilizer once in a week (on Sunday as I have a holiday). I use about one tablespoon for each plant.

      Pest control

      This is a major part of any plant care. If you do proper watering and used good fertilizer but not done anything for pest control, then your efforts will be in vain. The main pests which affect your hibiscus plants are aphid, mealybugs, thrips, caterpillar and ants.

      Aphid: These pets are usually found in clusters and are black, white or green in color. They suck the juices from foliage. If you do not control these pests, they will kill your entire plant. Four of my hibiscus plants died because of this pest.

      Aphid

      Mealybugs: These little unwanted guests will destroy your entire garden. Hibiscus foliage is their favorite food. These pests not only kill hibiscus but also affect other plants like rose, tomato and eggplant. Very difficult to control.

      Mealybug

      Thrips: These pests cause hibiscus buds to drop before flowering as they lay eggs inside the buds. I faced this problem a lot. These pests are difficult to detect as your plant will be in a healthy condition and you cannot see these pests. Only when you open the fallen bud you can see the patches inside it that also with a magnifying glass.

      Buds Affected with Thrips

      Caterpillar: These will affect your plant during the rainy season. They will eat away all the leaves within few hours. Sometime the leaves will be folded. When you open this fold, you can see tiny green caterpillar.

      Caterpillar

      Ants: These won’t directly affect your plant, but they help in the propagation of above-mentioned pests.

      Ants

      For all these pests I am using neem oil and cow urine as pesticides. I mix 1 tablespoon of cow urine or neem oil in 500ml of water and spray it on entire plant once in a week. This works as a precautionary measure but won’t help your plants if it is badly affected by pests.

      In such case you have to use soap water or shampoo water. When my plant was affected with mealy bugs, I tried this method and it worked. As I told you that I always do organic farming, so I am using herbal shampoo once in a week. Again, the spray includes 1 tablespoon of herbal shampoo in 500ml of water.

      If you still can’t get rid of these pests, then pruning is the only option. Prune the affected leaves and branches and throw it in far places or burry them as there are chances that they may return through wind or ants.

      Encourage beneficial insects like lady bugs (only work with temperatures 62-88°F) which eats about 50 aphids a day.  There are other useful insects like green lacewing and pirate bugs which helps in controlling the harmful pests in a natural way.

      Lady bug


      Thank you so many guys for reading this post. I hope this information is useful to you. If you know any website or nursery which deliver plants to Goa, plz give me information regarding that. Plz, add your suggestions in the comment box. Tell me how many hibiscus plants you have and from where you bought these plants. Plz, share photos of your hibiscus flowers too.

      Happy Gardening!!!